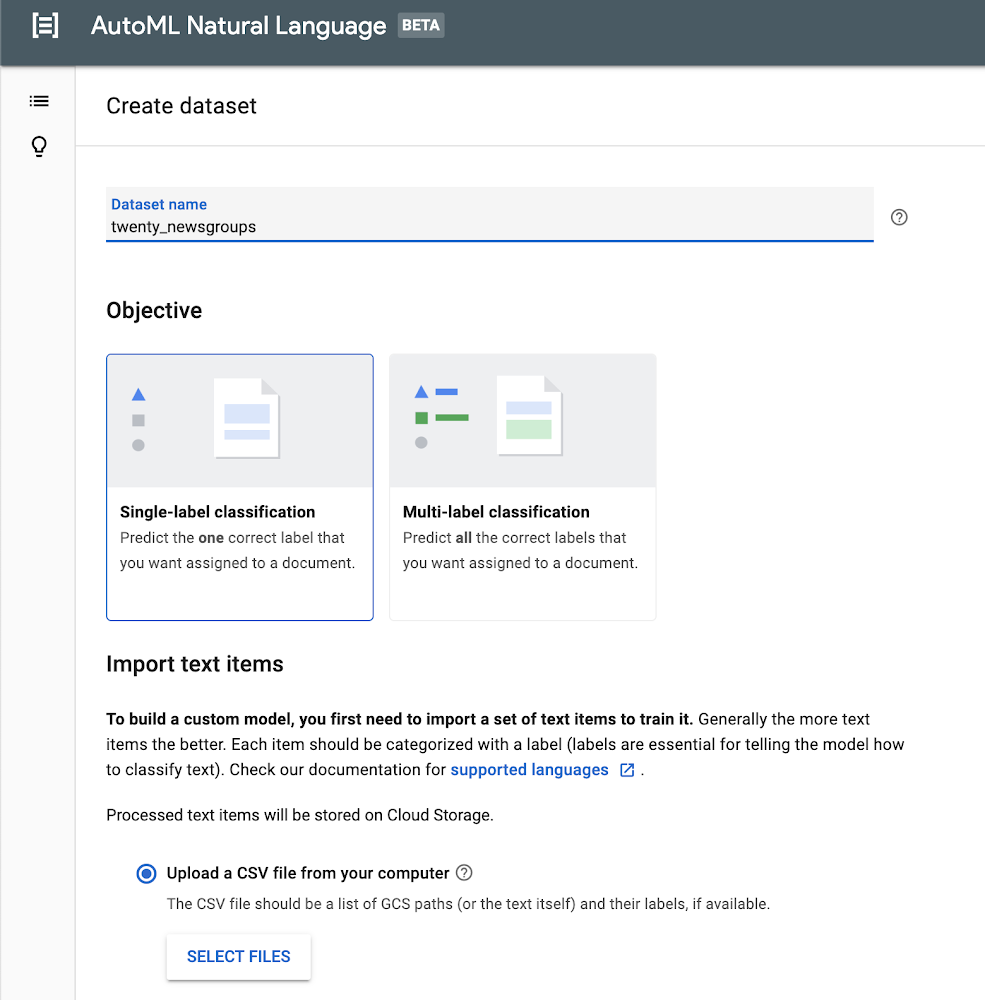
Modern organizations process greater volumes of text than ever before. Although certain tasks like legal annotation must be performed by experienced professionals with years of domain expertise, other processes require simpler types of sorting, processing, and analysis, with which machine learning can often lend a helping hand.Categorizing text content is a common machine learning task—typically called “content classification”—and it has all kinds of applications, from analyzing sentiment in a review of a consumer product on a retail site, to routing customer service inquiries to the right support agent. AutoML Natural Language helps developers and data scientists build custom content classification models without coding. Google Cloud’s Natural Language API helps you classify input text into a set of predefined categories. If those categories work for you, the API is a great place to start, but if you need custom categories, then building a model with AutoML Natural Language is very likely your best option.In this blog post, we’ll guide you through the entire process of using AutoML Natural Language. We’ll use the 20 Newsgroups dataset, which consists of about 20,000 posts, roughly evenly divided across 20 different newsgroups, and is frequently used for content classification and clustering tasks.As you’ll see, this can be a fun and tricky exercise, since the posts typically use casual language and don’t always stay on topic. Also, some of the newsgroups that we’ll use from the dataset overlap quite a bit; for example, two disparate groups cover PC and Mac hardware.Preparing your dataLet’s first start by downloading the data. I’ve included a link to a Jupyter notebook that will download the raw dataset, and then transform it into the CSV format expected by AutoML Natural Language. AutoML Natural Language looks for the text itself or a URL in the first column, and the label in the second column. In our example, we’re assigning one label to each sample, but AutoML Natural Language also supports multiple labels.To download the data, you can simply run the notebook in the hosted Google Colab environment, or you can find the source code on GitHub.Importing your dataWe are now ready to access the AutoML Natural Language UI. Let’s start by creating a new dataset by clicking the New Dataset button. Create a name like twenty_newsgroups and upload the CSV you downloaded in the earlier step.Training your modelIt will take several minutes for the endpoint to import your training text. Once complete, you’ll see a list of the text items and each accompanying label. You can drill down into the text items for specific labels on the left side.After you’ve loaded your data successfully, you can move on to the next stage by training your model. It will take several hours to return the optimal model, and you’ll receive notification emails about the status of the training.Evaluating your modelWhen the model training is complete, you’ll see a dashboard that displays a number of metrics. AutoML Natural Language generates these metrics comparing predictions against the actual labels in the test set. If these metrics are new to you, I’d recommend reading more about them in the Google Machine Learning Crash Course. In short, recall represents how well the model found instances of the correct label (minimizing false negatives). Precision represents how well it did at avoiding labeling instances incorrectly (minimizing false positives).The precision and recall metrics from this example are based on a score threshold of 0.5. You can try adjusting this threshold to see how it impacts your metrics. You can see that there is a tradeoff between precision and recall. If the confidence required to apply a label rises from 0.5 to 0.9, for example, precision will go up because your model will be less likely to mislabel a sample. On the other hand, recall will go down because any samples between 0.5 and 0.9 which were previously identified will not be labeled.Just below this paragraph, you’ll find a confusion matrix. This tool can help you more precisely evaluate the model’s accuracy at the label level. You’ll not only see how often the model identified each label correctly, but you’ll see which labels it mistakenly identified. You can drill down to see specific examples of false positives and negatives. This can prove to be very useful information, because you’ll know whether you need to add more training data to help your model better differentiate between labels that it frequently failed to predict.PredictionLet’s have some fun and try this on some example text. By moving to the Predict tab, you can paste or type some text and see how your newly trained model labels it. Let’s start with an easy example. I’ll take the first paragraph of a Google article about automotive trends, and paste it in. Woohoo! 100% accuracy.You can try some more examples yourself, entering text that might be a little tougher for the model to distinguish. You’ll also see how to invoke a prediction using the API at the bottom. For more details, the documentation provides examples in Python, Java, and Node.js.ConclusionOnce you’ve created a custom model that organizes content into categories, you can then use AutoML Natural Language’s robust evaluation tools to assess your model’s accuracy. These will help you refine your threshold and potentially add more data to shore up any weaknesses. Try it out for yourself!
Quelle: Google Cloud Platform
Published by