How SLSA and SBOM can help healthcare resiliency

Taking prescription medication at the direction of anyone other than a trained physician is very risky—and the same could be said for selecting technology used to run a hospital, to manage a drug manufacturing facility and, increasingly, to treat a patient for a medical condition.To pick the right medication, physicians need to carefully consider its ingredients, the therapeutic value they collectively provide, and the patient’s condition. Healthcare cybersecurity leaders similarly need to know what goes into the technology their organization’s use to manage patient medical records, manufacture compound drugs, and treat patients in order to keep them safe from cybersecurity threats.Just like prescription medication, careful vetting and selection of the technology is required to ensure patient safety and establish visibility and awareness into the technology modern healthcare depends on to create a resilient healthcare system. In this and our next blog, we focus on two topics critical to building resilience – software bill of materials (SBOM) and Google’s Supply chain Levels for Software Artifacts (SLSA) framework – and how to use them to make technology safe. Securing the software supply chain, or where the software we depend comes from, is a critical security priority for defenders and something Google is committed to helping organizations do.Diving deeper into the technology we rely onCybersecurity priorities for securing healthcare systems usually focus only on protecting sensitive healthcare information, like Protected Health Information (PHI). Maintaining the privacy of patient records is an important objective and securing data and systems plays a big role in this regard. Healthcare system leadership and other decision makers often depend on cybersecurity experts to select technologies and service providers that can meet regulatory rules for protecting data as a first (and sometimes only) priority. Trust is often placed on the reputations and compliance programs of the vendors who manufacture the technology they buy without much further inspection. Decision makers need to approach every key healthcare and life science technology or service provider choice as a high-risk, high-consequence decision, but few healthcare organizations have the skills, resources, and time to “go deep” in vetting the security built into the technology they buy before it enters a care setting. Vetting needs to include penetrating analysis of all aspects of software and hardware, their architecture and engineering quality, the provenance of all parts that they’re made of, and assessing each component for risk. Doing this can sometimes require deep technical skills and advanced knowledge of medical equipment threats that may not be easy to acquire. Instead of making additional investments to help secure their networks and systems, many organizations choose simpler paths.The failure to properly assess technological susceptibility to risk has exposed healthcare organizations and their patients to a variety of safety and security issues that may have been preventable. PTC (formerly Parametric Technology Corporation, which makes medical device software) disclosed seven vulnerabilities in March that impacted equipment used for robotic radiosurgery. In October 2019, the VxWorks Urgent 11 series of vulnerabilities was announced, affecting more than 1 billion connected devices, many used throughout healthcare and life sciences. More examples of medical devices and software found to have vulnerable components can be found on the FDAs cybersecurity website and in its recall database. How a physician understands, selects, and prescribes medication parallels how we address these concerns when selecting technology. Recent FDA guidance suggests manufacturers must soon provide increased levels of visibility into the technologies they market and sell in the healthcare industry. Here’s where the SBOM, a key visibility mechanism, comes in.What SBOMs do well, and how Google is helping make them betterThe National Telecommunications and Information Administration defines the SBOM as a “nested inventory for software, a list of ingredients that make up software components.”The concept of a SBOM appears to have found its start in enabling software makers back in the 1990s, although it originally stems from ideas popularized by visionary engineer and professor W. Edwards Deming. SBOM as a concept has advanced since then, with multiple standards for generating and sharing them now in use.Thanks to the continued focus on improving and using SBOMs, we expect it will be much easier for defenders to use SBOMs to track software and its components, where they come from, what security vulnerabilities they contain, and equip protectors with their ability to stop those vulnerabilities from being exploited, at scale, and before they impact patient care. “Software bills of materials help to bridge the knowledge gap created by running unknown, unpatched software and components as too many healthcare organizations currently do,” says Dan Walsh, chief information security officer at VillageMD, a tech-driven primary-care provider. “For security leaders, SBOM should be an extension of their asset inventory and management capability, regardless of whether that software was bought or built. At VillageMD, we are asking our vendors that store, transmit, receive or process PHI for an SBOM as part of our third-party vendor assessment program.”Today’s SBOMs are most often basic text files generated by a software developer when the creation of software is complete and a product is assembled (or application is created from source code.) The text file contains information about the product’s software components and subcomponents, where those components and subcomponents came from, and who owns them. But unlike a recipe used to make a pharmaceutical, for example, an SBOM also tracks the software versions of components and subcomponents. SBOMs often capture:Supplier NameComponent NameVersion of the ComponentOther Unique IdentifiersDependency RelationshipAuthor of SBOM DataTimestamp Here’s the format of a SBOM generated using the SPDX v2.2.1 standard:Technology producers, decision makers, and operators in any industry can use this information to deeply understand the risks the products pose to patients and the health system. An SBOM, for example, can show a reader if the software used on a medical device is merely out of date, or vulnerable to a cyber attack that could affect its safe use. Google sponsors a number of initiatives focused on securing the software supply chain, including how to use SBOMs, through our work with U.S. government agencies, the Open Source Security Foundation, and Linux Foundation, including a project focused on building and distributing SBOMs. Learn about the SPDX project and Cyclone DX, read the ISO/IEC 5962:2021 standard (for SPDX), ISO ISO/IEC 19770-2:2015 (for SWID; another artifact that provides a SBOM), and other training resources from the Linux Foundation.As an additional measure, healthcare organizations which use SBOM need to make sure they can trust that the SBOMs they rely on haven’t been changed since the manufacturer produced it. To defend against this, software makers can cryptographically sign their SBOMs making it easier to identify if a SBOM has been maliciously altered since it was first published. While U.S. Executive Order 14028 created a federal mandate for the SBOM, and although many organizations have begun to incorporate that mandate into their software production workflows, many issues and roadblocks remain unresolved. At Google, we think the use of SBOM will help organization’s gain important visibility into the technologies that are entering our healthcare facilities and enable defenders to more capably protect both patient safety and patient data privacy.Digging into the SLSAWe believe resilient organizations have resilient software supply chains. Sadly no single mechanism, like SBOM, can achieve this outcome. It’s why we created the SLSA framework, and services like Assured Open Source Software. SLSA was developed following Google’s own practices for securing its software supply chain. SLSA is guidance for securing software supply chains using a set of incremental, enforceable security guidelines that can automatically create auditable metadata. This metadata will then result in a “SLSA certification” to a particular package or build platform. It’s a verifiable way to assure consumers that the software they use hasn’t been tampered with, something which doesn’t exist broadly today. We’ve recently explained more about how the SLSA works in blog posts on SLSA basics and more in-depth SLSA details.Similarly, Assured Open Source Software gives organizations the ability to use the same regularly tested and secured software packages Google uses to build its software. Used in combination with a SBOM, technology makers can build reliable, safe, and verifiable products. Most technology buyers, such as those who run your local healthcare system, can use those same mechanisms to gain visibility into a technologies’ safety and fitness for use. Where do we go from here? Visibility into the components that make up the technology we use to care for patients is critically necessary. We can’t build a resilient healthcare system if our only priority is privacy of data. We must add resilience and safety to the list of our top priorities. Gaining deep visibility into the technology that decorates health system networks is a critical shift we must make. SBOM and SLSA help us make this shift. But remember, it’s not one or the other. As Dan Walsh from VillageMD says, the SBOM has a way to go:. “It won’t solve all of your problems,” he cautions, but adds that when used correctly, “SBOM will help you improve visibility into the software that runs on the critical systems that keep societies safe and we’re excited to see it get traction.”But when complemented with SLSA and topics we’ll cover next, such as a Vulnerability eXploitability Exchange (VEX), we are on a path to greater resilience.Related ArticleHow healthcare can strengthen its own cybersecurity resilienceBuilding resilience in healthcare cybersecurity may feel daunting, but lessons from exposure therapy and using core concepts can lead to …Read Article
Quelle: Google Cloud Platform

Azure Orbital Ground Station as Service extends life and reduces costs for satellite operators

How can Microsoft empower satellite operators to focus on their mission and enable them to continue the operation of their satellites, without making capital investments in their ground infrastructure?

To answer that question, Microsoft worked alongside the National Oceanic and Atmospheric Administration (NOAA), and our partner Xplore, to demonstrate how the commercial cloud can provide satellite mission management for NOAA’s legacy polar satellites (NOAA-18)—extending the mission life of these satellites while reducing the cost of operation through Azure Orbital Ground Station as-a-Service (GSaaS).

Partnering with the National Oceanic and Atmospheric Administration and Xplore

The initiative was part of a year-long cooperative research and development agreement (CRADA) with NOAA, where we worked together to determine the ability of the Azure Orbital platform to connect and downlink data from NOAA satellites. NOAA also tested the ability of Microsoft Azure to comply with specified security controls in a rapid and effective manner. Our cloud-based solutions performed successfully across all measures.

Partners are central to Microsoft’s approach to space, and they played a key role in this project. As part of the CRADA, we leveraged our partner network to bring together Azure Orbital with Xplore’s Major Tom mission control software platform. This approach enabled NOAA to transmit commands to the NOAA-18 spacecraft and verify the receipt of these commands. This test was conducted in real-time, and data was flowing bi-directionally with the NOAA-18 satellite.

Commercial technology enabled the rapid demonstration of these innovative capabilities. Xplore was able to move quickly to bring functions of NOAA’s heritage space system architecture to the Azure cloud through their Major Tom platform. This highlights the power of Azure as a platform to bring together Azure Orbital as the ground station, Major Tom to provide the mission control software for commanding and telemetry viewing, and the NOAA operators to monitor the scenarios.

This successful demonstration shows that the Azure Orbital GSaaS, and the partner network it brings together, enables sustainable outcomes for satellite operators. Our work with NOAA is just the beginning of the journey. We look forward to partnering with additional satellite operators to help them reduce their infrastructure management costs, lower latency, increase capacity and resiliency, and empower their missions through the power of Azure Orbital GSaaS and the Azure cloud.

Learn more about Azure Orbital and Azure Space

To learn more about Azure Orbital GSaaS, visit our product page, or take a look at the session with Microsoft Mechanics, which goes into more detail on how we connect space satellites around the world and bring earth observational data into Azure for analytics via Microsoft and partner ground stations. We demonstrate how it works and how it fits into Microsoft’s strategy with Azure Space to bring cloud connectivity everywhere on earth and to make space satellite data accessible for everyday use cases.

More broadly, Azure Space marks the convergence between global satellite constellations and the cloud. As the two join together, our purpose is to bring cloud connectivity to even the most remote corners of the earth, connect to satellites, and harness the vast amount of data collected from space. This can help solve both long-term trending issues affecting the earth like climate change, or short-term real-time issues such as connected agriculture, monitoring and controlling wildfires, or identifying supply chain bottlenecks.

Learn more about Azure Space today.
Quelle: Azure

9 Tips for Containerizing Your Spring Boot Code

At Docker, we’re incredibly proud of our vibrant, diverse and creative community. From time to time, we feature cool contributions from the community on our blog to highlight some of the great work our community does. Are you working on something awesome with Docker? Send your contributions to Ajeet Singh Raina (@ajeetraina) on the Docker Community Slack and we might feature your work!
Tons of developers use Docker containers to package their Spring Boot applications. According to VMWare’s State of Spring 2021 report, the number of organizations running containerized Spring apps spiked to 57% — compared to 44% in 2020.
What’s driving this significant growth? The ever-increasing demand to reduce startup times of web applications and optimize resource usage, which greatly boosts developer productivity.
Why is containerizing a Spring Boot app important?
Running your Spring Boot application in a Docker container has numerous benefits. First, Docker’s friendly, CLI-based workflow lets developers build, share, and run containerized Spring applications for other developers of all skill levels. Second, developers can install their app from a single package and get it up and running in minutes. Third, Spring developers can code and test locally while ensuring consistency between development and production.
Containerizing a Spring Boot application is easy. You can do this by copying the .jar or .war file right into a JDK base image and then packaging it as a Docker image. There are numerous articles online that can help you effectively package your apps. However, many important concerns like Docker image vulnerabilities, image bloat, missing image tags, and poor build performance aren’t addressed. We’ll tackle those common concerns while sharing nine tips for containerizing your Spring Boot code.
A Simple “Hello World” Spring Boot application
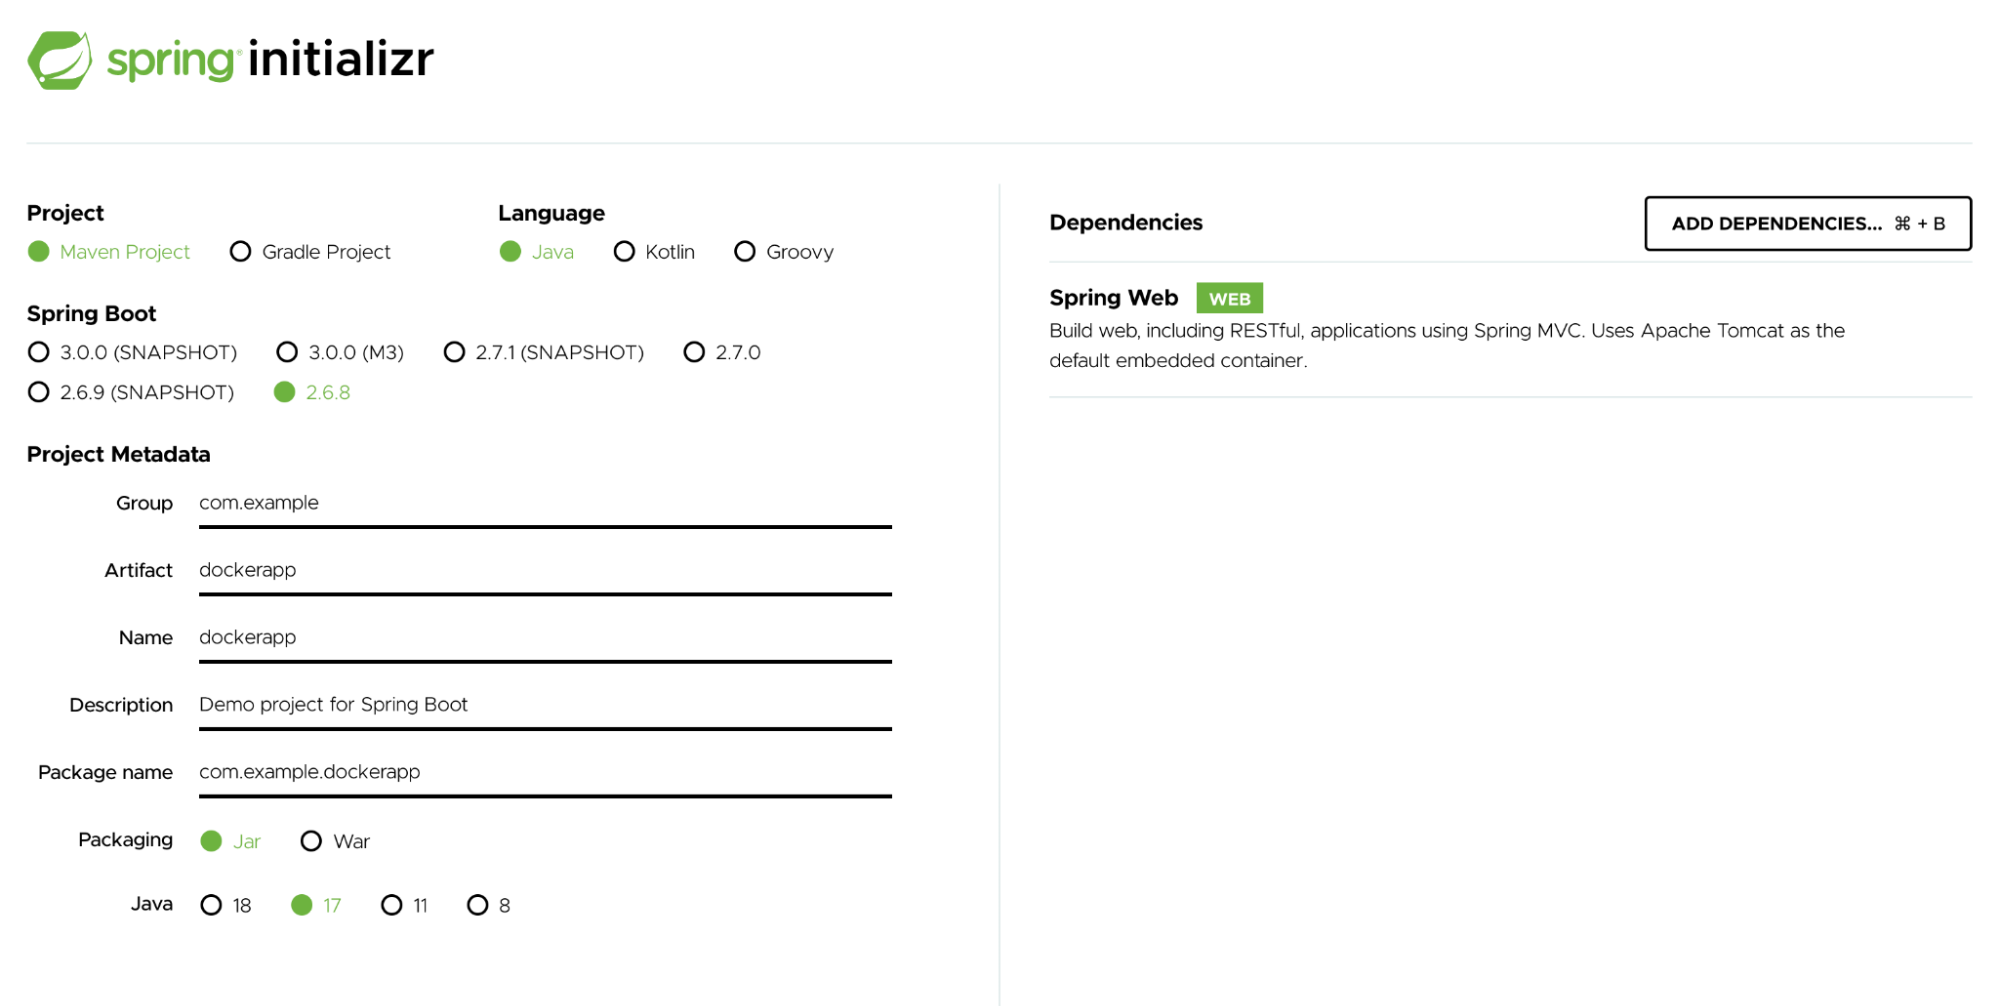
To better understand the unattended concern, let’s build a sample “Hello World” application. In our last blog post, you saw how easy it is to build the “Hello World!” application by downloading this pre-initialized project and generating a ZIP file. You’d then unzip it and complete the following steps to run the app.


Under the src/main/java/com/example/dockerapp/ directory, you can modify your DockerappApplication.java file with the following content:

package com.example.dockerapp;
import org.springframework.boot.SpringApplication;
import org.springframework.boot.autoconfigure.SpringBootApplication;
import org.springframework.web.bind.annotation.RequestMapping;
import org.springframework.web.bind.annotation.RestController;

@RestController
@SpringBootApplication
public class DockerappApplication {

@RequestMapping("/")
public String home() {
return "Hello World!";
}

public static void main(String[] args) {
SpringApplication.run(DockerappApplication.class, args);
}

}

 
The following command takes your compiled code and packages it into a distributable format, like a JAR:

./mvnw package
java -jar target/*.jar

 
By now, you should be able to access “Hello World” via http://localhost:8080.
In order to Dockerize this app, you’d use a Dockerfile.  A Dockerfile is a text document that contains every instruction a user could call on the command line to assemble a Docker image. A Docker image is composed of a stack of layers, each representing an instruction in our Dockerfile. Each subsequent layer contains changes to its underlying layer.
Typically, developers use the following Dockerfile template to build a Docker image.

FROM eclipse-temurin
ARG JAR_FILE=target/*.jar
COPY ${JAR_FILE} app.jar
EXPOSE 8080
ENTRYPOINT ["java", "-jar", "/app.jar"]

 
The first line defines the base image which is around 457 MB. The  ARG instruction specifies variables that are available to the COPY instruction. The COPY copies the  JAR file from the target/ folder to your Docker image’s root. The EXPOSE instruction informs Docker that the container listens on the specified network ports at runtime. Lastly, an ENTRYPOINT lets you configure a container that runs as an executable. It corresponds to your java -jar target/*.jar  command.
You’d build your image using the docker build command, which looks like this:

$ docker build -t spring-boot-docker .
Sending build context to Docker daemon 15.98MB
Step 1/5 : FROM eclipse-temurin
—a3562aa0b991
Step 2/5 : ARG JAR_FILE=target/*.jar
—Running in a8c13e294a66
Removing intermediate container a8c13e294a66
—aa039166d524
Step 3/5 : COPY ${JAR_FILE} app.jar
COPY failed: no source files were specified

 
One key drawback of our above example is that it isn’t fully containerized. You must first create a JAR file by running the ./mvnw package command on the host system. This requires you to manually install Java, set up the  JAVA_HOME environment variable, and install Maven. In a nutshell, your JDK must reside outside of your Docker container — adding even more complexity into your build environment. There has to be a better way.
1) Automate all the manual steps
We recommend building up the JAR during the build process within your Dockerfile itself. The following RUN instructions trigger a goal that resolves all project dependencies, including plugins, reports, and their dependencies:

FROM eclipse-temurin
WORKDIR /app

COPY .mvn/ .mvn
COPY mvnw pom.xml ./
RUN ./mvnw dependency:go-offline

COPY src ./src

CMD ["./mvnw", "spring-boot:run"]

 
💡 Avoid copying the JAR file manually while writing a Dockerfile
2) Use a specific base image tag, instead of latest
When building Docker images, it’s always recommended to specify useful tags which codify version information, intended destination (prod or test, for instance), stability, or other useful information for deploying your application in different environments. Don’t rely on the automatically-created latest tag. Using latest is unpredictable and may cause unexpected behavior. Every time you pull the latest image, it might contain a new build or untested release that could break your application.
For example, using the eclipse-temurin:latest Docker image as a base image isn’t ideal. Instead, you should use specific tags like eclipse-temurin:17-jdk-jammy , eclipse-temurin:8u332-b09-jre-alpin etc.
 
💡 Avoid using FROM eclipse-temurin:latest in your Dockerfile
3) Use Eclipse Temurin instead of JDK, if possible
On the OpenJDK Docker Hub page, you’ll find a list of recommended Docker Official Images that you should use while building Java applications. The upstream OpenJDK image no longer provides a JRE, so no official JRE images are produced. The official OpenJDK images just contain “vanilla” builds of the OpenJDK provided by Oracle or the relevant project lead.
One of the most popular official images with a build-worthy JDK is Eclipse Temurin. The Eclipse Temurin project provides code and processes that support the building of runtime binaries and associated technologies. These are high performance, enterprise-caliber, and cross-platform.

FROM eclipse-temurin:17-jdk-jammy

WORKDIR /app

COPY .mvn/ .mvn
COPY mvnw pom.xml ./
RUN ./mvnw dependency:go-offline

COPY src ./src

CMD ["./mvnw", "spring-boot:run"]

 
4) Use a Multi-Stage Build
With multi-stage builds, a Docker build can use one base image for compilation, packaging, and unit tests. Another image holds the runtime of the application. This makes the final image more secure and smaller in size (as it does not contain any development or debugging tools). Multi-stage Docker builds are a great way to ensure your builds are 100% reproducible and as lean as possible. You can create multiple stages within a Dockerfile and control how you build that image.
You can containerize your Spring Boot applications using a multi-layer approach. Each layer may contain different parts of the application such as dependencies, source code, resources, and even snapshot dependencies. Alternatively, you can build any application as a separate image from the final image that contains the runnable application. To better understand this, let’s consider the following Dockerfile:

FROM eclipse-temurin:17-jdk-jammy
ARG JAR_FILE=target/*.jar
COPY ${JAR_FILE} app.jar
EXPOSE 8080
ENTRYPOINT ["java", "-jar", "/app.jar"]

 
Spring Boot uses a “fat JAR” as its default packaging format. When we inspect the fat JAR, we see that the application forms a very small part of the entire JAR. This portion changes most frequently. The remaining portion contains the Spring Framework dependencies. Optimization typically involves isolating the application into a separate layer from the Spring Framework dependencies. You only have to download the dependencies layer — which forms the bulk of the fat JAR — once, plus it’s cached in the host system.
The above Dockerfile assumes that the fat JAR was already built on the command line. You can also do this in Docker using a multi-stage build and copying the results from one image to another. Instead of using the Maven or Gradle plugin, we can also create a layered JAR Docker image with a Dockerfile. While using Docker, we must follow two more steps to extract the layers and copy those into the final image.
In the first stage, we’ll extract the dependencies. In the second stage, we’ll copy the extracted dependencies to the final image:

FROM eclipse-temurin:17-jdk-jammy as builder
WORKDIR /opt/app
COPY .mvn/ .mvn
COPY mvnw pom.xml ./
RUN ./mvnw dependency:go-offline
COPY ./src ./src
RUN ./mvnw clean install

FROM eclipse-temurin:17-jre-jammy
WORKDIR /opt/app
EXPOSE 8080
COPY –from=builder /opt/app/target/*.jar /opt/app/*.jar
ENTRYPOINT ["java", "-jar", "/opt/app/*.jar" ]

 
The first image is labeled builder. We use it to run eclipse-temurin:17-jdk-jammy, build the fat JAR, and unpack it.
Notice that this Dockerfile has been split into two stages. The later layers contain the build configuration and the source code for the application, and the earlier layers contain the complete Eclipse JDK image itself. This small optimization also saves us from copying the target directory to a Docker image — even a temporary one used for the build. Our final image is just 277 MB, compared to the first stage build’s 450MB size.
5) Use .dockerignore
To increase build performance, we recommend creating a .dockerignore file in the same directory as your Dockerfile. For this tutorial, your .dockerignore file should contain just one line:

target

 
This line excludes the target directory, which contains output from Maven, from the Docker build context. There are many good reasons to carefully structure a .dockerignore file, but this simple file is good enough for now. Let’s now explain the build context and why it’s essential . The docker build command builds Docker images from a Dockerfile and a “context.” This context is the set of files located in your specified PATH or URL. The build process can reference any of these files.
Meanwhile, the compilation context is where the developer works. It could be a folder on Mac, Windows or a Linux directory. This directory contains all necessary application components like source code, configuration files, libraries, and plugins. With the .dockerignore file, we can determine which of the following elements like source code, configuration files, libraries, plugins, etc. to exclude while building your new image.
Here’s how your .dockerignore file might look if you choose to exclude the conf, libraries, and plugins directory from your build:


6) Favor Multi-Architecture Docker Images
Your CPU can only run binaries for its native architecture. For example, Docker images built for an x86 system can’t run on an Arm-based system. With Apple fully transitioning to their custom Arm-based silicon, it’s possible that your x86 (Intel or AMD) Docker Image won’t work with Apple’s recent M-series chips. Consequently, we always recommended building multi-arch container images. Below is the mplatform/mquery Docker image that lets you query the multi-platform status of any public image, in any public registry:

docker run –rm mplatform/mquery eclipse-temurin:17-jre-alpine
Image: eclipse-temurin:17-jre-alpine (digest: sha256:ac423a0315c490d3bc1444901d96eea7013e838bcf7cc09978cf84332d7afc76)
* Manifest List: Yes (Image type: application/vnd.docker.distribution.manifest.list.v2+json)
* Supported platforms:
– linux/amd64

 
We introduced the docker buildx command to help you build multi-architecture images. Buildx is a Docker component that enables many powerful build features with a familiar Docker user experience. All builds executed via Buildx run via the Moby BuildKit builder engine. BuildKit is designed to excel at multi-platform builds, or those not just targeting the user’s local platform. When you invoke a build, you can set the –platform flag to specify the build output’s target platform, (like linux/amd64, linux/arm64, or darwin/amd64):

docker buildx build –platform linux/amd64, linux/arm64 -t spring-helloworld .

7) Run as non-root user for security purposes
Running applications with user privileges is safer, since it helps mitigate risks. The same applies to Docker containers. By default, Docker containers and their running apps have root privileges. It’s therefore best to run Docker containers as non-root users. You can do this by adding USER instructions within your Dockerfile. The USER instruction sets the preferred user name (or UID) and optionally the user group (or GID) while running the image — and for any subsequent RUN, CMD, or ENTRYPOINT instructions:

FROM eclipse-temurin:17-jdk-alpine
RUN addgroup demogroup; adduser –ingroup demogroup –disabled-password demo
USER demo

WORKDIR /app

COPY .mvn/ .mvn
COPY mvnw pom.xml ./
RUN ./mvnw dependency:go-offline

COPY src ./src

CMD ["./mvnw", "spring-boot:run"]

8) Fix security vulnerabilities in your Java image
Today’s developers rely on third-party code and applications while building their services. By using external software without care, your code may be more vulnerable. Leveraging trusted images and continually monitoring your containers is essential to combatting this. Whenever you build a “Hello World” Docker image, Docker Desktop prompts you to run security scans of the image to detect any known vulnerabilities, like Log4Shell:

exporting to image 0.0s
== exporting layers 0.0s
== writing image sha256:cf6d952a1ece4eddcb80c8d29e0c5dd4d3531c1268291 0.0s
== naming to docker.io/library/spring-boot1 0.0s

Use ‘docker scan’ to run Snyk tests against images to find vulnerabilities and learn how to fix them

 
Let’s use the the Snyk Extension for Docker Desktop to inspect our Spring Boot application. To begin, install Docker Desktop 4.8.0+ on your Mac, Windows, or Linux machine and Enable Extension Marketplace.


Snyk’s extension lets you rapidly scan both local and remote Docker images to detect vulnerabilities.
 

Install the Snyk extension and supply the “Hello World” Docker Image.


Snyk’s tool uncovers 70 vulnerabilities of varying severity. Once you’re aware of these, you can begin remediation to galvanize your image.
 
💡 In order to perform a vulnerability check, you can use the following command directly against the Dockerfile: docker scan -f Dockerfile spring-helloworld
 
9) Use the OpenTelemetry API to measure Java performance
How do Spring Boot developers ensure that their apps are faster and performant? Generally, developers rely on third-party observability tools to measure the performance of their Java applications. Application performance monitoring is essential for all kinds of Java applications, and developers must create top notch user experiences.
Observability isn’t just limited to application performance. With the rise of microservices architectures, the three pillars of observability — metrics, traces, and logs — are front and center. Metrics help developers to understand what’s wrong with the system, while traces help you discover how it’s wrong. Logs tells you why it’s wrong, letting developers dig into particular metrics or traces to holistically understand system behavior.
Observing Java applications requires monitoring your Java VM metrics via JMX, underlying host metrics, and Java app traces. Java developers should monitor, analyze, and diagnose application performance using the Java OpenTelemetry API. OpenTelemetry provides a single set of APIs, libraries, agents, and collector services to capture distributed traces and metrics from your application. Check out this video to learn more.
Conclusion
In this blog post, you saw some of the many ways to optimize your Docker images by carefully crafting your Dockerfile and securing your image by using Snyk Docker Extension Marketplace. If you’d like to go further, check out these bonus resources that cover recommendations and best practices for building secure, production-grade Docker images.

Docker Development Best Practices
Dockerfile Best Practices
Build Images with BuildKit
Best Practices for Scanning Images
Getting Started with Docker Extensions


Quelle: https://blog.docker.com/feed/

Die AWS Service Catalog's Application Registry unterstützt jetzt kontoübergreifende Anwendungen.

Heute hat AWS Service Catalog die Unterstützung von kontoübergreifenden AppRegistry-Anwendungen und Attributgruppen angekündigt. Mit dieser Veröffentlichung können Anwendungen nun in Ihrer AWS-Organisation geteilt werden. So wird es Empfängerkonten ermöglicht, ihre lokalen Ressourcen geteilten Anwendungen zuzuweisen. Wenn Sie Anwendungsressourcen in mehr als einem Konto in Ihrer AWS-Organisation bereitgestellt haben, können Sie nun ein einzelnes Repository Ihrer Anwendungen und Anwendungs-Metadaten pflegen.
Quelle: aws.amazon.com

Verwenden Sie PySpark- und Altair-Codeschnipsel, um Daten schneller als je zuvor in Amazon SageMaker Data Wrangler vorzubereiten und zu visualisieren

Heute gestalten wir die Vorbereitung und Visualisierung von Daten mit der Unterstützung von Codeschnipseln in PySpark und Altair in Amazon SageMaker Data Wrangler schneller und einfacher als je zuvor. Amazon SageMaker Data Wrangler reduziert den Zeitaufwand für die Zusammenführung und Vorbereitung von Daten für Machine Learning (ML) von Wochen auf Minuten. Mit SageMaker Data Wrangler können Sie den Prozess der Datenvorbereitung und des Feature Engineerings vereinfachen und jeden Schritt des Datenvorbereitungs-Workflows, einschließlich der Datenauswahl, -reinigung, -erkundung und -visualisierung, über eine einzige visuelle Oberfläche abschließen. Mit dem Datenauswahl-Tool von SageMaker Data Wrangler können Sie schnell Daten aus mehreren Datenquellen wie Amazon S3, Amazon Athena, Amazon Redshift, AWS Lake Formation, Amazon SageMaker Feature Store, Databricks und SnowFlake auswählen.
Quelle: aws.amazon.com

Amazon SageMaker Canvas kündigt Unterstützung für VPC-Endpunkte an

Amazon SageMaker Canvas unterstützt jetzt VPC-Endpunkte und ermöglicht so die sichere, private Konnektivität mit anderen AWS-Diensten. SageMaker Canvas ist ein visueller Point-and-Click-Service, mit dem Geschäftsanalysten selbst genaue ML-Modelle für Erkenntnisse und Prognosen erstellen können – ohne Erfahrung mit Machine Learning zu haben oder eine einzige Zeile Code schreiben zu müssen.
Quelle: aws.amazon.com

Amazon Connect bietet nun die allgemeine Verfügbarkeit von ausgehenden Kampagnen für Anrufe, SMS und E-Mails

Ausgehende Kampagnen in Amazon Connect bieten Unternehmen jetzt eine eingebettete und kostengünstige Möglichkeit, täglich bis zu Millionen von Kunden für Mitteilungen wie Lieferbenachrichtigungen, Marketingaktionen, Terminerinnerungen oder Schuldeneintreibungen zu kontaktieren, ohne Tools von Drittanbietern integrieren zu müssen. Mit ausgehenden Kampagnen, die zuvor als ausgehende Hochvolumen-Mitteilungen bezeichnet wurden, können Sie proaktiv telefonisch, per SMS und E-Mail kommunizieren, um Ihre Kunden schnell zu bedienen und die Produktivität von Kundendienstmitarbeitern zu steigern. Die neuen Kommunikationsfähigkeiten umfassen außerdem Funktionen zur Unterstützung örtlicher Vorschriften wie TCPA über Point-of-Dial-Prüfungen und Anrufkontrollen für Tageszeit, Zeitzone, Anzahl der Versuche pro Kontakt und die erforderliche Zeit zur Verbindung mit einem verfügbaren Kundendienstmitarbeiter.
Quelle: aws.amazon.com






