Amazon Route 53 Profiles now supports AWS PrivateLink

Amazon Route 53 Profiles now supports AWS PrivateLink. Customers can now access and manage their Profiles privately, without going through the public internet. AWS PrivateLink provides private connectivity between VPCs, AWS services, and on-premises applications, securely over the Amazon network. When Route 53 Profiles is accessed via AWS PrivateLink, all operations, such as creating, deleting, editing, and listing of Profiles, can be handled via the Amazon private network.  Route 53 Profiles allows you to define a standard DNS configuration, in the form of a Profile, that may include Route 53 private hosted zone (PHZ) associations, Route 53 Resolver rules, and Route 53 Resolver DNS Firewall rule groups, and apply this configuration to multiple VPCs in your account. Profiles can also be used to enforce DNS settings for your VPCs, with configurations for DNSSEC validations, Resolver reverse DNS lookups, and the DNS Firewall failure mode. You can share Profiles with AWS accounts in your organization using AWS Resource Access Manager (RAM). Customers can use Profiles with AWS PrivateLink in regions where Route 53 Profiles is available today, including the AWS GovCloud (US) Regions. For more information about the AWS Regions where Profiles is available, see here. To learn more about configuring Route 53 Profiles, please refer to the service documentation.
Quelle: aws.amazon.com

Announcing AWS for Fluent Bit 3.0.0 based on Fluent Bit 4.1.0

AWS for Fluent Bit announces version 3.0.0, based on Fluent Bit version 4.1.0 and Amazon Linux 2023. Container logging using AWS for Fluent Bit is now more performant and more feature-rich for AWS customers, including those using Amazon Elastic Container Services (Amazon ECS) and Amazon Elastic Kubernetes Service (Amazon EKS). AWS for Fluent Bit enables Amazon ECS and Amazon EKS customers to collect, process, and route container logs to destinations including Amazon CloudWatch Logs, Amazon Data Firehose, Amazon Kinesis Data Streams, and Amazon S3 without changing application code. AWS for Fluent Bit 3.0.0 upgrades the Fluent Bit version to 4.1.0, and upgrades the base image to Amazon Linux 2023. These updates deliver access to the latest Fluent Bit features, significant performance improvements, and enhanced security. New features include native OpenTelemetry (OTel) support for ingesting and forwarding OTLP logs, metrics, and traces with AWS SigV4 authentication—eliminating the need for additional sidecars. Performance improvements include faster JSON parsing, processing more logs per vCPU with lower latency. Security enhancements include TLS min version and cipher controls, which enforce your TLS policy on outputs from AWS for Fluent Bit for stronger protocol posture. You can use AWS for Fluent Bit 3.0.0 on both ECS and EKS. On ECS, update the FireLens log-router container image in your task definition to the 3.0.0 tag from the Amazon ECR Public Gallery. On EKS, upgrade by either updating the Helm release or setting the DaemonSet image to the 3.0.0 version. The AWS for Fluent Bit image is available in the Amazon ECR Public Gallery and in the Amazon ECR repository. You can also find it on GitHub for source code and additional guidance.
Quelle: aws.amazon.com

Amazon EC2 M7i instances are now available in the Europe (Milan) Region

Starting today, Amazon Elastic Compute Cloud (Amazon EC2) M7i instances powered by custom 4th Gen Intel Xeon Scalable processors (code-named Sapphire Rapids) are available in the Europe (Milan) region. These custom processors, available only on AWS, offer up to 15% better performance over comparable x86-based Intel processors utilized by other cloud providers. M7i deliver up to 15% better price-performance compared to M6i. M7i instances are a great choice for workloads that need the largest instance sizes or continuous high CPU usage, such as gaming servers, CPU-based machine learning (ML), and video-streaming. M7i offer larger instance sizes, up to 48xlarge, and two bare metal sizes (metal-24xl, metal-48xl). These bare-metal sizes support built-in Intel accelerators: Data Streaming Accelerator, In-Memory Analytics Accelerator, and QuickAssist Technology that are used to facilitate efficient offload and acceleration of data operations and optimize performance for workloads. To learn more, visit Amazon EC2 M7i Instances. To get started, see the AWS Management Console.
Quelle: aws.amazon.com

100% Transparency and Five Pillars

How to Do Hardened Images (and Container Security) Right

Container security is understandably a hot topic these days, with more and more workloads running atop this mainstay of the cloud native landscape. While I might be biased because I work at Docker, it is safe to say that containers are the dominant form factor for running applications today. Equally important, the next generation of applications focused on AI are already running on containers. Because the world runs on containers, getting container security right is of paramount importance.

I am sad to say that most organizations who claim to be delivering container security are not. Particularly troubling are the growing ranks of hardened image providers who claim to be providing highly secure containers but are missing important components of what makes a container secure. Granted, we have a strong opinion on container security. We run the world’s largest repository and infrastructure for container hosting and management. And to be clear, our company’s future fate depends on the continued perception that containers are secure. So we have real skin in this game. 

The Essential Elements of Container Security

All of this being said, as the lead security engineer at Docker, and someone with a very long history with containers, I want to lay down our vision for container security. That vision is actually uncomplicated. There are five essential ingredients of maximum container security and hardened images. Those ingredients are:

Minimal Attack Surface: A proper hardened image only includes absolutely necessary software in the container. This means stripping out the majority of libraries, agents, and modules that may deliver useful functionality but are put into software distributions by default and add both complexity and CVE exposure. Our hardening process on average eliminates over 98% of the CVE exposure of a container. 

A 100% Complete Software Bills of Materials. This is the baseline and must be 100% complete (as per CISA guidance) with no minimum depth. provides accurate inventory including direct dependencies, transitive dependencies, and explicit relationships. SBOMs must be fully verifiable back to source, through open standards like SPDX or CycloneDX, standard component identifiers like PURLs, and honest gap disclosure.

Verifiable Build Provenance establishes chain of custody from source code to deployed artifact. SLSA Build Level 3 provenance provides non-falsifiable attestations about what was built, where, and by what process. If you don’t know how or where it was built and who built it, you can’t be sure it’s not tainted.

Standardized Exploitability Assessment clarifies which vulnerabilities affect specific deployment contexts. OpenVEX provides machine-readable statements about vulnerability status, enabling auditors and compliance tools to process assessments independently and properly leverage SBOMs. VEX statement transparency and interoperability make container security viable and allow teams to focus only on real risks.

Cryptographic Verification proves authenticity and integrity. Modern approaches like Sigstore and Cosign enable signing with public verification, allowing anyone to verify signatures without proprietary infrastructure. The signature and provenance chain must be transparent and easy to produce or query.

100% Transparency to Bind These Pillars Together. All of the above five elements must be transparent, not just in what they produce but in how they produce attestations, evidence, and any data or statements. This means using public sources for vulnerability intelligence (National Vulnerability Database or NVD, distribution security feeds, language ecosystem advisories, GitHub Security Advisories) with visible synchronization cadence. When CVEs listed in the KEV (Known Exploited Vulnerabilities) catalog  appear, transparency ensures alignment without negotiation. This means making the CVE selection process and criteria public and allowing users to see the process. This means making the SBOM creation process transparent so users can understand how the manifests are built. Ultimately, radical transparency transforms security from a trust exercise into a verification process where you can prove your posture, auditors can validate your evidence, and customers can independently assess your claims.

Of course container security also extends into the container runtimes to execute containers with highest security standards as well as continuous observability and enforcement of organizational policies across the entire container lifecycle. I’ll cover Docker’s activities in this area in a later post.

Why You Need to Verify All Vendor Claims on “Hardened Images”

For enterprises looking to better secure containers, I want to be very, very clear. Any “hardened” container image that cannot meet these requirements is a lie. Unfortunately, a number of hardened image vendors cannot meet these requirements. Here are some of the problems we have seen with competitors’ hardened images that our users and customers have brought us for comparison:

SBOMs that don’t pass the sniff test: A Node server with no npm packages is an oxymoron. Yet, that’s what we saw. Did they rewrite Node.js to remove any need for npm? I don’t think so. This means they left key elements from their SBOMs.

SBOMs missing transitive dependencies: CISA guidance is clear. Every SBOM must contain 100% of all dependencies. Not including them may be convenient because it hand waves the problem of securing those dependencies. But it’s not right.

Proprietary and opaque CVE designation: A vendor doesn’t get to decide whether a CVE is relevant and what its severity level is. That’s what public, transparent CVE feeds are for. Any vendor that won’t reveal their exact methodology or process for CVE assessment and provide it, on demand, is hiding something.

Incomplete SLSA Build claims: SLSA Build Level 3 is a binary. You either are or you are not meeting the requirements. Calling a build “transitional” is the same as checking the “no” box.

Why We’re Flipping the Table (and Resetting Expectations) on Container Security

It’s not news to say that supply chain attacks on the open source ecosystem are out of control. The smartest Black Hat minds in the world at the most advanced APTs are laser-focused on compromising supply chains because these are among the best ways to compromise entire ecosystems. Supply chain attacks can expose a huge swath of organizations to critical breaches leading to data exfiltration, ransomware and extortion, and espionage. Because we sit at a central position in the container ecosystem, we are also exposed any time the container supply chain is compromised. 

That’s why I’m writing this post. Docker has designed our hardened images explicitly to deliver on all five of the core pillars while also providing 100% transparency into process, inputs and outputs. I want to make it very easy for any platform, team, security team, CISO, or even CEO or business leader to be able to ask the right questions to determine whether their container security posture is valid, and whether the hardened images they are buying are actually delivering on their promise. (As a side note, container security is so important that we also think hardened images should be affordable to all. That’s why we’re now offering them at extremely reasonable prices, making them accessible even to two-person startups.) 

Container security is not hard. Container security is not rocket science. Container security is about radical transparency, honesty, and doing right for your users. In a perfect world, everyone would be doing container security the right way, and every organization would have easy access to rock-solid containers that are properly hardened by default and completely transparent. 

In this perfect world, Docker as a company is better off, the users are better off, the enterprises are better off, and the world is better off. Frankly, our competitors are also better off and their products are better. That’s a good thing. This is more than a sales pitch or an engineering rant. I guess you can call it a mission. Making the technology world safer is of fundamental importance and that’s the outcome we seek.
Quelle: https://blog.docker.com/feed/

Docker Model Runner on the new NVIDIA DGX Spark: a new paradigm for developing AI locally

We’re thrilled to bring NVIDIA DGX™ Spark support to Docker Model Runner. The new NVIDIA DGX Spark delivers incredible performance, and Docker Model Runner makes it accessible. With Model Runner, you can easily run and iterate on larger models right on your local machine, using the same intuitive Docker experience you already trust.

In this post, we’ll show how DGX Spark and Docker Model Runner work together to make local model development faster and simpler, covering the unboxing experience, how to set up Model Runner, and how to use it in real-world developer workflows.

What is NVIDIA DGX Spark

NVIDIA DGX Spark is the newest member of the DGX family: a compact, workstation-class AI system, powered by the Grace Blackwell GB10 Superchip  that delivers incredible  performance for local model development. Designed for researchers and developers, it makes prototyping, fine-tuning, and serving large models fast and effortless, all without relying on the cloud.

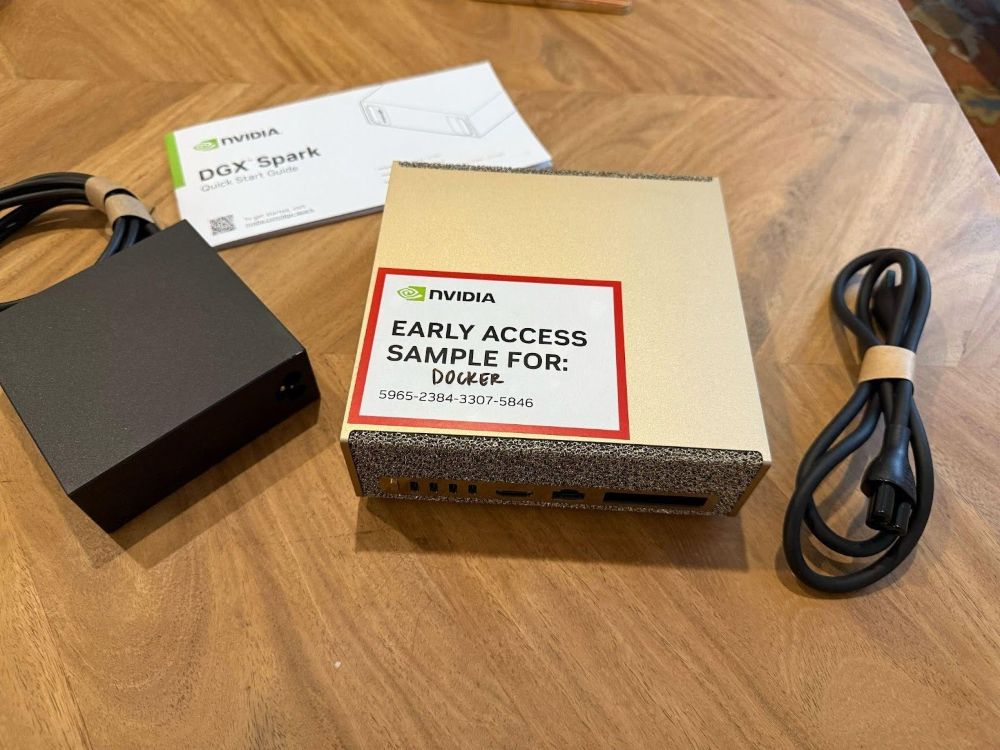
Here at Docker, we were fortunate to get a preproduction version of  DGX Spark. And yes, it’s every bit as impressive in person as it looks in NVIDIA’s launch materials.

Why Run Local AI Models and How Docker Model Runner and NVIDIA DGX Spark Make It Easy 

Many of us at Docker and across the broader developer community are experimenting with local AI models. Running locally has clear advantages:

Data privacy and control: no external API calls; everything stays on your machine

Offline availability: work from anywhere, even when you’re disconnected

 Ease of customization: experiment with prompts, adapters, or fine-tuned variants without relying on remote infrastructure

But there are also familiar tradeoffs:

Local GPUs and memory can be limiting for large models

Setting up CUDA, runtimes, and dependencies often eats time

Managing security and isolation for AI workloads can be complex

This is where DGX Spark and Docker Model Runner (DMR) shine. DMR provides an easy and secure way to run AI models in a sandboxed environment, fully integrated with Docker Desktop or Docker Engine. When combined with the DGX Spark’s NVIDIA AI software stack and large 128GB unified memory, you get the best of both worlds: plug-and-play GPU acceleration and Docker-level simplicity.

Unboxing NVIDIA DGX Spark

The device arrived well-packaged, sleek, and surprisingly small, resembling more a mini-workstation than a server.

Setup was refreshingly straightforward: plug in power, network, and peripherals, then boot into NVIDIA DGX OS, which includes NVIDIA drivers, CUDA, and AI software stack pre-installed.

Once on the network, enabling SSH access makes it easy to integrate the Spark into your existing workflow.

This way, the DGX Spark becomes an AI co-processor for your everyday development environment, augmenting, not replacing, your primary machine.

Getting Started with Docker Model Runner on NVIDIA DGX Spark

Installing Docker Model Runner on the DGX Spark is simple and can be done in a matter of minutes.

1. Verify Docker CE is Installed

DGX OS comes with Docker Engine (CE) preinstalled. Confirm you have it:

docker version

If it’s missing or outdated, install following the regular Ubuntu installation instructions.

2. Install the Docker Model CLI Plugin

The Model Runner CLI is distributed as a Debian package via Docker’s apt repository. Once the repository is configured (see linked instructions above) install via the following commands:

sudo apt-get update
sudo apt-get apt-get install docker-model-plugin

Or use Docker’s handy installation script:

curl -fsSL https://get.docker.com | sudo bash

You can confirm it’s installed with:

docker model version

3. Pull and Run a Model

Now that the plugin is installed, let’s pull a model from the Docker Hub AI Catalog. For example, the Qwen 3 Coder model:

docker model pull ai/qwen3-coder

The Model Runner container will automatically expose an OpenAI-compatible endpoint at:

http://localhost:12434/engines/v1

You can verify it’s live with a quick test:

# Test via API

curl http://localhost:12434/engines/v1/chat/completions   -H 'Content-Type: application/json'   -d
'{"model":"ai/qwen3-coder","messages":[{"role":"user","content":"Hello!"}]}'

# Or via CLI
docker model run ai/qwen3-coder

GPUs are allocated to the Model Runner container via nvidia-container-runtime and the Model Runner will take advantage of any available GPUs automatically. To see GPU usage:

nvidia-smi

4. Architecture Overview

Here’s what’s happening under the hood:

[ DGX Spark Hardware (GPU + Grace CPU) ]

             │

     (NVIDIA Container Runtime)

             │

     [ Docker Engine (CE) ]

             │

     [ Docker Model Runner Container ]

             │

     OpenAI-compatible API :12434

The NVIDIA Container Runtime bridges the NVIDIA GB10 Grace Blackwell Superchip drivers and Docker Engine, so containers can access CUDA directly. Docker Model Runner then runs inside its own container, managing the model lifecycle and providing the standard OpenAI API endpoint. (For more info on Model Runner architecture, see this blog).

From a developer’s perspective, interact with models similarly to any other Dockerized service — docker model pull, list, inspect, and run all work out of the box.

Using Local Models in Your Daily Workflows

If you’re using a laptop or desktop as your primary machine, the DGX Spark can act as your remote model host. With a few SSH tunnels, you can both access the Model Runner API and monitor GPU utilization via the DGX dashboard, all from your local workstation.

1. Forward the DMR Port (for Model Access)

To access the DGX Spark via SSH first set up an SSH server:

Using Local Models in Your Daily WorkflowsIf you’re using a laptop or desktop as your primary machine, the DGX Spark can act as your remote model host. With a few SSH tunnels, you can both access the Model Runner API and monitor GPU utilization via the DGX dashboard, all from your local workstation.

sudo apt install openssh-server
sudo systemctl enable –now ssh

Run the following command to access Model Runner via your local machine. Replace user with the username you configured when you first booted the DGX Spark and replace dgx-spark.local with the IP address of the DGX Spark on your local network or a hostname configured in /etc/hosts. 

ssh -N -L localhost:12435:localhost:12434 user@dgx-spark.local

This forwards the Model Runner API from the DGX Spark to your local machine.Now, in your IDE, CLI tool, or app that expects an OpenAI-compatible API, just point it to:

http://localhost:12435/engines/v1/models

Set the model name (e.g. ai/qwen3-coder) and you’re ready to use local inference seamlessly.

2. Forward the DGX Dashboard Port (for Monitoring)

The DGX Spark exposes a lightweight browser dashboard showing real-time GPU, memory, and thermal stats, usually served locally at:

http://localhost:11000

You can forward it through the same SSH session or a separate one:

ssh -N -L localhost:11000:localhost:11000 user@dgx-spark.local

Then open http://localhost:11000 in your browser on your main workstation to monitor the DGX Spark performance while running your models.

This combination makes the DGX Spark feel like a remote, GPU-powered extension of your development environment. Your IDE or tools still live on your laptop, while model execution and resource-heavy workloads happen securely on the Spark.

Example application: Configuring Opencode with Qwen3-Coder

Let’s make this concrete.

Suppose you use OpenCode, an open-source, terminal-based AI coding agent.

Once your DGX Spark is running Docker Model Runner with ai/qwen3-coder pulled and the port is forwarded, you can configure OpenCode by adding the following to ~/.config/opencode/opencode.json

{
  "$schema": "https://opencode.ai/config.json",
  "provider": {
    "dmr": {
      "npm": "@ai-sdk/openai-compatible",
      "name": "Docker Model Runner",
      "options": {
        "baseURL": "http://localhost:12435/engines/v1"   // DMR’s OpenAI-compatible base
      },
      "models": {
        "ai/qwen3-coder": { "name": "Qwen3 Coder" }
      }
    }
  },
  "model": "ai/qwen3-coder"
}

Now run opencode and select Qwen3 Coder with the /models command:

That’s it! Completions and chat requests will be routed through Docker Model Runner on your DGX Spark, meaning Qwen3-Coder now powers your agentic development experience locally.

You can verify that the model is running by opening http://localhost:11000 (the DGX dashboard) to watch GPU utilization in real time while coding.This setup lets you:

Keep your laptop light while leveraging the DGX Spark GPUs

Experiment with custom or fine-tuned models through DMR

Stay fully within your local environment for privacy and cost-control

Summary

Running Docker Model Runner on the NVIDIA DGX Spark makes it remarkably easy to turn powerful local hardware into a seamless extension of your everyday Docker workflow.You install one plugin and use familiar Docker commands (docker model pull, docker model run).You get full GPU acceleration through NVIDIA’s container runtime.You can forward both the model API and monitoring dashboard to your main workstation for effortless development and visibility.This setup bridges the gap between developer productivity and AI infrastructure, giving you the speed, privacy, and flexibility of local execution with the reliability and simplicity Docker provides.As local model workloads continue to grow, the DGX Spark + Docker Model Runner combo represents a practical, developer-friendly way to bring serious AI compute to your desk — no data center or cloud dependency required.Learn more:

Read the official announcement of DGX Spark launch on NVIDIA newsroom

Check out the Docker Model Runner General Availability announcement

Visit our Model Runner GitHub repo. Docker Model Runner is open-source, and we welcome collaboration and contributions from the community! Star, fork and contribute.

Quelle: https://blog.docker.com/feed/