Earn Money on Your WordPress.com Website with Premium Content and Paid Newsletters

Make money while you build an engaged following for your website: use the WordPress.com Premium Content block to create monthly and yearly paid memberships that give followers access to the premium content of your choice – text, photos, videos, and more. You can now automatically deliver your new premium posts right to subscribers’ inboxes as a paid newsletter!

Anything that you can publish on a WordPress.com site with a block can become part of your premium content offering. Summer recipes, podcasts, fitness instruction videos, photography portfolios, music samples, access to digital downloads, poetry, political remarks —  people on WordPress.com include all of that and more in Premium Content blocks, and they make money for sharing their expertise.

Premium Content block examples

Premium Content memberships also offer you a new way to engage your most engaged fans. Create membership tiers with different costs and content access levels. Craft targeted messaging for each one. Want to send special emails and offers or ask for suggestions about what kind of content you might create next? You control what content and messaging goes to your paying members via Premium Content blocks.

You focus on creating amazing content. We’ll handle the credit and debit card payment processing, reporting, and providing the right access for paying members to view your premium content or get your newsletters.

Launch your first membership

To use Premium Content blocks, you’ll need a WordPress.com website with any paid plan — Personal, Premium, Business, or eCommerce.Create a new page or post, and add a Premium Content block.

To set up your first paid membership or subscription, create a Stripe account (if you don’t have one already). Stripe is the company we’ve partnered with to process credit and debit card payments in a safe, secure, and speedy way.

Set the cost of the membership and decide whether people will pay monthly or yearly. Want to offer multiple kinds of memberships with access to different kinds of content? Add separate Premium Content blocks for each one to create multiple membership options.

Add content that’s included with this particular membership to the Premium Content block. You’ll add content using blocks, and can add as many blocks within the Premium Content block as you like.To let followers opt into receiving new premium content via email, turn on the “Posts via email” option in your paid membership plan settings. Your membership payments are processed by a WordPress.com feature called Recurring Payments, which powers seamless credit and debit card processing for the Premium Content block.

And just like that, you’re a membership organization! Share your new membership offerings with your network — social media, email, and word of mouth are all great places to start — and start building your following along with your stable, recurring revenue.
Quelle: RedHat Stack

Support the Fight Against Inequality: Resources and Ways to Act

The past few months have been tiring for everyone. As the coronavirus spread across the globe, most of us thought that we were going to live with the uncomfortableness of shelter-in-place for a few months before things could return to normal. We thought that what would consume most of our free time was TikTok videos, Animal Crossing, Netflix, and maybe a reignition of hobbies. Unfortunately, this has not been the case.

Fast-forward to today. Society has not returned to normal and instead, we have had more time to engage on the topic of race on a global scale — specifically, how unfairly Black Americans are treated in American society.

We are not only bearing witness to how disproportionately the COVID-19 pandemic has hit Black and Brown Americans, we are seeing the injustices and violence Black Americans face daily in an amplified manner. Whether it’s having the cops called on you following a simple and reasonable request in the park, going jogging in your neighborhood, or being asleep in your own home, the world is watching and finally responding to these injustices. From Eric Garner to George Floyd, the list of people we grieve over is far too long.

We are hurt, confused, frustrated, angry, and just tired.

We are tired but never done.

How can you support your Black colleagues and friends?

Give them a bit more time, space, and compassion.Understand that some of them are whiplashed and at a loss for what to do.Let them come to you with causes you can support.Collectively agree on a way of showing wordless support, like an emoji for example:

How can you support this movement?

Understand that this movement is not history, nor will it soon be over. We need to fight for equality until life, liberty, and the pursuit of happiness are available for all.

Here is a list of places you can amplify, donate to, or sign petitions for change:

Donate

Donate to any of these organizations and petitions to show support and help advance the agenda for equal representation and justice.

Nationwide Bail FundReclaim the BlockBlack Visions CollectiveThe Official GoFundMe of George Floyd’s FamilyJustice for Regis Official FundEqual Justice InitiativeNAACP Empowerment ProgramBlack Lives Matter Network

Sign

Sign any of these petitions to show support for change and accountability in our judicial system.

Color of Change PetitionOfficial Petition for Breonna Taylor Justice for Tony McDade PetitionJustice for Ahmaud Arbery PetitionJustice for George Floyd Petition

Do

Call, tweet, and send posts on your social networks to your elected state or local officials and demand equal justice today.

Educational resources

Dedicate time to learn more deeply about institutionalized racism in America, and how to safely take action against it.

This Anguish and Action post from the Obama Foundation includes a “Get Informed” section with anti-racism articles and resources.This detailed list of anti-racism resources includes articles, books, TV shows, and movies.This post by Barack Obama reflects on how to make this moment the turning point for real change.This Anti-Defamation League guide offers practical tips on how to engage young people in conversations about race and racism.This post compiles resources and links on ways to support and fight for an anti-racist future together.Just Mercy is an important read by lawyer and Equal Justice Initiative founder Bryan Stevenson.

Mental health resources

Ethel’s Club – A Black-owned and -operated social club that offers access to Black therapists and a multitude of creative events for People of Color. Crisis Text Line – A different approach to crisis intervention, Crisis Text Line offers you help when you text 741-741. You’ll be able to chat with someone who is willing to listen and provide you with additional resources.Shine Text –  A Black-owned self-care app through which you can sign up to receive cheerful texts and tips every day. Therapy for Black Girls – A Black-owned directory to help you find Black therapists in your area. BEAM Community – A Black emotional and mental health collective committed to the health and healing of Black communities.Self-Care Tips for Black People Who Are Struggling With This Very Painful Week – A resource on VICE with tips that may provide a bit of relief.

Tips for protesting

Knowing your rights – An indispensable resource from the ACLU.How to protest safely and legally – Remember to wear a mask in order to protect yourself!How to help someone who’s been tear-gassed

Lastly, let’s celebrate solidarity and beauty when we see it:

The international community is watching and protesting alongside us across the globe.Protesters doing the cupid shuffle.Protesters take a knee and raise their fists in Upper East Side, New York.Protesting in Harlem, New York.In New York City, chief police officer kneels with protesters.

Stay safe out there!
Quelle: RedHat Stack

Not Sure How to Get Your Blog Off the Ground? Join Our New Workshop.

Starting a blog is easy and free on WordPress.com. But what if you’re new to blogging? If you need guidance on best practices, actionable tips on how to grow your audience and find inspiration to write, and constructive feedback from experts and fellow bloggers, you should join us at Blogging: From Concept to Content. It’s a three-day, hands-on, intensive workshop that will take you from “I’m not entirely sure what I’m doing?” to “I’m a blogger!”

Date: June 16–18, 2020Time: 7:00 a.m. – 11:00 a.m. PDT | 8:00 a.m. –12:00 p.m. MDT | 9:00 am-1:00 pm CDT | 10:00 a.m. – 2:00 p.m. EDT| 14:00 – 18:00 UTCLocation: Online via Zoom and private blogCost: Early Bird Price — US$99 until 23:59 UTC on June 8, 2020. Regular price — US$179 from June 9 – June 15, 2020.Register now: https://wordpress.com/blogging-basics-workshop/

Featuring guest speakers and WordPress.com experts in areas like content and writing, SEO, design, and digital marketing, the workshop will include daily assignments and interactive discussions. You’ll also have plenty of opportunities to interact directly with the instructors as well as with Happiness Engineers. At the end of the workshop, you’ll walk away with:

A ready-to-launch blog.An editorial calendar for the next 8–12 weeks.A well-stocked toolkit of tips and techniques to continue to develop your blog and grow its reach.Finally, and at least as important: a community of new blogging friends to learn from and grow with long after the workshop has ended.

We created this workshop for new bloggers who crave a structured, step-by-step approach to creating a blog that reflects their vision and voice, and who don’t want to waste time looking for answers all over the web. Be prepared to dive in and do the work! You won’t regret this investment, and you’ll be in great company.

Seats are limited to facilitate interaction between participants and instructors, so register now to save your slot. By registering this week, you’ll take advantage of our Early Bird Price of US$99 through June 8, after which the regular registration price of $179 will take effect.

See you then!
Quelle: RedHat Stack

NVIDIA GPU Nodes for Docker Enterprise Kubernetes

The post NVIDIA GPU Nodes for Docker Enterprise Kubernetes appeared first on Mirantis | Pure Play Open Cloud.
Accelerate Machine Learning, Data Analysis, Media Processing, and other Challenging Workloads
Docker Enterprise 3.1 with Kubernetes 1.17 makes it simple to add standard GPU (Graphics Processing Unit – but you knew that) worker node capacity to Kubernetes clusters. A few easily-automated steps configure the (Linux) node, either before or after joining it to Docker Enterprise, and thereafter, Docker Kubernetes Service automatically recognizes the node as GPU-enabled, and deployments requiring or able to use this specialized capacity can be tagged and configured to seek it out. 
This capability complements the ever-wider availability of NVIDIA GPU boards for datacenter (and desktop) computing, as well as rapid expansion of GPU hardware-equipped virtual machine options from public cloud providers. Easy availability of GPU compute capacity and strong support for standard GPUs at the container level (for example, in containerized TensorFlow) is enabling an explosion of new applications and business models, from AI to bioinformatics to gaming. Meanwhile, Kubernetes and containers are making it easier to share still-relatively-expensive GPU capacity. You can also configure and deploy to cloud-based GPU nodes on an as-needed basis, potentially enabling savings, since billing for GPU nodes tends to be high.
The GPU Recipe
Currently, GPU capability is supported on Linux only, but that includes a wide range of compatible NVIDIA hardware. The main thing to consider is whether the apps you intend to run can exploit the hardware at hand. Most application substrates (for example, the Tensorflow Docker Container) can access a range of NVIDIA datacenter GPU architectures. 
However, distributed computing projects aimed at consumer-side deployment (such as Folding at Home, which is deployable on Kubernetes thanks to community contributions such as k8s-fah) may not work well with, for example, the Tesla M60 to V100 GPUs found in Amazon G2, P3, and other GPU-equipped instance types. The problem isn’t technical compatibility so much as the fact that FAH workloads are configured for running on at-home graphics cards, so the system preferentially distributes work units to these devices, which may leave volunteered cloud GPUs idle.
All of this means it’s important to prep workloads carefully, with an eye to the GPU hardware on which they’ll run. You must select the correct parent and base images, and you’ll typically need to add configuration steps to Dockerfiles to add NVIDIA Container Toolkit and other bits before workloads installed on these containers can access underlying physical GPUs. The TensorFlow Docker workflow is also kind of neat in that it lets you build and debug apps in CPU-only containers, then swap in GPU support to deploy on production platforms. In general, containerizing GPU-reliant apps is a big win, since it makes these applications and deployments highly portable between environments, testable on diverse environments, and easy to share, accelerating research. In fact, because containerization minimizes external dependencies, it can even help make certain kinds of experiments more repeatable. 
Configuring a GPU Node for Docker Kubernetes
Preparing a GPU node for use in a Docker Enterprise Kubernetes cluster begins with configuring the node to join the cluster as a regular worker. You can then join the node to the cluster as a regular worker, or wait until after you’ve installed and persisted GPU drivers.
We’ll show the procedure for configuring a Ubuntu Linux 18.04 node to be added to a Docker Enterprise cluster as a GPU node. Please refer to the documentation for recipes for other operating systems and versions.
We’ll assume you updated the host before installing Docker Enterprise Engine and UCP (a recent kernel is essential). So the next step is to ensure that certain dependencies are in place. For Ubuntu 18.04, you’ll need to install pkg-config (an application that NVIDIA and other software uses to find build and other components).
sudo apt install pkg-config
Next, you’ll make sure build tools and headers are onboard:
sudo apt-get install -y gcc make curl linux-headers-$(uname -r)
Then confirm that i2c_core and ipmi_msghandler kernel modules are in place. These are used to manage communications between and among CPUs and GPUs:
sudo modprobe -a i2c_core ipmi_msghandler
And then configure to reload the modules on restarts:
echo -e “i2c_corenipmi_msghandler” | sudo tee /etc/modules-load.d/nvidia.conf
Then we set a prefix term used in subsequent commands, make a directory for the NVIDIA drivers in the appropriate place, update the NVIDIA configuration file, and refresh links to libraries.
NVIDIA_OPENGL_PREFIX=/opt/kubernetes/nvidia
sudo mkdir -p $NVIDIA_OPENGL_PREFIX/lib
echo “${NVIDIA_OPENGL_PREFIX}/lib” | sudo tee /etc/ld.so.conf.d/nvidia.conf
sudo ldconfig
Next, we set another variable to contain the current driver version:
NVIDIA_DRIVER_VERSION=440.59
We curl down the driver executable and save it as nvidia.run:
curl -LSf https://us.download.nvidia.com/XFree86/Linux-x86_64/${NVIDIA_DRIVER_VERSION}/NVIDIA-Linux-x86_64-${NVIDIA_DRIVER_VERSION}.run -o nvidia.run
Then we install the driver itself:
sudo sh nvidia.run –opengl-prefix=”${NVIDIA_OPENGL_PREFIX}”
The driver app will ask you a few questions before completing the installation. Do you want to install NVIDIA 32-bit drivers? (Answer is probably no.) The utility may complain that it has no tool (Xorg) to resolve changed library paths, and that if it fails to install, you’ll need to install Xorg dev tools. (Answer is OK. Don’t worry about this.) Update the configuration to load NVIDIA X driver on restarts? (Answer is probably yes.)
Once the library is installed, we load NVIDIA memory kernel modules while creating device files for them:
sudo tee /etc/systemd/system/nvidia-modprobe.service << END
[Unit]
Description=NVIDIA modprobe

[Service]
Type=oneshot
RemainAfterExit=yes
ExecStart=/usr/bin/nvidia-modprobe -c0 -u

[Install]
WantedBy=multi-user.target
END
Then enable and start the modules:
sudo systemctl enable nvidia-modprobe
sudo systemctl start nvidia-modprobe
Finally, we configure the NVIDIA persistence daemon service:
sudo tee /etc/systemd/system/nvidia-persistenced.service << END
[Unit]
Description=NVIDIA Persistence Daemon
Wants=syslog.target

[Service]
Type=forking
PIDFile=/var/run/nvidia-persistenced/nvidia-persistenced.pid
Restart=always
ExecStart=/usr/bin/nvidia-persistenced –verbose
ExecStopPost=/bin/rm -rf /var/run/nvidia-persistenced

[Install]
WantedBy=multi-user.target
END
Then enable and start it up.
sudo systemctl enable nvidia-persistenced
sudo systemctl start nvidia-persistenced
At this point, you can (if you haven’t done so already), obtain from Docker Enterprise/UCP the “docker join” command required to add nodes to your cluster, copy this to the command line of your GPU node, and join it up. The generalized or node-specific orchestration settings in Docker Enteprise will determine that the node joins as a Kubernetes worker. The Kubernetes GPU device plugin is built in, and the node will come up (or change state) to indicate on the Dashboard that it’s a GPU node.
Test Deployment
You can now easily run a test deployment with kubectl, pulling it down from Docker Hub. The following can be pasted directly to your command line, or the YAML portion can be saved as a file and applied after editing. The image contains a program that will access the platform and log a dossier on your available GPU hardware:
kubectl apply -f- <<EOF
apiVersion: apps/v1
kind: Deployment
metadata:
 creationTimestamp: null
 labels:
   run: gpu-test
 name: gpu-test
spec:
 replicas: 1
 selector:
   matchLabels:
     run: gpu-test
 template:
   metadata:
     labels:
       run: gpu-test
   spec:
     containers:
     – command:
       – sh
       – -c
       – “deviceQuery && sleep infinity”
       image: mirantis/gpu-example:cuda-10.2
       name: gpu-test
       resources:
         limits:
           nvidia.com/gpu: “1”
EOF
You can change the number of replicas and increase the limit if more than one GPU or GPU-equipped node is available to your cluster. Pods will be scheduled only onto GPU nodes per the stated limit. Attempts to schedule more pods than you have GPU capacity to support will result in a FailedScheduling error with the annotation “Insufficient nvidia.com/gpu.”
List the pods and their states with:
kubectl get pods
(Example output)
NAME                        READY   STATUS    RESTARTS   AGE
gpu-test-747d746885-hpv74   1/1     Running   0          14m
Then view the log with:
kubectl logs <name of pod>
Finally, you can delete the deployment by entering:
kubectl delete deployment gpu-test
More to Come
Now that we have GPU capacity, we’re playing with some machine learning tools. Soon we expect to post some benchmark results comparing classifier training exercises on conventional (e.g., Xeon) (v)CPUs vs GPUs.
If you’d like to see this in action, download the Mirantis Launchpad CLI Tool, or join us for a demonstration webinar!
The post NVIDIA GPU Nodes for Docker Enterprise Kubernetes appeared first on Mirantis | Pure Play Open Cloud.
Quelle: Mirantis

Improved Navigation in the WordPress Apps

An app should be intuitive to use, so you can do what you need to do while you’re in a hurry or on the go. The newest versions of the Android and iOS mobile apps are reorganized based on how you actually use them. Publishing and finding what you need have never been faster, so you can spend less time hunting and tapping — and more time creating and engaging.

How did we decide on these changes? We analyzed our apps for pain points and hard-to-do tasks. We looked at the data and talked to people about which features are most important to them. We interviewed WordPress users and showed them prototypes. All these changes come from you — thanks!

Fewer tabs for faster focus

We’ve simplified the app into three main sections focused on the key things you do every day: managing your site, finding and reading great content, and keeping up to date with notifications.

Your account, where it should be

People expect to find account information and settings in the upper-right corner, so that’s where it is now: get to your profile and account by heading to the My Site screen and tapping on your photo. It’s where you expect it to be when you need it, and out of the way when you don’t. 

Start drafting, right now

There’s one button to tap to create new posts or pages. It’s big. It’s pink. It’s got a plus sign on it. It’s always there on the My Site screen, waiting. Tap it and type away!

The links you use the most, right at the top

There are a lot of things you can do with your site, but there are some things you do more often than others — check stats, edit posts, upload photos. We made links to those actions big, and we put them at the top of the My Site screen, right under a more prominent site name and logo.

Content discovery, your way

You’ll now see great content from the sites you follow as soon as you open the Reader. Use the top tabs to switch between different streams of content, or narrow things down with the filter bar if you’re only interested in specific sites or tags.

To see the improvements, make sure you’ve updated your app. The WordPress mobile apps are free and available for both Android and iOS devices. If you have any questions or feedback, reach out to us directly from the app — in My Site, tap your profile image → Help & Support → Contact Us.

Many of you are increasingly building your sites and reading other sites on mobile devices, so we’re constantly looking for ways to make our apps easier to use. Look out for upcoming changes that streamline site management and further refine the reading experience!
Quelle: RedHat Stack

Celebrating Pride Month with Out in Tech

Happy Pride Month! Last year, I shared resources and highlighted organizations doing awesome work in the LGBTQ+ community. This year, I’m excited to tell you more about Out in Tech, an organization that Automattic has partnered with for the past four years. I’m proud to say that this year, the Queeromattic Employee Resource Group — an employee-led collective for LGBTQ+ initiatives at Automattic — is co-sponsoring this partnership for the first time. 

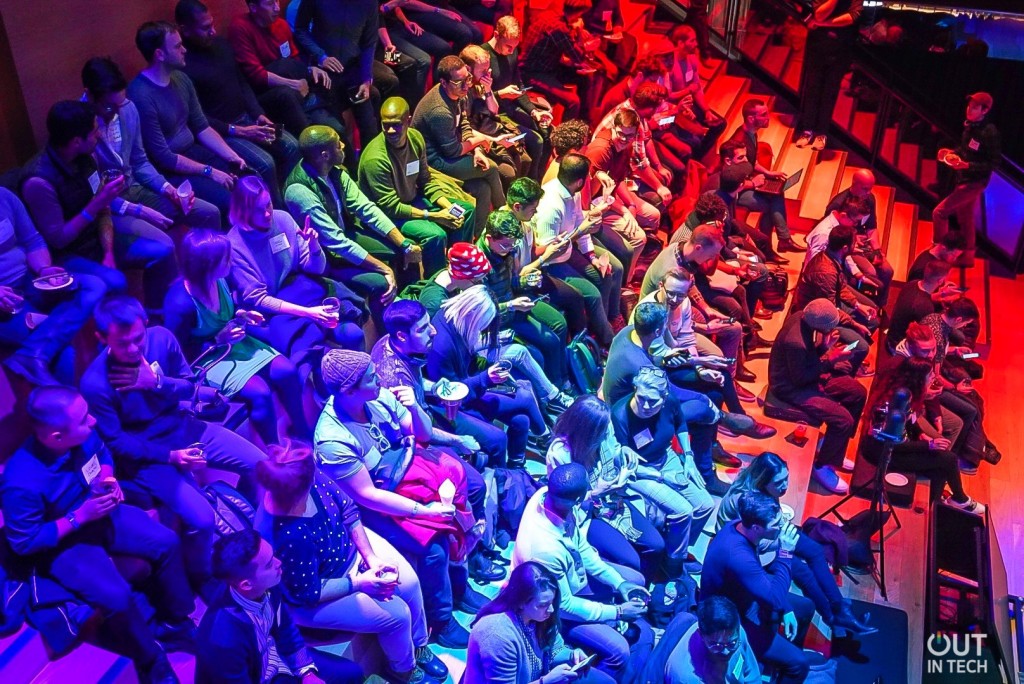
“We’re a global nonprofit community of 40,000 members working toward a world in which LGBTQ+ people are empowered, well-represented in the tech industry, and have full agency, from intern to CEO,” says Gary Goldman, the Senior Program Director of Out in Tech. As the Queeromattic Lead, I’ve been fortunate to benefit from the wonderful and empowering community Out in Tech has created through their Qorporate Roundtables, vibrant Slack community, and virtual hangouts in light of COVID-19. It brings me great joy to share more about Out In Tech with you all in this recent interview with Gary. 

Q. Tell us a bit about yourself! How do you identify? How did you get started with Out in Tech?

I identify as a cisgender gay man. Before Out in Tech, I worked as a United Nations consultant for five years in data management. During that time, I was a volunteer for Out in Tech as head of the New York chapter. It has been a dream come true to transition to being a staff member and work for my actual favorite organization out there. 

Q. Can you share any exciting things Out in Tech has planned for Pride?

The unsung heroes of the LGBTQ+ community are the activists working on the ground in the 70+ countries where being queer is illegal (and sometimes even punishable by death). 

On June 20, we’ll be building WordPress.com websites for 10 incredible organizations in these countries; they’re planning on using these sites to advocate for policy change, grow their community, and fundraise.We’re also hosting a virtual Pride series the second week of June for those working in customer experience (June 10) as well as a day of workshops for folks currently navigating the job market (June 13).  To learn more, visit outintech.com.

Q. Is there one person you’ve helped over the years (or a project you’ve worked on) that stands out in your memory?

I’ve noticed that a lot of people in the LGBTQ+ tech community have been eager to leverage their skills to make the world a better place. 

Derrick Reyes was an early recipient of the Out in Tech Coding Scholarship. Since graduating, they’ve been leveraging their new skills to create an incredible company called Queerly Health, which helps you find and book LGBTQ+ friendly health and wellness practitioners. It was a real full-circle moment to welcome them as a panelist at an Out in Tech event back in January. 

Q. Has partnering with Automattic helped your work?

This partnership has made all the difference in Out in Tech’s work, and that’s not an understatement. When I was a United Nations consultant, I traveled to dozens of countries where being LGBTQ+ is outlawed, and where activists needed a digital platform to amplify their voices. 

WordPress turned that vision into a reality. 

Since 2017, the Out in Tech Digital Corps has built over 100 WordPress.com websites for activists in 50+ countries. 

Automattic provides these activists with hosting, themes, and domains free of charge. We also have Automatticians support us technically during the Digital Corps build days — a special shout-out to Mindy Postoff, who has been to over 10 build days!Simply put, Out in Tech is powered by Automattic, and we’re incredibly grateful to Marlene Ho, Megan Marcel, and Matt Mullenweg for making it all happen. 

Q. In this time when organizations have pivoted to digital events, can you tell us about your virtual events and other ways to participate in your community?  

Out in Tech’s mission is to create opportunities for our members to advance their careers, grow their networks, and leverage tech for social change. During COVID-19, we’re still doing just that — but digitally. 

Every week, members have an opportunity to hear from dozens of companies that are actively hiring and to network with each other during Queer and Trans People of Color (QTPOC) socials and even RuPaul’s Drag Race viewing parties. We also have virtual events featuring prominent LGBTQ+ tech leaders, such as Arlan Hamilton, the founder of Backstage Capital, and Jeff Titterton, the chief marketing officer of Zendesk. 

When it comes to leveraging tech for social change, 100 volunteers built websites for organizations in Senegal, Uganda, Nigeria, and Zimbabwe (among others), and we’re doing it again in June. This spring, our mentorship program connected 83 LGBTQ+ youth to tech mentors for eight weeks. They’re graduating at the end of this month, and we hope some of you reading this will hire them as interns!

Q. What do you look for when partnering with organizations and LGBTQ+ activists around the world?

Out in Tech accepts applications from LGBTQ+ groups on every continent on a rolling basis. When our Digital Corps leadership team reviews applications, they assess four main criteria: 

Does the LGBTQ+ organization have a good reason for needing a website? This can range from needing to crowdsource input from the community to applying for grants. Do they already have a website and just need a revamp? We only select organizations who either do not have an existing web presence, or whose website is very challenging to navigate. Has the organization been around for more than one year? We want to ensure that the groups we support are established and are going to stick around for the long haul after we build their shiny new website. Does the organization have at least a few volunteers to keep the website active and up to date once we deliver a user guide to them? We regularly track and monitor which sites are active and how they’re being used.  This helps us to continuously improve our efforts to unite the global LGBTQ+ community.

Community is so important, especially in these times, and I’m doubly thankful for people like Gary who have helped the LGBTQ+ community remain strong. What organizations are you celebrating this month? How are you creating community from afar? Share in the comments below!

At WordPress.com, we strive to be a platform that democratizes publishing so that anyone can share their stories regardless of income, gender, politics, language, or where they live in the world. This month is a great reminder for why we work hard to expand the open web.
Quelle: RedHat Stack

Today I Learned: How to Enable SSH With Keypair Login on Windows Server 2019

The post Today I Learned: How to Enable SSH With Keypair Login on Windows Server 2019 appeared first on Mirantis | Pure Play Open Cloud.
TL;DR – When deploying stuff automatically to Windows Server 2019, Windows Remote Management (winrm) is probably the preferred solution, with Remote Desktop (.rdp) for manual logins and fiddling. But you can also use SSH, which can be more convenient (or can at least feel more convenient) to Linux-native operators.
The goal here is to be able to open a terminal and type:
$ ssh -i my_private_key Administrator@<Windows Server 2019 URL or IP address>
… and instantly end up in PowerShell on the node, logged in as Administrator.
The catch is: end-to-end instructions for enabling and configuring SSH with keypair access on Windows Server 2019 are thin upon the ground. This tutorial pulls together gleanings from several recent blogs to show how this can be done.
As a bonus, it also shows how it can be scripted for injection into cloud-based Windows Server 2019 VMs at launch, causing these to come up SSH-accessible from the jump. This bypasses the need to:

Wait for the server to come up completely
Obtain and record the Administrator password (on AWS, this ironically involves presenting your private key in the ‘Connect’ dialog in order to decrypt your password)
Download the offered .rdp access file
Use the .rdp (with password) to log into the server

… before making the changes required so that you never need to do any of this again.
Why did I need to figure this out? Glad you asked. Over the past few weeks, in preparation for the launch of Docker Enterprise Barracuda, we’ve been deploying a lot of demo clusters using daily builds and “Beta bits” (and bobs). A key feature in Barracuda, reflecting capabilities introduced with Kubernetes 1.19, is the ability to use Windows Server worker nodes (both vanilla and GPU-equipped!) in heterogeneous clusters.
The catch there: because the bits I was using weren’t yet fully-baked, our standard cluster-deployment tooling (in this case, I was using docker cluster) hadn’t yet been extended to do absolutely everything I needed to do. Specifically, I could deploy Docker Enterprise Barracuda with Windows Worker nodes in minutes (and Docker Enterprise itself could automatically configure those nodes as Kubernetes workers and implement the GPU plugin). But then I had to log into those nodes to install NVIDIA drivers and services enabling GPU access.
That (to quote this xkcd strip) broke my Linux-oriented workflow. Each time I deployed a new cluster, I had to leave my Linux operations VM, browse to EC2 on my Windows desktop, find the brand-new Windows nodes I’d deployed on GPU instances, decrypt and store their gobbledegook passwords, download the .rdp files, then navigate .rdp login repeatedly to visit and reconfigure the instances.
SSH-(with keypairs)-from-the-jump would make this easier. And after Googling for a while, I figured it out. Of course, what would have made it a lot easier would have been to automate the GPU driver setup, and we’ll do that presently. As of this writing, bits are still flying around a bit, so it’s a moving target.
Meanwhile, here’s how you enable SSH for keypair access on Windows Server 2019.
First, the manual approach:
Prerequisites:

An SSH keypair (private and public keys: id_rsa and id_rsa.pub). Your cloud service may have let you generate one or more of these, which you downloaded. If you need a new one, you can generate it from the Linux command line using ssh-keygen, following this DigitalOcean tutorial.
Windows Server 2019 running somewhere accessible.
Administrative credentials and a way of logging in (.rdp perhaps?) and opening PowerShell as the Administrator.
As needed, access to Security Groups administration, so you can add an Inbound rule opening up port 22 for SSH (perhaps enabling login only from your IP address, or only enabling connections from private subnet IPs, enabling SSH login via a VPN or jumpbox within your subnet).

And here’s the recipe, which (I swear) was working for me as of 5/6/2020 on standard Amazon EC2 Windows Server 2019 Full AMIs.
Once you’re at the PowerShell prompt, start by installing OpenSSH server. (Many recipes suggest also installing the OpenSSH client, but we’re not going to do that, here.)
Add-WindowsCapability -Online -Name OpenSSH.Server~~~~0.0.1.0
Then configure the SSH server process to run at startup, and start it:
Set-Service -Name sshd -StartupType ‘Automatic’
Start-Service sshd
Having completed those steps, you should be able to log into your Windows Server 2019 machine using SSH, with passwords, as follows. Log in as the Administrator:
(from Linux) $ ssh Administrator@Administrator@<Windows Server 2019 URL or IP address>
If you’re running on AWS, you’ll need to use your private key to decrypt your password from the Connect dialog in the EC2 console.
Now, just like Linux, we need to write our public key into a known address on the server, so that sshd can match it with the private key our SSH client will present when logging in. By default, sshd wants to see Administrator Group member keys (that’s you, Administrator) in a file called 
C:ProgramDatasshadministrators_authorized_keys
… which you will need to create.
As a Linux person, you might think of doing this with echo <keytext> > filename. But on PowerShell, that’s a bad idea, since operators like “>” use 16-bit Unicode encoding, which OpenSSH (sshd) can’t read. See this fascinating StackOverflow post about Windows and PowerShell character encoding norms, and recent updates in PowerShell Core.
In case you’ve already made this mistake (and trust me, I tried echo first), you’ll notice that an acceptably-encoded RSA public keyfile is about 400 bytes long, whereas the Unicode (unreadable) version is around 800. Just kill that “extended mix,” grab a new copy of your key, and paste it in the script as shown below, which uses the Set-Content commandlet (which outputs ANSI by default). Advanced users, non-US users, and others who may be dealing with cloud-based Windows Servers and PowerShell environments globally configured to use Unicode (for example) may still need to set an explicit encoding here. 
$key = “<paste private key here>”
$key | Set-Content C:ProgramDatasshadministrators_authorized_keys
Now, we need to modify the security settings on this file, so that:

inheritance is disabled
there are only two users: Administrator (you) and Administrators (the Administrators group)
and both users have Full Control

… or key-based access will not work. This is analogous to doing:
(in Linux) $ chmod 600 ~/.ssh authorized_keys
In Windows, we can do this manually by right-clicking on the file, selecting Properties, clicking the Security tab, pressing the button marked Disable Inheritance, manually removing users other than Administrator and Administrators, and ensuring that both Administrator and Administrators have Full Control permissions.
Or, we can do it programmatically in PowerShell, like this:
$acl = Get-Acl C:ProgramDatasshadministrators_authorized_keys # get access control list
$acl.SetAccessRuleProtection($true, $false) # eliminates inheritance
$acl.Access | %{$acl.RemoveAccessRule($_)} # delete all users and permissions
$administratorRule = New-Object # build a Full Control rule for Administrator system.security.accesscontrol.filesystemaccessrule(“Administrator”,”FullControl”,”Allow”)
$acl.SetAccessRule($administratorRule)
$administratorsRule = New-Object # ditto for Administrators system.security.accesscontrol.filesystemaccessrule(“Administrators”,”FullControl”,”Allow”)
$acl.SetAccessRule($administratorsRule)
(Get-Item ‘C:ProgramDatasshadministrators_authorized_keys’).SetAccessControl($acl)
The last line imposes the modified acl back on the file. Using SetAccessControl avoids a small bug in Set-Acl, which seems to have caused some pain as well.
As a last step, we can (optionally) set the default login shell of the Administrator to PowerShell, instead of the old-school command shell.
New-ItemProperty -Path “HKLM:SOFTWAREOpenSSH” -Name DefaultShell -Value “C:WindowsSystem32WindowsPowerShellv1.0powershell.exe” -PropertyType String -Force
Finally, we restart the sshd server:
restart service sshd
At this point, you should be able to log into your Windows Server 2019 box from any SSH, using your private key, as shown up top, and end up in PowerShell. If you want to use PuTTY, you’ll probably need to convert your private key to RSA format with PuttyGen, as described in this recipe.
If you’re using cloud-based Windows Server VMs, this script can also (in most cases) run as a User Data script, when you launch a new box. In AWS EC2, for example, you can just pick up the below script (along with the required <powershell></powershell> tags) and drop it right into the EC2 webUI when launching a new instance from the EC2 console, or copied into a file invoked by an AWS CLI run-instances command. 
<powershell>
Add-WindowsCapability -Online -Name OpenSSH.Server~~~~0.0.1.0
Set-Service -Name sshd -StartupType ‘Automatic’
Start-Service sshd
$key = “<paste public key here>”
$key | Set-Content C:ProgramDatasshadministrators_authorized_keys
$acl = Get-Acl C:ProgramDatasshadministrators_authorized_keys
$acl.SetAccessRuleProtection($true, $false)
$acl.Access | %{$acl.RemoveAccessRule($_)} # strip everything
$administratorRule = New-Object system.security.accesscontrol.filesystemaccessrule(“Administrator”,”FullControl”,”Allow”)
$acl.SetAccessRule($administratorRule)
$administratorsRule = New-Object system.security.accesscontrol.filesystemaccessrule(“Administrators”,”FullControl”,”Allow”)
$acl.SetAccessRule($administratorsRule)
(Get-Item ‘C:ProgramDatasshadministrators_authorized_keys’).SetAccessControl($acl)
New-ItemProperty -Path “HKLM:SOFTWAREOpenSSH” -Name DefaultShell -Value “C:WindowsSystem32WindowsPowerShellv1.0powershell.exe” -PropertyType String -Force
restart-service sshd
</powershell>
Let the instance spin up, and you should be able to log right into it from your terminal, via SSH and your private key.
The post Today I Learned: How to Enable SSH With Keypair Login on Windows Server 2019 appeared first on Mirantis | Pure Play Open Cloud.
Quelle: Mirantis

Windows Worker Nodes for Docker Enterprise Kubernetes: Easily add and scale Windows workload capacity

The post Windows Worker Nodes for Docker Enterprise Kubernetes: Easily add and scale Windows workload capacity appeared first on Mirantis | Pure Play Open Cloud.
Docker Enterprise 3.1 with Kubernetes 1.17 lets you easily add Windows Kubernetes workers to a cluster (cluster master nodes must still run on Linux), mixing them optionally with Linux workers. Newly-joined Windows workers are immediately recognized by Docker Enterprise Kubernetes, and workloads can be scheduled on them reliably via the nodeSelector element in a deployment spec. 
The ability to orchestrate Windows-based container deployments lets organizations leverage the wide availability of components in Windows container formats, both for new application development and app modernization. It provides a relatively easy on-ramp for containerizing and operating mission-critical (even legacy) Windows applications in an environment that helps guarantee availability and facilitates scaling, while also enabling underlying infrastructure management via familiar Windows-oriented policies, tooling, and affordances. Of course, it also frees users to exploit Azure Stack, and/or and other cloud platforms offering Windows Server virtual and bare metal infrastructure.
Configure Windows Server Workers
Before you add a Windows Server worker to the cluster, you of course have to have the cluster itself, which must run on Linux. If you haven’t got a cluster, please set one up by following instructions in our Getting Started Blog. You only need to create a single server cluster.
 
The next step is to create the Windows Server node and add the Docker Enterprise 3.1 software to it so you can add it to the cluster.
 
The following instructions detail configuration of a Windows Server 2019 node for use as a Kubernetes worker with Docker Enterprise 3.1, using PowerShell as the Administrator. If using a cloud host, please select a Windows Server 2019 basic OS image, rather than an image preconfigured for containers.  
 
We start by enabling the Windows containers feature, then restart. Note backticks are used to mark newlines:
 
Enable-WindowsOptionalFeature `
  -All `
  -FeatureName containers `
  -Online;
 
Then we restart the computer, if required:
 
Restart-Computer;
 
Following restart, we set an execution policy to allow remotely-downloaded scripts to execute in the current session:
 
Set-ExecutionPolicy `
  -ExecutionPolicy RemoteSigned `
  -Force `
  -Scope Process;
 
Then we download the installation script:
 
Invoke-WebRequest `
  -OutFile ‘install.ps1′ `
  -Uri ‘https://get.mirantis.com/install.ps1′ `
  -UseBasicParsing;
 
And execute it directly:
 
.install.ps1 -Channel ‘test’ -dockerVersion ‘19.03.8’;
 
Following execution, we need to log out and back in, to update path variables:
 
logoff
 
Logging back in, we remove the installation script:
 
Remove-Item -Path ‘install.ps1′;
 
Following this initial configuration, all we need to do is download UCP images and store them locally in the Docker repo.
 
We can optionally turn off PowerShell’s status bar, to increase download speed:
 
$ProgressPreference = ‘SilentlyContinue’
 
Then we download the image bundle:
 
Invoke-WebRequest `
  -OutFile ‘ucp_images.tar.gz’ `
  -Uri ‘https://packages.docker.com/caas/ucp_images_win_2019_3.3.0.tar.gz’ `
  -UseBasicParsing;
 
Once downloaded, we can load the bundle into the repo:
 
docker load –input ‘ucp_images.tar.gz';
 
We can then list the images: 
 
docker images;
 
And finally, clean up the downloaded bundle archive:
 
Remove-Item -Path ‘ucp_images.tar.gz';
 
At this point, you can obtain from Docker Enterprise/UCP the “docker join” command required to add nodes to your cluster.  This command may be obtained by either running  “docker swarm join-token worker” from the manager node console, or by navigating to the “nodes” page in UCP  web interface where the join command is shown, ready for copying. Copy this to the PowerShell command line of your new Windows Worker node, and join it up. The node will be recognized by Docker Enterprise, and will appear in the node list (Shared Resources/Nodes) identified as a Windows node.
 
If you’ve configured Docker Enterprise to add new nodes as Kubernetes workers (Admin Settings/Orchestration), the new node will be started as a Kubernetes worker. Otherwise, by default, the node orchestrator is configured as ‘swarm.’ To switch it to Kubernetes,  run the following command from the manager node console:
 
docker node update <nodename> –label-add com.docker.ucp.orchestrator.kubernetes=true
docker node update <nodename> –label-rm com.docker.ucp.orchestrator.swarm
Test Deployment
You can now easily run a test deployment — this example deploys a Windows webserver with two pods behind a load balancer. To deploy it, you’ll need “kubectl” installed on your machine and authenticated to your Docker Enterprise cluster using the env.sh script in the authentication bundle downloaded from the Docker Enterprise UI for your account. See the Getting Started Blog (link) for more.
 
The following code is the same as presented in Kubernetes documentation.
 
Start by creating a namespace for your deployment:
 
kubectl create -f demo-namespace.yaml
# demo-namespace.yaml
apiVersion: v1
kind: Namespace
metadata:
  name: demo
 
Then create a new file called win-webserver.yaml, and place in it the following YAML. Note that the YAML includes a (long!) embedded command that configures the webserver and creates a homepage application that responds to requests (in this case, to the IP address of the service on port 80) by identifying the IP of the pod on which the responding webserver is running. This can be used later to demonstrate load-balancing:
 
# win-webserver.yaml
apiVersion: v1
kind: Service
metadata:
  name: win-webserver
  namespace: demo
  labels:
    app: win-webserver
spec:
  ports:
    # the port that this service should serve on
    – port: 80
      targetPort: 80
  selector:
    app: win-webserver
  type: NodePort

apiVersion: apps/v1
kind: Deployment
metadata:
  labels:
    app: win-webserver
    namespace: demo
  name: win-webserver
  namespace: demo
spec:
  replicas: 2
  selector:
    matchLabels:
      app: win-webserver
  template:
    metadata:
      labels:
        app: win-webserver
      name: win-webserver
    spec:
      affinity:
        podAntiAffinity:
          requiredDuringSchedulingIgnoredDuringExecution:
            – labelSelector:
                matchExpressions:
                  – key: app
                    operator: In
                    values:
                      – win-webserver
              topologyKey: “kubernetes.io/hostname”
      containers:
        – name: windowswebserver
          image: mcr.microsoft.com/windows/servercore:ltsc2019
          command:
            – powershell.exe
            – -command
            – “<#code used from https://gist.github.com/wagnerandrade/5424431#> ; $$listener = New-Object System.Net.HttpListener ; $$listener.Prefixes.Add(‘http://*:80/’) ; $$listener.Start() ; $$callerCounts = @{} ; Write-Host(‘Listening at http://*:80/’) ; while ($$listener.IsListening) { ;$$context = $$listener.GetContext() ;$$requestUrl = $$context.Request.Url ;$$clientIP = $$context.Request.RemoteEndPoint.Address ;$$response = $$context.Response ;Write-Host ” ;Write-Host(‘> {0}’ -f $$requestUrl) ;  ;$$count = 1 ;$$k=$$callerCounts.Get_Item($$clientIP) ;if ($$k -ne $$null) { $$count += $$k } ;$$callerCounts.Set_Item($$clientIP, $$count) ;$$ip=(Get-NetAdapter | Get-NetIpAddress); $$header='<html><body><H1>Windows Container Web Server</H1>’ ;$$callerCountsString=” ;$$callerCounts.Keys | % { $$callerCountsString+='<p>IP {0} callerCount {1} ‘ -f $$ip[1].IPAddress,$$callerCounts.Item($$_) } ;$$footer='</body></html>’ ;$$content='{0}{1}{2}’ -f $$header,$$callerCountsString,$$footer ;Write-Output $$content ;$$buffer = [System.Text.Encoding]::UTF8.GetBytes($$content) ;$$response.ContentLength64 = $$buffer.Length ;$$response.OutputStream.Write($$buffer, 0, $$buffer.Length) ;$$response.Close() ;$$responseStatus = $$response.StatusCode ;Write-Host(‘< {0}’ -f $$responseStatus)  } ; “
      nodeSelector:
        beta.kubernetes.io/os: windows
 
Then create the deployment as a service:
 
kubectl create -f win-webserver.yaml
 
Confirm that the service is running:
 
kubectl get service –namespace demo
 
An example response:
NAME            TYPE       CLUSTER-IP    EXTERNAL-IP   PORT(S)        AGE
win-webserver   NodePort   10.96.29.12   <none>        80:35048/TCP   12m
 
You’ll see the IP address of the service listed. Visiting that in a browser will show the application. Calling the IP with curl several times in succession …
 
curl 10.96.29.12
 
… should show that the application has been deployed to two pods, with two different IP addresses, and the incoming requests are load-balanced.
 
Finally, delete the service and its namespace:
kubectl delete service win-webserver
kubectl delete namespace demo
The post Windows Worker Nodes for Docker Enterprise Kubernetes: Easily add and scale Windows workload capacity appeared first on Mirantis | Pure Play Open Cloud.
Quelle: Mirantis