Top Tips and Use Cases for Managing Your Volumes

The architecture of a container includes its application layer, data layer, and local storage within the containerized image. Data is critical to helping your apps run effectively and serving content to users.
Running containers also produce files that must exist beyond their own lifecycles. Occasionally, it’s necessary to share these files between your containers — since applications need continued access to things like user-generated content, database content, and log files. While you can use the underlying host filesystem, it’s better to use Docker volumes as persistent storage.
A Docker volume represents a directory on the underlying host, and is a standalone storage volume managed by the Docker runtime. One advantage of volumes is that you don’t have to specify a persistent storage location. This happens automatically within Docker and is hands-off. The primary purpose of Docker volumes is to provide named persistent storage across hosts and platforms.
This article covers how to leverage volumes, some quick Docker Desktop volume-management tips, and common use cases you may find helpful. Let’s jump in.
Working with Volumes
You can do the following to interact with Docker volumes:

Specify the -v (–volume) parameter in your docker run command. If the volume doesn’t exist yet, this creates it.
Include the volumes parameter in a Docker Compose file.
Run docker volume create to have more control in the creation step of a volume, after which you can mount it on one or more containers.
Run docker volume ls to view the different Docker volumes available on a host.
Run docker volume rm <volumename> to remove the persistent volume.
Run docker volume inspect <volumename> to view a volume’s configurations.

 
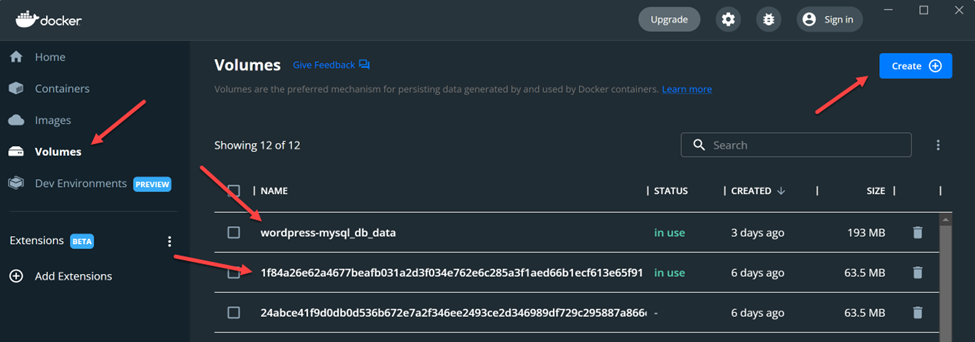
While the CLI is useful, you can also use Docker Desktop to easily create and manage volumes. Volume management has been one of the significant updates in Docker Desktop since v3.5, which we previously announced on our blog.
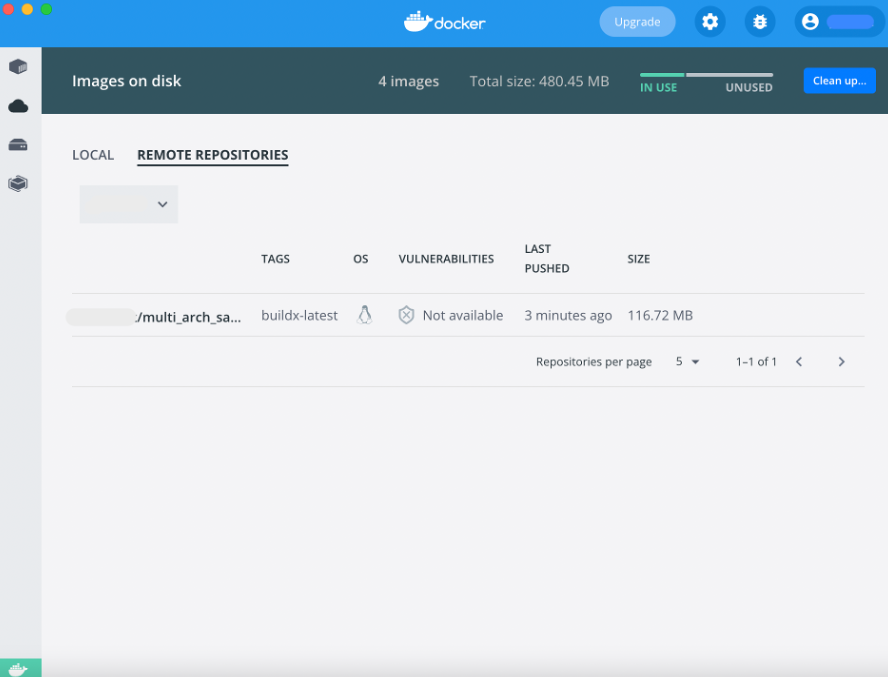
The following screenshots show the Volumes interface within Docker Desktop:


With Docker Desktop, you can do the following:

Create new volumes with the click of a button.
View important details about each volume (name, status, modification date, and size).
Delete volumes as needed.
Browse a volume’s contents directly through the interface.


Quick Tips for Easier Volume Management
Getting the most out of Docker Desktop means familiarizing yourself with some handy processes. Let’s explore some quick tips for managing Docker volumes.
Remove Unneeded Volumes to Save Space
Viewing each volume’s size within Docker Desktop is easy. Locate the size column and sort accordingly to view which volumes are consuming the most space. Volume removal isn’t automatic, so you need to manage this process yourself.
Simply find the volume you want to remove from your list, select it, and click either the trash can icon on the right or the red “Delete” button that appears above that list. This is great for saving local disk space. The process takes seconds, and Docker Desktop will save you from inadvertently removing active volumes — something best suited for the docker volume -f <volumename> command.
Leverage Batch Volume Selection
With Docker Desktop v4.7+, you can select multiple inactive volumes and delete them simultaneously. Alternatively, you can still use the docker volume prune CLI command to do this.
Ensure that your volumes are safe to delete, since they might contain crucial data. There’s currently no way to recover data from deleted or pruned volumes. It’s easier to erase critical application data while juggling multiple volumes, so exercise a little more caution with this CLI command.


Manage Data Within Volumes
You can also delete specific data within a volume or extract data from a volume (and save it) to use it externally. Use the three-dot menu to the right of a file item to delete or save your data. You can also easily view your volume’s collection of stored files in a familiar list format — helping you understand where important data and application dependencies reside.


Common and Clever Use Cases
Persisting Data with Named Volumes
The primary reason for using or switching to named volumes over bind mounts (which require you to manage the source location) is storage simplification. You might not care where your files are stored, and instead just need them reliably persisted across restarts.
And while you could once make a performance argument for named volumes on Linux or macOS, this is no longer the case following Docker Desktop’s v4.6 release.
There are a few other areas where named volumes are ideal, including:

Larger, static dependency trees and libraries
Database scenarios such as MySQL, MariaDB, and SQLite
Log file preservation and adding caching directories
Sharing files between different containers

 
Named volumes also give you a chance to semantically describe your storage, which is considered a best practice even if it’s not required. These identifiers can help you keep things organized — either visually, or more easily via CLI commands. After all, a specific name is much easier to remember than a randomized alphanumeric string (if you can remember those complex strings at all).
Better Testing and Security with Read-only Volumes
In most cases, you’ll want to provide a read and write storage endpoint for your running, containerized workloads. However, read-only volumes do have their perks. For example, you might have a test scenario where you want an application to access a data back end without overwriting the actual data.
Additionally, there might be a security scenario wherein read-only data volumes reduce tampering. While an attacker could gain access to your files, there’s nothing they could do to alter the filesystem.
You could even run into a niche scenario where you’re spinning up a server application — which requires read-write access — yet don’t need to persist your data between container runs. NGINX and Apache might particularly require write permissions for crucial PID or lock files. You can still leverage read-only volumes. Simply add the –tmpfs flag to denote a destination filesystem location.
Docker lets you define any volume as read-only using the :ro option, shown below:
docker run -v demovolume:/containerpath:ro my/demovolume
Tapping into Cloud Storage
Local storage is great, but your application may rely on cloud-based data sharing to run effectively. AWS and Azure are popular platforms, and it’s understandable that you’ll want to leverage them within your builds.
You can set up persistent cloud storage drivers, for Docker for AWS and Docker for Azure, using Docker’s Cloudstor plugin. This helps you get up and running with cloud-centric volumes after installation via the CLI. You can read more about setting up Cloudstor, and even starting a companion NGINX service, here.
What about shared object storage? You can also create volumes with a driver that supports writing files externally to NFS or Amazon S3. You can store your most important data in the cloud without grappling with application logic, saving time and effort.
Sharing Volumes Using Docker Compose
Since you can share Docker volumes among containers, they’re the perfect solution in a Docker Compose scenario. Each assigned container can have a volume parameter or you can share a volume among containers.
A Docker Compose file with volumes looks like this:

services:
db:
# We use a mariadb image which supports both amd64 & arm64 architecture
#image: mariadb:10.6.4-focal
# If you really want to use MySQL, uncomment the following line
image: mysql:8.0.27
command: ‘–default-authentication-plugin=mysql_native_password’
volumes:
– db_data:/var/lib/mysql
restart: always
environment:
– MYSQL_ROOT_PASSWORD=P@55W.RD123
– MYSQL_DATABASE=wordpress
– MYSQL_USER=wordpress
– MYSQL_PASSWORD=P@55W.RD123
expose:
– 3306
– 33060
wordpress:
image: wordpress:latest
ports:
– 80:80
restart: always
environment:
– WORDPRESS_DB_HOST=db
– WORDPRESS_DB_USER=wordpress
– WORDPRESS_DB_PASSWORD=P@55W.RD123
– WORDPRESS_DB_NAME=wordpress
volumes:
db_data:

 
This code creates a volume named db_data and mounts it at /var/lib/mysql within the db container. When the MySQL container runs, it’ll store its files in this directory and persist them between container restarts.
Check out our documentation on using volumes to learn more about Docker volumes and how to manage them.
Conclusion
Docker volumes are convenient file-storage solutions for Docker container runtimes. They’re also the recommended way to concurrently share data among multiple containers. Given the fact that Docker volumes are persistent, they enable the storage and backup of critical data. They also enable storage centralization between containers.
We’ve also explored working with volumes, powerful use cases, and the volume-management benefits that Docker Desktop provides aside from the CLI.
Download Docker Desktop to get started with easier volume management. However, our volume management features (and use cases) are always evolving! To stay current with Docker Desktop’s latest releases, remember to bookmark our evolving changelog.
Quelle: https://blog.docker.com/feed/

Docker Hub v1 API Deprecation

Docker has planned to deprecate the Docker Hub v1 API endpoints that access information related to Docker Hub repositories on September 5th, 2022.
Context
At this time, we have found that the number of v1 API consumers on Docker Hub has fallen below a reasonable threshold to maintain this version of the Hub API. Additionally, approximately 95% of Hub API requests target the newer v2 API. This decision has been made to ensure the stability and enhanced performance of our services so that we can continue to provide you with the best developer experience.
How does this impact you?
After the 5th of September, the following API routes within the v1 path will no longer work and will return a 404 status code:

/v1/repositories/<name>/images
/v1/repositories/<name>/tags
/v1/repositories/<name>/tags/<tag_name>
/v1/repositories/<namespace>/<name>/images
/v1/repositories/<namespace>/<name>/tags
/v1/repositories/<namespace>/<name>/tags/<tag_name>

If you want to continue using the Docker Hub API in your current applications, you must update your clients to use the v2 endpoints. Additional documentation and technical details about how to use the v2 API are available at the following URL: https://docs.docker.com/docker-hub/api/latest/
How do you get additional help?
If you have additional questions or concerns about the Hub v1 API deprecation process, you can contact us at v1-api-deprecation@docker.com.
Quelle: https://blog.docker.com/feed/

Securing the Software Supply Chain: Atomist Joins Docker

I’m excited to share some big news: Atomist is joining Docker. I know our team will thrive in its new home, and look forward to taking the great stuff we’ve built to a much larger audience.
I’ve devoted most of my career to trying to improve developer productivity and the development experience. Thus it’s particularly pleasing to me that Atomist is becoming part of a company that understands and values developers and has transformed developer experience for the better over the last 10 years. Docker’s impact on how we work has been profound and varied. Just a few of the ways I use it nearly every day: quickly spinning up and trying out a complex stack on my laptop without having to dread uninstallation; creating and destroying a database instance in seconds during CI to check the validity of a schema; confidently deploying my own code and third party products to production. Docker is both integral to development and a vital part of deployment. This is rare and makes it core to how we work.

What does this acquisition mean for users and customers?
First, Atomist’s technology can help Docker provide additional value throughout the delivery lifecycle. Docker will integrate Atomist’s rich understanding of the secure software supply chain into its products. To start with, this will surface in sophisticated reporting and remediation of container vulnerabilities. But that is just the start. As deployed software becomes more and more complex, it’s vital to understand what’s in production deployments and how it evolves over time. Container images are core to this, and Atomist’s ability to make sense of the supply chain both at any point in time and as it changes becomes ever more important. Security is just one application for this insight–although arguably the single most critical.
Second, Docker will leverage Atomist’s sophisticated integration platform. Docker (the company) understands that the modern development and delivery environment is heterogeneous. No single vendor can supply best of breed solutions for every stage, and it’s not in customers’ interests for them to do so. Atomist will help Docker customers understand what’s happening through the delivery flow, while preserving their ability to choose the products that best meet their needs.
Finally, Atomist’s automation technology will help Docker improve development experience in a variety of ways, driven by user input.
We’re proud to have built powerful, unique capabilities at Atomist. And we’re ready to take them to a much larger audience as Docker. This is an important point in a longer voyage, with the best yet to come. Want to be the first to experience the new features resulting from this combination? You can sign up for the latest updates by visiting this page. 
Quelle: https://blog.docker.com/feed/

How to Rapidly Build Multi-Architecture Images with Buildx

Successfully running your container images on a variety of CPU architectures can be tricky. For example, you might want to build your IoT application — running on an arm64 device like the Raspberry Pi — from a specific base image. However, Docker images typically support amd64 architectures by default. This scenario calls for a container image that supports multiple architectures, which we’ve highlighted in the past.
Multi-architecture (multi-arch) images typically contain variants for different architectures and OSes. These images may also support CPU architectures like arm32v5+, arm64v8, s390x, and others. The magic of multi-arch images is that Docker automatically grabs the variant matching your OS and CPU pairing.
While a regular container image has a manifest, a multi-architecture image has a manifest list. The list combines the manifests that show information about each variant’s size, architecture, and operating system.
Multi-architecture images are beneficial when you want to run your container locally on your x86-64 Linux machine, and remotely atop AWS Elastic Compute Cloud (EC2) Graviton2 CPUs. Additionally, it’s possible to build language-specific, multi-arch images — as we’ve done with Rust.
Follow along as we learn about each component behind multi-arch image builds, then quickly create our image using Buildx and Docker Desktop.
Building Multi-Architecture Images with Buildx and Docker Desktop
You can build a multi-arch image by creating the individual images for each architecture, pushing them to Docker Hub, and entering docker manifest to combine them within a tagged manifest list. You can then push the manifest list to Docker Hub. This method is valid in some situations, but it can become tedious and relatively time consuming.
 
Note: However, you should only use the docker manifest command in testing — not production. This command is experimental. We’re continually tweaking functionality and any associated UX while making docker manifest production ready.
 
However, two tools make it much easier to create multi-architectural builds: Docker Desktop and Docker Buildx. Docker Buildx enables you to complete every multi-architecture build step with one command via Docker Desktop.
Before diving into the nitty gritty, let’s briefly examine some core Docker technologies.
Dockerfiles
The Dockerfile is a text file containing all necessary instructions needed to assemble and deploy a container image with Docker. We’ll summarize the most common types of instructions, while our documentation contains information about others:

The FROM instruction headlines each Dockerfile, initializing the build stage and setting a base image which can receive subsequent instructions.
RUN defines important executables and forms additional image layers as a result. RUN also has a shell form for running commands.
WORKDIR sets a working directory for any following instructions. While you can explicitly set this, Docker will automatically assign a directory in its absence.
COPY, as it sounds, copies new files from a specified source and adds them into your container’s filesystem at a given relative path.
CMD comes in three forms, letting you define executables, parameters, or shell commands. Each Dockerfile only has one CMD, and only the latest CMD instance is respected when multiple exist.

 
Dockerfiles facilitate automated, multi-layer image builds based on your unique configurations. They’re relatively easy to create, and can grow to support images that require complex instructions. Dockerfiles are crucial inputs for image builds.
Buildx
Buildx leverages the docker build command to build images from a Dockerfile and sets of files located at a specified PATH or URL. Buildx comes packaged within Docker Desktop, and is a CLI plugin at its core. We consider it a plugin because it extends this base command with complete support for BuildKit’s feature set.
We offer Buildx as a CLI command called docker buildx, which you can use with Docker Desktop. In Linux environments, the buildx command also works with the build command on the terminal. Check out our Docker Buildx documentation to learn more.
BuildKit Engine
BuildKit is one core component within our Moby Project framework, which is also open source. It’s an efficient build system that improves upon the original Docker Engine. For example, BuildKit lets you connect with remote repositories like Docker Hub, and offers better performance via caching. You don’t have to rebuild every image layer after making changes.
While building a multi-arch image, BuildKit detects your specified architectures and triggers Docker Desktop to build and simulate those architectures. The docker buildx command helps you tap into BuildKit.
Docker Desktop
Docker Desktop is an application — built atop Docker Engine — that bundles together the Docker CLI, Docker Compose, Kubernetes, and related tools. You can use it to build, share, and manage containerized applications. Through the baked-in Docker Dashboard UI, Docker Desktop lets you tackle tasks with quick button clicks instead of manually entering intricate commands (though this is still possible).
Docker Desktop’s QEMU emulation support lets you build and simulate multiple architectures in a single environment. It also enables building and testing on your macOS, Windows, and Linux machines.
Now that you have working knowledge of each component, let’s hop into our walkthrough.
Prerequisites
Our tutorial requires the following:

The correct Go binary for your OS, which you can download here
The latest version of Docker Desktop
A basic understanding of how Docker works. You can follow our getting started guide to familiarize yourself with Docker Desktop.

 
Building a Sample Go Application
Let’s begin by building a basic Go application which prints text to your terminal. First, create a new folder called multi_arch_sample and move to it:
mkdir multi_arch_sample && cd multi_arch_sample
Second, run the following command to track code changes in the application dependencies:
go mod init multi_arch_sample
Your terminal will output a similar response to the following:

go: creating new go.mod: module multi_arch_sample
go: to add module requirements and sums:
go mod tidy

 
Third, create a new main.go file and add the following code to it:

package main

import (
"fmt"
"net/http"
)

func readyToLearn(w http.ResponseWriter, req *http.Request) {
w.Write([]byte("<h1>Ready to learn!</h1>"))
fmt.Println("Server running…")
}

func main() {

http.HandleFunc("/", readyToLearn)
http.ListenAndServe(":8000", nil)
}

 
This code created the function readyToLearn, which prints “Ready to learn!” at the 127.0.0.1:8000 web address. It also outputs the phrase Server running… to the terminal.
Next, enter the go run main.go command to run your application code in the terminal, which will produce the Ready to learn! response.
Since your app is ready, you can prepare a Dockerfile to handle the multi-architecture deployment of your Go application.
Creating a Dockerfile for Multi-arch Deployments
Create a new file in the working directory and name it Dockerfile. Next, open that file and add in the following lines:

# syntax=docker/dockerfile:1

# specify the base image to be used for the application
FROM golang:1.17-alpine

# create the working directory in the image
WORKDIR /app

# copy Go modules and dependencies to image
COPY go.mod ./

# download Go modules and dependencies
RUN go mod download

# copy all the Go files ending with .go extension
COPY *.go ./

# compile application
RUN go build -o /multi_arch_sample

# network port at runtime
EXPOSE 8000

# execute when the container starts
CMD [ "/multi_arch_sample" ]

 
Building with Buildx
Next, you’ll need to build your multi-arch image. This image is compatible with both the amd64 and arm32 server architectures. Since you’re using Buildx, BuildKit is also enabled by default. You won’t have to switch on this setting or enter any extra commands to leverage its functionality.
The builder builds and provisions a container. It also packages the container for reuse. Additionally, Buildx supports multiple builder instances — which is pretty handy for creating scoped, isolated, and switchable environments for your image builds.
Enter the following command to create a new builder, which we’ll call mybuilder:
docker buildx create –name mybuilder –use –bootstrap
You should get a terminal response that says mybuilder. You can also view a list of builders using the docker buildx ls command. You can even inspect a new builder by entering docker buildx inspect <name>.
Triggering the Build
Now, you’ll jumpstart your multi-architecture build with the single docker buildx command shown below:
docker buildx build –push
–platform linux/amd64,linux/arm64
–tag your_docker_username/multi_arch_sample:buildx-latest .
 
This does several things:

Combines the build command to start a build
Shares the image with Docker Hub using the push operation
Uses the –platform flag to specify the target architectures you want to build for. BuildKit then assembles the image manifest for the architectures
Uses the –tag flag to set the image name as multi_arch_sample

 
Once your build is finished, your terminal will display the following:
[+] Building 123.0s (23/23) FINISHED
 
Next, navigate to the Docker Desktop and go to Images > REMOTE REPOSITORIES. You’ll see your newly-created image via the Dashboard!


Conclusion
Congratulations! You’ve successfully explored multi-architecture builds, step by step. You’ve seen how Docker Desktop, Buildx, BuildKit, and other tooling enable you to create and deploy multi-architecture images. While we’ve used a sample Go web application, you can apply these processes to other images and applications.
To tackle your own projects, learn how to get started with Docker to build more multi-architecture images with Docker Desktop and Buildx. We’ve also outlined how to create a custom registry configuration using Buildx.
Quelle: https://blog.docker.com/feed/

How to Train and Deploy a Linear Regression Model Using PyTorch – Part 1

Python is one of today’s most popular programming languages and is used in many different applications. The 2021 StackOverflow Developer Survey showed that Python remains the third most popular programming language among developers. In GitHub’s 2021 State of the Octoverse report, Python took the silver medal behind Javascript.
Thanks to its longstanding popularity, developers have built many popular Python frameworks and libraries like Flask, Django, and FastAPI for web development.
However, Python isn’t just for web development. It powers libraries and frameworks like NumPy (Numerical Python), Matplotlib, scikit-learn, PyTorch, and others which are pivotal in engineering and machine learning. Python is arguably the top language for AI, machine learning, and data science development. For deep learning (DL), leading frameworks like TensorFlow, PyTorch, and Keras are Python-friendly.
We’ll introduce PyTorch and how to use it for a simple problem like linear regression. We’ll also provide a simple way to containerize your application. Also, keep an eye out for Part 2 — where we’ll dive deeply into a real-world problem and deployment via containers. Let’s get started.
What is PyTorch?
A Brief History and Evolution of PyTorch
Torch debuted in 2002 as a deep-learning library developed in the Lua language. Accordingly, Soumith Chintala and Adam Paszke (both from Meta) developed PyTorch in 2016 and based it on the Torch library. Since then, developers have flocked to it. PyTorch was the third-most-popular framework per the 2021 StackOverflow Developer Survey. However, it’s the most loved DL library among developers and ranks third in popularity. Pytorch is also the DL framework of choice for Tesla, Uber, Microsoft, and over 7,300 others.
PyTorch enables tensor computation with GPU acceleration, plus deep neural networks built on a tape-based autograd system. We’ll briefly break these terms down, in case you’ve just started learning about these technologies.

A tensor, in a machine learning context, refers to an n-dimensional array.
A tape-based autograd means that Pytorch uses reverse-mode automatic differentiation, which is a mathematical technique to compute derivatives (or gradients) effectively using a computer.

Since diving into these mathematics might take too much time, check out these links for more information:

What is a Pytorch Tensor?
What is a tape-based autograd system?
Automatic differentiation

PyTorch is a vast library and contains plenty of features for various deep learning applications. To get started, let’s evaluate a use case like linear regression.
What is Linear Regression?
Linear Regression is one of the most commonly used mathematical modeling techniques. It models a linear relationship between two variables. This technique helps determine correlations between two variables — or determines the value-dependent variable based on a particular value of the independent variable.
In machine learning, linear regression often applies to prediction and forecasting applications. You can solve it analytically, typically without needing any DL framework. However, this is a good way to understand the PyTorch framework and kick off some analytical problem-solving.
Numerous books and web resources address the theory of linear regression. We’ll cover just enough theory to help you implement the model. We’ll also explain some key terms. If you want to explore further, check out the useful resources at the end of this section.
Linear Regression Model
You can represent a basic linear regression model with the following equation:
Y = mX + bias
What does each portion represent?

Y is the dependent variable, also called a target or a label.
X is the independent variable, also called a feature(s) or co-variate(s).
bias is also called offset.
m refers to the weight or “slope.”

These terms are often interchangeable. The dependent and independent variables can be scalars or tensors.
The goal of the linear regression is to choose weights and biases so that any prediction for a new data point — based on the existing dataset — yields the lowest error rate. In simpler terms, linear regression is finding the best possible curve (line, in this case) to match your data distribution.
Loss Function
A loss function is an error function that expresses the error (or loss) between real and predicted values. A very popular way to measure loss is by using a root mean squared error, which we’ll also use.
Gradient Descent Algorithms
Gradient descent is a class of optimization algorithms that tries to solve the problem (either analytically or using deep learning models) by starting from an initial guess of weights and bias. It then iteratively reduces errors by updating weights and bias values with successively better guesses.
A simplified approach uses the derivative of the loss function and minimizes the loss. The derivative is the slope of the mathematical curve, and we’re attempting to reach the bottom of it — hence the name gradient descent. The stochastic gradient method samples smaller batches of data to compute updates which are computationally better than passing the entire dataset at each iteration.
To learn more about this theory, the following resources are helpful:

MIT lecture on Linear regression
Linear regression Wikipedia article
Dive into deep learning online resources on linear regression

Linear Regression with Pytorch
Now, let’s talk about implementing a linear regression model using PyTorch. The script shown in the steps below is main.py — which resides in the GitHub repository and is forked from the “Dive Into Deep learning” example repository. You can find code samples within the pytorch directory.
For our regression example, you’ll need the following:

Python 3
PyTorch module (pip install torch) installed on your system
NumPy module (pip install numpy) installed
Optionally, an editor (VS Code is used in our example)

Problem Statement
As mentioned previously, linear regression is analytically solvable. We’re using deep learning to solve this problem since it helps you quickly get started and easily check the validity of your training data. This compares your training data against the data set.
We’ll attempt the following using Python and PyTorch:

Creating synthetic data where we’re aware of weights and bias
Using the PyTorch framework and built-in functions for tensor operations, dataset loading, model definition, and training

We don’t need a validation set for this example since we already have the ground truth. We’d assess our results by measuring the error against the weights and bias values used while creating our synthetic data.
Step 1: Import Libraries and Namespaces
For our simple linear regression, we’ll import the torch library in Python. We’ll also add some specific namespaces from our torch import. This helps create cleaner code:

# Step 1 import libraries and namespaces

import torch

from torch.utils import data

# `nn` is an abbreviation for neural networks

from torch import nn

Step 2: Create a Dataset
For simplicity’s sake, this example creates a synthetic dataset that aims to form a linear relationship between two variables with some bias.
i.e. y = mx + bias + noise

#Step 2: Create Dataset

#Define a function to generate noisy data

def synthetic_data(m, c, num_examples):

"""Generate y = mX + bias(c) + noise"""

X = torch.normal(0, 1, (num_examples, len(m)))

y = torch.matmul(X, m) + c

y += torch.normal(0, 0.01, y.shape)

return X, y.reshape((-1, 1))

&amp;amp;amp;amp;nbsp;

true_m = torch.tensor([2, -3.4])

true_c = 4.2

features, labels = synthetic_data(true_m, true_c, 1000)

Here, we use the built-in PyTorch function torch.normal to return a tensor of normally distributed random numbers. We’re also using the torch.matmul function to multiply tensor X with tensor m, and Y is distributed normally again.
The dataset looks like this when visualized using a simple scatter plot:

The code to create the visualization can be found in this GitHub repository.
Step 3: Read the Dataset and Define Small Batches of Data

#Step 3: Read dataset and create small batch

#define a function to create a data iterator. Input is the features and labels from synthetic data

# Output is iterable batched data using torch.utils.data.DataLoader

def load_array(data_arrays, batch_size, is_train=True):

"""Construct a PyTorch data iterator."""

dataset = data.TensorDataset(*data_arrays)

return data.DataLoader(dataset, batch_size, shuffle=is_train)

&amp;amp;amp;nbsp;

batch_size = 10

data_iter = load_array((features, labels), batch_size)

&amp;amp;amp;nbsp;

next(iter(data_iter))

Here, we use the PyTorch functions to read and sample the dataset. TensorDataset stores the samples and their corresponding labels, while DataLoader wraps an iterable around the TensorDataset for easier access.
The iter function creates a Python iterator, while next obtains the first item from that iterator.
Step 4: Define the Model
PyTorch offers pre-built models for different cases. For our case, a single-layer, feed-forward network with two inputs and one output layer is sufficient. The PyTorch documentation provides details about the nn.linear implementation.
The model also requires the initialization of weights and biases. In the code, we initialize the weights using a Gaussian (normal) distribution with a mean value of 0, and a standard deviation value of 0.01. The bias is simply zero.

#Step4: Define model &amp;amp;amp; initialization

# Create a single layer feed-forward network with 2 inputs and 1 outputs.

net = nn.Linear(2, 1)

&amp;amp;amp;nbsp;

#Initialize model params

net.weight.data.normal_(0, 0.01)

net.bias.data.fill_(0)

Step 5: Define the Loss Function
The loss function is defined as a root mean squared error. The loss function tells you how far from the regression line the data points are:

#Step 5: Define loss function
# mean squared error loss function
loss = nn.MSELoss()

Step 6: Define an Optimization Algorithm
For optimization, we’ll implement a stochastic gradient descent method.
The lr stands for learning rate and determines the update step during training.

#Step 6: Define optimization algorithm
# implements a stochastic gradient descent optimization method
trainer = torch.optim.SGD(net.parameters(), lr=0.03)

Step 7: Training
For training, we’ll use specialized training data for n epochs (five in our case), iteratively using minibatch features and corresponding labels. For each minibatch, we’ll do the following:

Compute predictions and calculate the loss
Calculate gradients by running the backpropagation
Update the model parameters
Compute the loss after each epoch

# Step 7: Training

# Use complete training data for n epochs, iteratively using a minibatch features and corresponding label

# For each minibatch:

# &amp;nbsp; Compute predictions by calling net(X) and calculate the loss l

# &amp;nbsp; Calculate gradients by running the backpropagation

# &amp;nbsp; Update the model parameters using optimizer

# &amp;nbsp; Compute the loss after each epoch and print it to monitor progress

num_epochs = 5

for epoch in range(num_epochs):

for X, y in data_iter:

l = loss(net(X) ,y)

trainer.zero_grad() #sets gradients to zero

l.backward() # back propagation

trainer.step() # parameter update

l = loss(net(features), labels)

print(f’epoch {epoch + 1}, loss {l:f}’)

Results
Finally, compute errors by comparing the true value with the trained model parameters. A low error value is desirable. You can compute the results with the following code snippet:

#Results
m = net.weight.data
print(‘error in estimating m:’, true_m – m.reshape(true_m.shape))
c = net.bias.data
print(‘error in estimating c:’, true_c – c)

When you run your code, the terminal window outputs the following:
python3 main.py
features: tensor([1.4539, 1.1952])
label: tensor([3.0446])
epoch 1, loss 0.000298
epoch 2, loss 0.000102
epoch 3, loss 0.000101
epoch 4, loss 0.000101
epoch 5, loss 0.000101
error in estimating m: tensor([0.0004, 0.0005])
error in estimating c: tensor([0.0002])
As you can see, errors gradually shrink alongside the values.
Containerizing the Script
In the previous example, we had to install multiple Python packages just to run a simple script. Containers, meanwhile, let us easily package all dependencies into an image and run an application.
We’ll show you how to quickly and easily Dockerize your script. Part 2 of the blog will discuss containerized deployment in greater detail.
Containerize the Script
Containers help you bundle together your code, dependencies, and libraries needed to run applications in an isolated environment. Let’s tackle a simple workflow for our linear regression script.
We’ll achieve this using Docker Desktop. Docker Desktop incorporates Dockerfiles, which specify an image’s overall contents.
Make sure to pull a Python base image (version 3.10) for our example:
FROM python:3.10
Next, we’ll install the numpy and torch dependencies needed to run our code:
RUN apt update && apt install -y python3-pip
RUN pip3 install numpy torch
Afterwards, we’ll need to place our main.py script into a directory:
COPY main.py app/
Finally, the CMD instruction defines important executables. In our case, we’ll run our main.py script:
CMD [“python3″, “app/main.py” ]
Our complete Dockerfile is shown below, and exists within this GitHub repo:
FROM python:3.10
RUN apt update && apt install -y python3-pip
RUN pip3 install numpy torch
COPY main.py app/
CMD [“python3″, “app/main.py” ]
Build the Docker Image
Now that we have every instruction that Docker Desktop needs to build our image, we’ll follow these steps to create it:

In the GitHub repository, our sample script and Dockerfile are located in a directory called pytorch. From the repo’s home folder, we can enter cd deeplearning-docker/pytorch to access the correct directory.
Our Docker image is named linear_regression. To build your image, run the docker build -t linear_regression. command.

Run the Docker Image
Now that we have our image, we can run it as a container with the following command:
docker run linear_regression
This command will create a container and execute the main.py script. Once we run the container, it’ll re-print the loss and estimates. The container will automatically exit after executing these commands. You can view your container’s status via Docker Desktop’s Container interface:

Desktop shows us that linear_regression executed the commands and exited successfully.
We can view our error estimates via the terminal or directly within Docker Desktop. I used a Docker Extension called Logs Explorer to view my container’s output (shown below):
Alternatively, you may also experiment using the Docker image that we created in this blog.

As we can see, the results from running the script on my system and inside the container are comparable.
To learn more about using containers with Python, visit these helpful links:

Patrick Loeber’s talk, “How to Containerize Your Python Application with Docker”
Docker documentation on building containers using Python

Want to learn more about PyTorch theories and examples?
We took a very tiny peek into the world of Python, PyTorch, and deep learning. However, many resources are available if you’re interested in learning more. Here are some great starting points:

PyTorch tutorials
Dive into Deep learning GitHub
Machine Learning Mastery Tutorials

Additionally, endless free and paid courses exist on websites like YouTube, Udemy, Coursera, and others.
Stay tuned for more!
In this blog, we’ve introduced PyTorch and linear regression, and we’ve used the PyTorch framework to solve a very simple linear regression problem. We’ve also shown a very simple way to containerize your PyTorch application.
But, we have much, much more to discuss on deployment. Stay tuned for our follow-up blog — where we’ll tackle the ins and outs of deep-learning deployments! You won’t want to miss this one.
Quelle: https://blog.docker.com/feed/

Getting Started with Visual Studio Code and IntelliJ IDEA Docker Plugins

Today’s developers swear by IDEs that best support their workflows. Jumping repeatedly between windows and apps is highly inconvenient, which makes these programs so valuable. By remaining within your IDE, it’s possible to get more done in less time.
Today, we’ll take a look at two leading IDEs — VS Code and IntelliJ IDEA — and how they can mesh with your favorite Docker tools. We’ll borrow a sample ASP.NET application and interact with it throughout this guide. We’ll show you why Docker integrations are so useful during this process.
The Case for Integration
When working with Docker images, you’ll often need to perform repetitive tasks like building, tagging, and pushing each image — after creating unique Dockerfiles and Compose files.
In a typical workflow, you’d create a Dockerfile and then build your image using the docker build CLI command. Then, you’d tag the image using the docker tag command and upload it to your remote registry with docker push. This process is required each time you update your application. Additionally, you’ll frequently need to inspect your running containers, volumes, and networks.
Before the Docker, Docker Explorer, and “Remote – Containers” plugins debuted, (to name a few), you’d have to switch between your IDE and Docker Desktop to perform tasks. Now, Docker Desktop IDE integration unlocks Desktop’s functionality without compromising productivity. The user experience is seamless.
Integrating your favorite IDE with Docker Desktop enables you to be more productive without leaving either app. These extensions let you create Dockerfiles and Compose files based on your entered source code — letting you view and manage containers directly from within your IDE.
Now, let’s explore how to install and leverage various Docker plugins within each of these IDEs.
Prerequisites
You’ll need to download and install the following before getting started:

The latest version of Docker Desktop
Visual Studio Code
IntelliJ IDEA
Our sample ASP.NET Core app

 
Before beginning either part of the tutorial, you’ll first need to download and install Docker Desktop. This grabs all Docker dependencies and places them onto your machine — for both the CLI and GUI. After installing Desktop, launch it before proceeding.
Next, pull the Docker image from the ASP.NET Core app using the Docker CLI command:
docker pull mcr.microsoft.com/dotnet/samples:aspnetapp
 
However, our example is applicable to any image. You can find a simple image on Docker Hub and grab it using the appropriate docker pull command.
Integrations with VS Code
Depending on which version you’re running (since you might’ve installed it prior), VS Code’s welcome screen will automatically prompt you to install recommended Docker plugins. This is very convenient for quickly getting up and running:
 
VS Code displays an overlay in the bottom right, asking to install Docker-related extensions.


If you want to install everything at once, simply click the Install button. However, it’s likely that you’ll want to know what VS Code is adding to your workspace. Click the Show Recommendations button. This summons a list of Docker and Docker-adjacent extensions — while displaying Microsoft’s native “Remote – Containers” extension front and center:


You can click any of these items in the sidebar and install them using the green Install button. Selecting the dropdown arrow attached to this button lets you install a release version or pre-release version depending on your preferences. Additionally, each extension may also install its own dependencies that let it work properly. You can click the Dependencies tab, if applicable, to view these sidekick programs.
However, you may have to manually open the Extensions pane if this prompt doesn’t appear. From the column of icons in the sidebar, click the Extensions icon that resembles a window pane, search for “Docker” in the search bar.


You’ll also see a wide variety of other Docker-related extensions, sorted by popularity and relevance. These are developed by community members and verified publishers.
Once your installation finishes, a “Getting Started with Docker” screen will greet you in the main window, letting you open a workspace Folder, run a container, and more:


The Docker whale icon will also appear in the left-hand pane. Clicking it shows a view similar to that shown below:


Each section expands to reveal more information. You can then check your running containers and images, stop or start them, connect to registries, plus inspect networks, volumes, and contexts.
Remember that ASP.NET image we pulled earlier? You can now expand the Images group and spin up a container using the ASP.NET Core image. Locate mcr.microsoft.com/dotnet/samples in the list, right click the aspnetapp tag, and choose “Run”:


You’ll then see your running container under the Containers group:


This method lets you easily preview container files right within VS Code.
Expand the Files group under the running container and select any file from the list. Our example below previews the site.css file from the app/wwwroot/css directory:


Finally, you may need to tag your local image before pushing it to the remote registry. You can do this by opening the Registries group and clicking “Connect Registry.”
VSCode will display a wizard that lets you choose your registry service — like Azure, Docker Hub, the Docker Registry, or GitLab. Let’s use Docker Hub by selecting it from the options list:


Now, Visual Studio will prompt you to enter credentials. Enter these to sign in. Once you’ve successfully logged in, your registry will appear within the group:


After connecting to Hub, you can tag local images using your remote repository name. For example:
YOUR_REPOSITORY_NAME/samples:aspnetapp
 
To do this, return to the Images group and right-click on the aspnetapp Docker image. Then, select the “Tag” option from the context menu. VS will display the wizard, where you can enter your desired tag.
Finally, right-click again on aspnetapp and select “Push” from the context menu:


This method is much faster than manually entering your code into the terminal.
However, this showcases just some of what you can achieve with the Docker extension for VS Code. For example, you can automatically generate Dockerfiles from within VS Code.
To create these, open the Command Palette (View > Command Palette…), and type “Docker” to view all available commands:


Next, click “Add Docker Files to Workspace…” You can now create your Dockerfiles from within VS Code.
Additionally, note the variety of Docker functions available from the Command Palette. The Docker extension integrates seamlessly with your development processes.
IntelliJ IDEA
In the IntelliJ IDEA Ultimate Edition, the Docker plugin is enabled by default. However, if you’re using the Community Edition, you’ll need to install the plugin manually.
You can either do this when the IDE starts (as shown below), or by clicking the Preferences window in the Plugins section.


Once you’ve installed the Docker plugin, you’ll need to connect it to Docker Desktop. Follow these steps:

Navigate to IntelliJ IDEA > Preferences.
Expand the Build, Execution, Deployment group. Click Docker, and then click the small  “+” icon to the right.
Choose the correct Docker daemon for your platform (for example, Docker for Mac).

 
The installation may take a few minutes. Once it’s complete, you’ll see the “Connection successful” message toward the middle-bottom of the Preferences pane:


Next, click “Apply” and then expand the Docker group from the left sidebar.
Select “Docker Registry” and add your preferred registry from there. Like our VS Code example, this demo also uses Docker Hub.
IntelliJ will prompt you to enter your credentials. You should again see the “Connection successful” message under the Test connection pane if you’re successful:


Now, click OK. Your Docker daemon and the Docker Registry connections will appear in the bottom portion of your IDE, in the Services pane:


This should closely resemble what happens within VS Code. Now, you can spin up another container!
To do this, click to expand the Images group. Locate your container image and select it to open the menu. Click the “Create Container” button from there.


This launches the “Create Docker Configuration” window, where you can configure port binding, entrypoints, command variables, and more.
You can otherwise interact with these options via the “Modify options” drop-down list — written in blue near the upper-right corner of the window:


After configuring your options, click “Run” to start the container. Now, the running container (test-container) will appear in the Services pane:


You can also inspect the running container just like you would in VS Code.
First, navigate back to the Dashboard tab. You’ll see additional buttons that let you quickly “Restart” or “Stop” the container:


Additionally, you can access the container command prompt by clicking “Terminal.” You’ll then use this CLI to inspect your container files.


Finally, you can now easily tag and push the image. Here’s how:

Expand the Images group, and click on your image. You’ll see the Tags list in the right-hand panel.
Click on “Add…” to create a new tag. This prompts the Tag image window to appear. Use this window to provide your repository name.
Click “Tag” to view your new tag in the list.


Click on your tag. Then use the “Push Image” button to send your image to the remote registry.
Wrapping Up
By following this tutorial, you’ve learned how easy it is to perform common, crucial Docker tasks within your IDE. The process of managing containers and images is much smoother. Accordingly, you no longer need to juggle multiple windows or programs while getting things done. Docker Desktop’s functionality is baked seamlessly into VS Code and IntelliJ IDEA.
To enjoy streamlined workflows yourself, remember to download Docker Desktop and add Docker plugins and extensions to your favorite IDE.
Want to harness these Docker integrations? Read VS Code’s docs to learn how to use a Docker container as a fully-featured dev environment, or customize the official VS Code Docker extension. You can learn more about how Docker and IntelliJ team up here.
Quelle: https://blog.docker.com/feed/

Cross Compiling Rust Code for Multiple Architectures

Getting an idea, planning it out, implementing your Rust code, and releasing the final build is a long process full of unexpected issues. Cross compilation of your code will allow you to reach more users, but it requires knowledge of building executables for different runtime environments. Luckily, this post will help in getting your Rust application running on multiple architectures, including x86 for Windows.
Overview
You want to vet your idea with as many users as possible, so you need to be able to compile your code for multiple architectures. Your users have their own preferences on what machines and OS to use, so we should do our best to meet them in their preferred set-up. This is why it’s critical to pick a language or framework that lends itself to support multiple ways to export your code for multiple target environments with minimal developer effort. Also, it’d be better to have tooling in place to help automate this export process.
If we invest some time in the beginning to pick the right coding language and automation tooling, then we’ll avoid the headaches of not being able to reach a wider audience without the use of cumbersome manual steps. Basically, we need to remove as many barriers as possible between our code and our audience.
This post will cover building a custom Docker image, instantiating a container from that image, and finally using that container to cross compile your Rust code. Your code will be compiled, and an executable will be created for your target environment within your working directory.
What You’ll Need

Your Rust code (to help you get started, you can use the source code from this git repo)
The latest version of Docker Desktop

Getting Started
My Rust directory has the following structure:

.
├── Cargo.lock
├── Cargo.toml
└── src
└── main.rs

 
The lock file and toml file both share the same format. The lock file lists packages and their properties. The Cargo program maintains the lock file, and this file should not be manually edited. The toml file is a manifest file that specifies the metadata of your project. Unlike the lock file, you can edit the toml file. The actual Rust code is in main.rs. In my example, the main.rs file contains a version of the game Snake that uses ASCII art graphics. These files run on Linux machines, and our goal is to cross compile them into a Windows executable.
The cross compilation of your Rust code will be done via Docker. Download and install the latest version of Docker Desktop. Choose the version matching your workstation OS — and remember to choose either the Intel or Apple (M-series) processor variant if you’re running macOS.


Creating Your Docker Image
Once you’ve installed Docker Desktop, navigate to your Rust directory. Then, create an empty file called Dockerfile within that directory. The Dockerfile will contain the instructions needed to create your Docker image. Paste the following code into your Dockerfile:

FROM rust:latest

RUN apt update &amp;&amp; apt upgrade -y
RUN apt install -y g++-mingw-w64-x86-64

RUN rustup target add x86_64-pc-windows-gnu
RUN rustup toolchain install stable-x86_64-pc-windows-gnu

WORKDIR /app

CMD ["cargo", "build", "–target", "x86_64-pc-windows-gnu"]

 
Setting Up Your Image
The first line creates your image from the Rust base image. The next command upgrades the contents of your image’s packages to the latest version and installs mingw, an open source program that builds Windows applications.
Compiling for Windows
The next two lines are key to getting cross compilation working. The rustup program is a command line toolchain manager for Rust that allows Rust to support compilation for different target platforms. We need to specify which target platform to add for Rust (a target specifies an architecture which can be compiled into by Rust). We then install that toolchain into Rust. A toolchain is a set of programs needed to compile our application to our desired target architecture.
Building Your Code
Next, we’ll set the working directory of our image to the app folder. The final line utilizes the CMD instruction in our running container. Our command instructs Cargo, the Rust build system, to build our Rust code to the designated target architecture.
Building Your Image
Let’s save our Dockerfile, and then navigate to that directory in our terminal. In the terminal, run the following command:
docker build . -t rust_cross_compile/windows
 
Docker will build the image by using the current directory’s Dockerfile. The command will also tag this image as rust_cross_compile/windows.
Running Your Container
Once you’ve created the image, then you can run the container by executing the following command:
docker run –rm -v ‘your-pwd’:/app rust_cross_compile/windows
 
The -rm option will remove the container when the command completes. The -v command allows you to persist data after a container has existed by linking your container storage with your local machine. Replace ‘your-pwd’ with the absolute path to your Rust directory. Once you run the above command, then you will see the following directory structure within your Rust directory:

.
├── Cargo.lock
├── Cargo.toml
└── src
└── main.rs
└── target
└── debug
└── x86_64-pc-windows-gnu
└── debug
termsnake.exe

 
Running Your Rust Code
You should now see a newly created directory called target. This directory will contain a subdirectory that will be named after the architecture you are targeting. Inside this directory, you will see a debug directory that contains the executable file. Clicking the executable allows you to run the application on a Windows machine. In my case, I was able to start playing the game Snake:


Running Rust on armv7
We have compiled our application into a Windows executable, but we can modify the Dockerfile like the below in order for our application to run on the armv7 architecture:

FROM rust:latest

RUN apt update &amp;&amp; apt upgrade -y
RUN apt install -y g++-arm-linux-gnueabihf libc6-dev-armhf-cross

RUN rustup target add armv7-unknown-linux-gnueabihf
RUN rustup toolchain install stable-armv7-unknown-linux-gnueabihf

WORKDIR /app

ENV CARGO_TARGET_ARMV7_UNKNOWN_LINUX_GNUEABIHF_LINKER=arm-linux-gnueabihf-gcc CC_armv7_unknown_Linux_gnueabihf=arm-linux-gnueabihf-gcc CXX_armv7_unknown_linux_gnueabihf=arm-linux-gnueabihf-g++

CMD ["cargo", "build", "–target", "armv7-unknown-linux-gnueabihf"]

 
Running Rust on aarch64
Alternatively, we could edit the Dockerfile with the below to support aarch64:

FROM rust:latest

RUN apt update &amp;&amp; apt upgrade -y
RUN apt install -y g++-aarch64-linux-gnu libc6-dev-arm64-cross

RUN rustup target add aarch64-unknown-linux-gnu
RUN rustup toolchain install stable-aarch64-unknown-linux-gnu

WORKDIR /app

ENV CARGO_TARGET_AARCH64_UNKNOWN_LINUX_GNU_LINKER=aarch64-linux-gnu-gcc CC_aarch64_unknown_linux_gnu=aarch64-linux-gnu-gcc CXX_aarch64_unknown_linux_gnu=aarch64-linux-gnu-g++

CMD ["cargo", "build", "–target", "aarch64-unknown-linux-gnu"]

 
Another way to compile for different architectures without going through the creation of a Dockerfile would be to install the cross project, using the cargo install -f cross command. From there, simply run the following command to start the build:
cross build –target x86_64-pc-windows-gnu
Conclusion
Docker Desktop allows you to quickly build a development environment that can support different languages and frameworks. We can build and compile our code for many target architectures. In this post, we got Rust code written on Linux to run on Windows, but we don’t have to limit ourselves to just that example. We can pick many other languages and architectures. Alternatively, Docker Buildx is a tool that was designed to help solve these same problems. Checkout more documentation of Buildx here.
Quelle: https://blog.docker.com/feed/

Creating the KubeCon Flappy Dock Extension

During KubeCon EU 2022, our Docker team was able to show off many of our latest releases, including Docker Desktop for Linux and Docker Extensions. Community feedback on these has been overwhelmingly positive! To help demonstrate the types of extensions available, we demoed the Disk Usage extension and built our own extension just for the conference: Flappy Dock! Let’s dive into the extension and how we built it.


The Makeup of an Extension
In case you haven’t built your own extension, extensions are simply specially formatted Docker images that contain a frontend and optional backend services. The frontend is simply a web app that’s extracted from the image and rendered within Docker Desktop. Therefore, anything that can run in a web browser can run as an extension! The extension’s metadata.json (more on that later) configuration file tells Docker Desktop how to install and use it.
As we looked around for fun ideas for KubeCon, we decided to run a simple game. Fortunately, we found a web adaptation of Flappy Bird on GitHub — thanks nebez/floppybird! This would be a perfect starting point.
Converting Flappy Bird to Flappy Dock
While Flappy Bird is fun, why don’t we make it match our nautical theme while using Moby and Molly? Luckily, that’s a pretty easy change to make with the following steps.
1) Using the NGINX Container
After cloning the repo locally, we can launch the app using an nginx container. Using the new Featured Images page, I can start my container with a few clicks. If I start an nginx container, select the directory I cloned the repo into, and open the site, I get Flappy Bird! Feel free to play a game or two (use either the mouse or spacebar to play the game)!


2) Swapping Out Our Images
To customize the game, we need to swap out some images with some Docker-themed images! Each of the following images go into the assets folder.

Moby
Molly
The ocean background (replacing the sky)
The ocean ceiling
The ocean floor (replacing the land)

 
3) Changing Your CSS
We’ll modify the css/main.css and replace the original sky, ceiling, and land assets with our new images. If we refresh our browser, we should have the following now!


Our images are now in place, but we’ll need to tweak the colors where the images aren’t being used. We’ll do that next!
In the css/main.css file, make the following changes:

In the #sky declaration, set the background color value to #222D6D
In the #land declaration, set the background color value to #094892

 
You can see our game coming together!


4) Updating Your Game Code
With both CSS classes in place, let’s update the game code to randomly choose a character. We also must clear out the previous character choice, since you can play the game multiple times without refreshing the page. In the js/main.js file, locate the showSplash function. At the top of that function, add the following:

const useMolly = Math.floor(Math.random() * 2) === 0;
$("#player")
.removeClass("moby").removeClass("molly")
.addClass(useMolly ? "molly" : "moby");

 
Finally, check out your game. You should now successfully have either Moby or Molly as your main character while playing Flappy Dock!


Turning Flappy Dock into an Extension
Now that we have our web-based game ready to go, it’s time to turn it into an extension! As we mentioned earlier, an extension is simply a specialized image that contains a metadata.json with configurations.
To use the docker extension commands, first install the Docker Extension SDK plugin (instructions can be found here). This is currently the only method to install an extension not listed in the Extensions Marketplace.
1) Adding Configurations to the Root
In the root of our project, we’re then going to create a metadata.json file with the following contents:

{
"icon": "docker.svg",
"ui": {
"dashboard-tab": {
"title": "Flappy Dock",
"root": "ui",
"src": "index.html"
}
}
}

 
This configuration specifies the extension title and the location within the container image that contains the web-based application.
2) Creating an Image
Now, all that’s left is to create a container image. We can use the following Dockerfile to do so!

FROM alpine
LABEL org.opencontainers.image.title="Flabby Dock"
org.opencontainers.image.description="A fun extension to play Flappy Bird, but Docker style!"
org.opencontainers.image.vendor="Your name here"
com.docker.desktop.extension.api.version=">= 0.2.3"
com.docker.extension.screenshots=""
com.docker.extension.detailed-description=""
com.docker.extension.publisher-url=""
com.docker.extension.additional-urls=""
com.docker.extension.changelog=""

COPY metadata.json .
COPY index.html ui/
COPY assets ui/assets
COPY css ui/css
COPY js ui/js

 
The Dockerfile here simply puts the metadata.json at the root and copies other key files in the locations we specified in our config. You can also use various labels to describe the image (which is helpful for images in the Marketplace).
At this point, we can build our image and install it with the following commands:
docker build -t flappy-dock .
docker extension install flappy-dock
 
3) Confirming Within Docker Desktop
Within Docker Desktop, we should now see Flappy Dock in the sidebar! If you click on it, you can play the game!


For KubeCon, we added a few additional changes to the app — including a running total score, run count, and an available “easy mode” with extra space between the pipes. Want to learn more? Check out our version of the code in this GitHub code repo.
Recap
While a fairly basic example — by building Flappy Dock into an extension — we demonstrated how to turn any web-based interface into an extension. If you have ideas for your own tools, documentation, or even games, we hope this blog post helped out!
If you want to dive deeper into Docker Extensions and explore the additional capabilities provided through the SDK (including running Docker commands, listing containers and images, and more), visit the resources below. We’d love to hear your feedback and about what you want to build with Docker Extensions!
 

Extensions SDK Docs – useful when building your own extension and exploring the SDK
Extensions SDK Repo – useful for sharing feedback, reporting bugs, or submitting feature requests

Quelle: https://blog.docker.com/feed/

8 Organizations Supporting the LGBTQ+ Tech Community

8 Organizations Supporting the LGBTQ+ Tech Community
June is Pride Month. And while it’s time to celebrate the LGBTQ+ community, it’s also an important reminder that diversity within the workforce remains an ongoing challenge within tech (as well as many other industries) for LGBTQ+ people. To help face that challenge, we want to highlight eight amazing organizations that are helping to support the LGBTQ+ tech community.

1. Out in Science, Technology, Engineering, and Mathematics (oSTEM)
A non-profit professional association for LGBTQ+ people in the STEM community. With over 100 student chapters at colleges/universities and professional chapters in cities across the United States and abroad, oSTEM is the largest chapter-based organization focused on LGBTQ+ people in STEM. oSTEM empowers LGBTQ+ people in STEM to succeed personally, academically, and professionally by cultivating environments and communities that nurture innovation, leadership, and advocacy.
2. TransTech Social Enterprises
An incubator for LGBTQ+ Talent with a focus on economically empowering the T, transgender people, in our community. They provide training, mentorship, and employment opportunities both in person and online for their members. 
3. Out for Undergrad (O4U)
An organization that holds major conferences for LGBTQ+ students. Students are able to network, learn from professionals, and participate in career fairs. Participation for students is also free as the cost of airfare, lodging, and the conferences are covered by participating employers. 
4. Lesbians Who Tech
A community of LGBTQ+ women, non-binary, and trans indviduals in and around tech (and the people who support them). The goals of Lesbians Who Tech are to be more visible to each other, to be more visible to others, to get more women, POC, and queer and trans people in technology, and to connect the community to other organizations and companies that are doing incredible work. Each year, they hold a summit focused on technology and offer a scholarship for LGBTQ+ women in coding that covers 50% of tuition for a coding school program. 
5.  Out in Tech
The world’s largest non-profit community of LGBTQ+ tech leaders. They create opportunities for their 40,000 members to advance their careers, grow their networks, and leverage tech for social change. Their Out in Tech U Mentorship program pairs LGBTQ+ youth with tech professionals to provide both technical and professional skills. 
6. LGBTQ in Technology
A space for LGBTQ+ people in technology to chat and support each other. They strive to keep it safe, positive, and confidential. The Slack channel is open to anybody who identifies as lesbian, gay, bisexual, trans, non-binary, gender non-conforming, queer, and those questioning whether they fit into those or any of the many other sub-genres of people who aren’t generally considered both “straight” and cis.
7. Out to Innovate
An organization that empowers LGBTQ+ individuals in STEM by providing education, advocacy, professional development, networking, and peer support.
They educate all communities regarding scientific, technological, and medical concerns of LGBTQ+ people.
8. Pride in STEM
A charity run by an independent group of LGBTQ+ scientists & engineers from around the world. They aim to showcase and support all LGBTQ+ people in STEM fields.Their goal has been to raise the profile of LGBTQ+ people in science, technology, engineering, and math/medicine (STEM) as well as to highlight the struggles LGBTQ+ STEM people often face.
We celebrate all members of the LGBTQ+ community
In the Docker community, we know the importance of bringing your whole self to everything you do, and we embrace what makes each of us unique. We’re proud of all LGBTQ+ members in our community, and celebrate you for who you are.
We also want to support the LGBTQ+ tech community. That’s why, in honor of Pride month, we’re making a donation to each of the organizations listed above.
To everyone in the LGBTQ+ tech community: Thank you. And we’re glad to have you here.
Quelle: https://blog.docker.com/feed/

Simplify Your Deployments Using the Rust Official Image

We previously tackled how to deploy your web applications quicker with the Caddy 2 Official Image. This time, we’re turning our attention to Rust applications.
The Rust Foundation introduced developers to the Rust programming language in 2010. Since then, developers have relied on it while building CLI programs, networking services, embedded applications, and WebAssembly apps.
Rust is also the most-loved programming language according to Stack Overflow’s 2021 Developer Survey, and Mac developers’ most-sought language per Git Tower’s 2022 survey. It has over 85,000 dedicated libraries, while our Rust Official Image has over 10 million downloads. Rust has a passionate user base. Its popularity has only grown following 2018’s productivity updates and 2021’s language-consistency enhancements.
That said, Rust application deployments aren’t always straightforward. Why’s this the case?
The Deployment Challenge
Developers have numerous avenues for deploying their Rust applications. While flexibility is good, the variety of options can be overwhelming. Accordingly, your deployment strategies will change depending on application types and their users.
Do you need a fully-managed IaaS solution, a PaaS solution, or something simpler? How important is scalability? Is this application as a personal project or as part of an enterprise deployment? The answers to these will impact your deployment approach — especially if you’ll be supporting that application for a long time.
Let’s consider something like Heroku. The platform provides official support for major languages like PHP, Python, Go, Node.js, Java, Ruby, and others. However, only these languages receive what Heroku calls “first-class” support.
In Rust’s case, Heroku’s team therefore doesn’t actively maintain any Rust frameworks, language features, or updated versioning. You’re responsible for tackling these tasks. You must comb through a variety of unofficial, community-made Buildpacks to extend Heroku effectively. Interestingly, some packs do include notes on testing with Docker, but why not just cut out the middle man?
There are also options like Render and Vercel, which feature different levels of production readiness.
That’s why the Rust Official Image is so useful. It accelerates deployment by simplifying the process. Are you tackling your next Rust project? We’ll discuss common use cases, streamline deployment via the Rust Official Image, and share some important tips.
Why Rust?
Rust’s maintainers and community have centered on system programming, networking, command-line applications, and WebAssembly (AKA “Wasm”). Many often present Rust as an alternative to C++ since they share multiple use cases. Accordingly, Rust also boasts memory safety, strong type safety, and modularity.
You can also harness Rust’s application binary interface (ABI) compatibility with C, which helps Rust apps access lower-level binary data within C libraries. Additionally, helpers like wasm-pack, wasm-bindgen, Neon, Helix, rust-cpython, and cbindgen let you extend codebases written in other languages with Rust components. This helps all portions of your application work seamlessly together.
Finally, you can easily cross compile to static x86 binaries (or non-x86 binaries like Arm), in 32-bit or 64-bit. Rust is platform-agnostic. Its built-in mechanisms even support long-running services with greater reliability.
That said, Rust isn’t normally considered an “entry-level” language. Experienced developers (especially those versed in C or C++) tend to pick up Rust a little easier. Luckily, alleviating common build complexities can boost its accessibility. This is where container images shine. We’ll now briefly cover the basics behind leveraging the Rust image.
To learn more about Rust’s advantages, read this informative breakdown.
Prerequisites and Technical Fundamentals
The Rust Official Image helps accelerate your deployment, and groups all dependencies into one package.
 
Here’s what you’ll need to get started:

Your Rust application code
The latest version of Docker Desktop
Your IDE of choice (VSCode is recommended, but not required)

 
In this guide, we’ll assume that you’re bringing your finalized application code along. Ensure that this resides in the proper location, so that it’s discoverable and usable within your upcoming build.
Your Rust build may also leverage pre-existing Rust crates (learn more about packages and crates here). Your package contains one or more crates (or groups of compiled executables and binary programs) that provide core functionality for your application. You can also leverage library crates for applications with shared dependencies.
Some crates contain important executables — typically in the form of standalone tools. Then we have configurations to consider. Like .yaml files, Cargo.toml files — also called the package manifests — form an app’s foundation. Each manifest contains sections. For example, here’s how [package] section looks:

[package]
name = "hello_world" # the name of the package
version = "0.1.0" # the current version, obeying semver
authors = ["Alice <a@example.com>", "Bob <b@example.com>"]

 
You can define many configurations within your manifests. Rust generates these sectioned files upon package creation, using this $ cargo new script:

$ cargo new my-project
Created binary (application) `my-project` package
$ ls my-project
Cargo.toml
src
$ ls my-project/src
main.rs

 
Rust automatically uses src/main.rs as the binary crate root directory, whereas src/lib.rs references a package with a library crate. The above example from Rust’s official documentation incorporates a simple binary crate within the build.
Before moving ahead, we recommend installing Docker Desktop, because it makes managing containers and images much easier. You can view, run, stop, and configure your containers via the Dashboard instead of the CLI. However, the CLI remains available within VSCode — and you can `SSH` directly into your containers via Docker Desktop’s Container interface.
Now, let’s inspect our image and discuss some best practices. To make things a little easier, launch Docker Desktop before proceeding.
Using the Rust Official Image
The simplest way to use the Rust image is by running it as a Rust container. First, enter the `docker pull rust` command to automatically grab the `latest` image version. This takes about 20 seconds within VSCode:


You can confirm that Docker Desktop pulled your image successfully by accessing the Images tab in the sidebar — then locating your rust image in the list:


To run this image as a container, hover over it and click the blue “Run” button that appears. Confirm by clicking “Run” again within the popup modal. You can expand the Optional Settings form to customize your container, though that’s not currently necessary.
Confirm that your rust container is running by visiting the Containers tab, and finding it within the list. Since we bypassed the Optional Settings, Docker Desktop will give your container a random name. Note the blue labels beside each container name. Docker Desktop displays the base image’s name:tag info for each container:


Note: Alternatively, you can pull a specific version of Rust with the tag :<version>. This may be preferable in production, where predictability and pre-deployment testing is critical. While :latest images can bring new fixes and features, they may also introduce unknown vulnerabilities into your application.
 
You can stop your container by hovering over it and clicking the square “Stop” button. This process takes 10 seconds to complete. Once stopped, Docker Desktop labels your container as exited. This step is important prior to making any configuration changes.
Similarly, you can (and should) remove your container before moving onward.
Customizing Your Dockerfiles
The above example showcased how images and containers live within Desktop. However, you might’ve noticed that we were working with “bare” containers, since we didn’t use any Rust application code.
Your project code brings your application to life, and you’ll need to add it into your image build. The Dockerfile accomplishes this. It helps you build layered images with sequential instructions.
Here’s how your basic Rust Dockerfile might look:

FROM rust:1.61.0

WORKDIR /usr/src/myapp
COPY . .

RUN cargo install –path .

CMD ["myapp"]

 
You’ll see that Docker can access your project code. Additionally, the cargo install RUN command grabs your packages.
To build and run your image with a complete set of Rust tooling packaged in, enter the following commands:

$ docker build -t my-rust-app .
$ docker run -it –rm –name my-running-app my-rust-app

 
This image is 1.8GB — which is pretty large. You may instead need the slimmest possible image builds. Let’s cover some tips and best practices.
Image Tips and Best Practices
Save Space by Compiling Without Tooling
While Rust tooling is useful, it’s not always essential for applications. There are scenarios where just the compiled application is needed. Here’s how your augmented Dockerfile could account for this:

FROM rust:1.61.0 as builder
WORKDIR /usr/src/myapp
COPY . .
RUN cargo install –path .

FROM debian:buster-slim
RUN apt-get update && apt-get install -y extra-runtime-dependencies && rm -rf /var/lib/apt/lists/*
COPY –from=builder /usr/local/cargo/bin/myapp /usr/local/bin/myapp
CMD ["myapp"]

 
Per the Rust Project’s developers, this image is merely 200MB. That’s tiny compared to our previous image. This saves disk space, reduces application bloat, and makes it easier to track layer-by-layer changes. That outcome appears paradoxical, since your build is multi-stage (adding layers) yet shrinks significantly.
Additionally, naming your stages and using those names in each COPY ensures that each COPY won’t break if you reorder your instructions.
This solution lets you copy key artifacts between stages and abandon unwanted artifacts. You’re not carrying unwanted components forward into your final image. As a bonus, you’re also building your Rust application from a single Dockerfile.
 
Note: See the && operator used above? This helps compress multiple RUN commands together, yet we don’t necessarily consider this a best practice. These unified commands can be tricky to maintain over time. It’s easy to forget to add your line continuation syntax () as those strings grow.
 
Finally, Rust is statically compiled. You can create your Dockerfile with the FROM scratch instruction and append only the binary to the image. Docker treats scratch as a no-op and doesn’t create an extra layer. Consequently, Scratch can help you create minuscule builds measuring just a few MB.
To better understand each Dockerfile instruction, check out our reference documentation.
Use Tags to Your Advantage
Need to save even more space? Using the Rust alpine image can save another 60MB. You’d instead specify an instruction like FROM rust:1.61.0-alpine as builder. This isn’t caveat-free, however. Alpine images leverage musl libc instead of glibc and friends, so your software may encounter issues if important dependencies are excluded. You can compare each library here to be safe.
 
There are some other ways to build smaller Rust images:

The rust:<version>-slim tag pulls an image that contains just the minimum packages needed to run Rust. This saves plenty of space, but fails in environments that require deployments beyond just your rust image
The rust:<version>-slim-bullseye tag pulls an image built upon Debian 11 branch, which is the current stable distro
The rust:<version>slim-buster tag also pulls an image built upon the Debian 10 branch, which is even slightly smaller than its bullseye successor

 
Docker Hub lists numerous image tags for the Rust Official Image. Each version’s size is listed according to each OS architecture.
Creating the slimmest possible application is an admirable goal. However, this process must have a goal or benefit in mind. For example, reducing your image size (by stripping dependencies) is okay when your application doesn’t need them. You should never sacrifice core functionality to save a few megabytes.
Lastly, you can lean on the `cargo-chef` subcommand to dramatically speed up your Rust Docker builds. This solution fully leverages Docker’s native caching, and offers promising performance gains. Learn more about it here.
Conclusion
Cross-platform Rust development doesn’t have to be complicated. You can follow some simple steps, and make some approachable optimizations, to improve your builds. This reduces complexity, application size, and build times by wide margins. Moreover, embracing best practices can make your life easier.
Want to jumpstart your next Rust project? Our awesome-compose library features a shortcut for getting started with a Rust backend. Follow our example to build a React application that leverages a Rust backend with a Postgres database. You’ll also learn how Docker Compose can help streamline the process.
Quelle: https://blog.docker.com/feed/