Customer churn is a million-dollar problem for businesses today. The SaaS market is becoming increasingly saturated, and customers can choose from plenty of providers. Retention and nurturing are challenging. Online businesses view customers as churn when they stop purchasing goods and services. Customer churn can depend on industry-specific factors, yet some common drivers include lack of product usage, contract tenure, and cheaper prices elsewhere.
Limiting churn strengthens your revenue streams. Businesses and marketers must predict and prevent customer churn to remain sustainable. The best way to do so is by knowing your customers. And spotting behavioral patterns in historical data can help immensely with this. So, how do we uncover them?
Applying machine learning (ML) to customer data helps companies develop focused customer-retention programs. For example, a marketing department could use an ML churn model to identify high-risk customers and send promotional content to entice them.
To enable these models to make predictions with new data, knowing how to package a model as a user-facing, interactive application is essential. In this blog, we’ll take an ML model from a Jupyter Notebook environment to a containerized application. We’ll use Streamlit as our application framework to build UI components and package our model. Next, we’ll use Docker to publish our model as an endpoint.
Docker containerization helps make this application hardware-and-OS agnostic. Users can access the app from their browser through the endpoint, input customer details, and receive a churn probability in a fraction of a second. If a customer’s churn score exceeds a certain threshold, that customer may receive targeted push notifications and special offers. The diagram below puts this into perspective:
Why choose Streamlit?
Streamlit is an open source, Python-based framework for building UIs and powerful ML apps from a trained model. It’s popular among machine learning engineers and data scientists as it enables quick web-app development — requiring minimal Python code and a simple API. This API lets users create widgets using pure Python without worrying about backend code, routes, or requests. It provides several components that let you build charts, tables, and different figures to meet your application’s needs. Streamlit also utilizes models that you’ve saved or pickled into the app to make predictions.
Conversely, alternative frameworks like FastAPI, Flask, and Shiny require a strong grasp of HTML/CSS to build interactive, frontend apps. Streamlit is the fastest way to build and share data apps. The Streamlit API is minimal and extremely easy to understand. Minimal changes to your underlying Python script are needed to create an interactive dashboard.
Getting Started
git clone https://github.com/dockersamples/customer-churnapp-streamlit
Key Components
An IDE or text editor Python 3.6+ PIP (or Anaconda)Not required but recommended: An environment-management tool such as pipenv, venv, virtualenv, or condaDocker Desktop
Before starting, install Python 3.6+. Afterwards, follow these steps to install all libraries required to run the model on your system.
Our project directory structure should look like this:
$ tree
.
├── Churn_EDA_model_development.ipynb
├── Churn_model_metrics.ipynb
├── Dockerfile
├── Pipfile
├── Pipfile.lock
├── WA_Fn-UseC_-Telco-Customer-Churn.csv
├── train.py
├── requirements.txt
├── README.md
├── images
│ ├── churndemo.gif
│ ├── icone.png
│ └── image.png
├── model_C=1.0.bin
└── stream_app.py
Install project dependencies in a virtual environment
We’ll use the Pipenv library to create a virtual Python environment and install the dependencies required to run Streamlit. The Pipenv tool automatically manages project packages through the Pipfile as you install or uninstall them. It also generates a Pipfile.lock file, which helps produce deterministic builds and creates a snapshot of your working environment. Follow these steps to get started.
1) Enter your project directory
cd customer-churnapp-streamlit
2) Install Pipenv
pip install pipenv
3) Install the dependencies
pipenv install
4) Enter the pipenv virtual environment
pipenv shell
After completing these steps, you can run scripts from your virtual environment!
Building a simple machine-learning model
Machine learning uses algorithms and statistical models. These analyze historical data and make inferences from patterns without any explicit programming. Ultimately, the goal is to predict outcomes based on incoming data.
In our case, we’re creating a model from historical customer data to predict which customers are likely to leave. Since we need to classify customers as either churn or no-churn, we’ll train a simple-yet-powerful classification model. Our model uses logistic regression on a telecom company’s historical customer dataset. This set tracks customer demographics, tenure, monthly charges, and more. However, one key question is also answered: did the customer churn?
Logistic regression estimates an event’s probability based on a given dataset of independent variables. Since the outcome is a probability, the dependent variable is bounded between 0 and 1. The model will undergo multiple iterations and calculate best-fit coefficients for each variable. This quantifies just how much each impacts churn. With these coefficients, the model can assign churn likelihood scores between 0 and 1 to new customers. Someone who scores a 1 is extremely likely to churn. Someone with a 0 is incredibly unlikely to churn.
Python has great libraries like Pandas, NumPy, and Matplotlib that support data analytics. Open-source frameworks like Scikit Learn have pre-built wrappers for various ML models. We’ll use their API to train a logistic-regression model. To understand how this basic churn prediction model was born, refer to Churn_EDA_model_development.ipynb. ML models require many attempts to get right. Therefore, we recommend using a Jupyter notebook or an IDE.
In a nutshell we performed the below steps to create our churn prediction model:
Initial data preparation Perform sanity checks on data types and column names Make data type corrections if needed Data and feature understanding Check the distribution of numerical featuresCheck the distinct values of categorical features Check the target feature distribution Exploratory data analysis Handle missing values Handle outliers Understand correlations and identify spurious ones Feature engineering and importance Analyze churn rate and risk scores across different cohorts and feature groups Calculate mutual information Check feature correlations Encoding categorical features and scaling numerical features Convert categorical features into numerical values using Scikit-Learn’s helper function: Dictionary Vectoriser Scale numerical features to standardize them into a fixed range Model training Select an appropriate ML algorithm Train the model with custom parameters Model evaluation Refer to Churn_model_metrics.ipynb Use different metrics to evaluate the model like accuracy, confusion table, precision, recall, ROC curves, AUROC, and cross-validation.Repeat steps 6 and 7 for different algorithms and model hyperparameters, then select the best-fit model.
It’s best practice to automate the training process using a Python script. Each time we choose to retrain the model with a new parameter or a new dataset, we can execute this script and save the resulting model.
Check out train.py to explore how to package a model into a script that automates model training!
Once we uncover the best-fit model, we must save it to reuse it later without running any of the above training code scripts. Let’s get started.
Save the model
In machine learning, we save trained models in a file and restore them to compare each with other models. We can also test them using new data. The save process is called Serialization, while restoration is called Deserialization.
We use a helper Python library called Pickle to save the model. The Pickle module implements a fundamental, yet powerful, algorithm for serializing and de-serializing a Python object structure.
You can also use the following functions:
pickle.dump serializes an object hierarchy using dump().pickle.load deserializes a data stream via the load() function.
We’ve chosen Pickle since it supports models created using the Scikit-Learn framework and offers great loading performance. Similar training frameworks like Tensorflow and Keras have their own built-in libraries for saving models, which are designed to perform well with their architectures.
Dump the Model and Dictionary Vectorizer
import pickle
with open(‘model_C=1.0.bin’, ‘wb’) as f_out
pickle.dump((dict_vectorizer, model), f_out)
f_out.close() ## After opening any file it’s necessary to close it
We just saved a binary file named model_C=1.0.bin and wrote the dict_vectorizer for one Hot Encoding and included Logistic Regression Model as an array within it.
Create a new Python file
Now, we’ll create a stream_app.py script that both defines our app layout and trigger-able backend logic. This logic activates when users interact with different UI components. Crucially, this file is reusable with any model.
This is just an example. We strongly recommend exploring more components and design options from the Streamlit library. If you’re skilled in HTML and JavaScript, you can create your own Streamlit components that grant you more control over your app’s layout.
First, import the required libraries:
import pickle
import streamlit as st
import pandas as pd
from PIL import Image
Next, you’ll need to load the same binary file we saved earlier to deserialize the model and dictionary vectorizer.
model_file = ‘model_C=1.0.bin’
with open(model_file, ‘rb’) as f_in:
dv, model = pickle.load(f_in)
The following code snippet loads the images and displays them on your screen. The st.image portion helps display an image on the frontend:
image = Image.open(‘images/icone.png’)
image2 = Image.open(‘images/image.png’)
st.image(image,use_column_width=False)
To display items in the sidebar, you’ll need the following code snippet:
add_selectbox = st.sidebar.selectbox("How would you like to predict?",
("Online", "Batch"))
st.sidebar.info(‘This app is created to predict Customer Churn’)
st.sidebar.image(image2)
Streamlit’s sidebar renders a vertical, collapsible bar where users can select the type of model scoring they want to perform — like batch scoring (predictions for multiple customers) or online scoring (for single customers). We also add text and images to decorate the sidebar.
The following code helps you display the main title:
st.title("Predicting Customer Churn")
You can display input widgets to collect customer details and generate predictions, when the user selects the ‘Online’ option:
if add_selectbox == ‘Online':
gender = st.selectbox(‘Gender:’, [’male’, ‘female’])
seniorcitizen= st.selectbox(‘ Customer is a senior citizen:’, [0, 1])
partner= st.selectbox(‘ Customer has a partner:’, [’yes’, ‘no’])
dependents = st.selectbox(‘ Customer has dependents:’, [’yes’, ‘no’])
phoneservice = st.selectbox(‘ Customer has phoneservice:’, [’yes’, ‘no’])
multiplelines = st.selectbox(‘ Customer has multiplelines:’, [’yes’, ‘no’, ‘no_phone_service’])
internetservice= st.selectbox(‘ Customer has internetservice:’, [’dsl’, ‘no’, ‘fiber_optic’])
onlinesecurity= st.selectbox(‘ Customer has onlinesecurity:’, [’yes’, ‘no’, ‘no_internet_service’])
onlinebackup = st.selectbox(‘ Customer has onlinebackup:’, [’yes’, ‘no’, ‘no_internet_service’])
deviceprotection = st.selectbox(‘ Customer has deviceprotection:’, [’yes’, ‘no’, ‘no_internet_service’])
techsupport = st.selectbox(‘ Customer has techsupport:’, [’yes’, ‘no’, ‘no_internet_service’])
streamingtv = st.selectbox(‘ Customer has streamingtv:’, [’yes’, ‘no’, ‘no_internet_service’])
streamingmovies = st.selectbox(‘ Customer has streamingmovies:’, [’yes’, ‘no’, ‘no_internet_service’])
contract= st.selectbox(‘ Customer has a contract:’, [’month-to-month’, ‘one_year’, ‘two_year’])
paperlessbilling = st.selectbox(‘ Customer has a paperlessbilling:’, [’yes’, ‘no’])
paymentmethod= st.selectbox(‘Payment Option:’, [’bank_transfer_(automatic)’, ‘credit_card_(automatic)’, ‘electronic_check’ ,’mailed_check’])
tenure = st.number_input(‘Number of months the customer has been with the current telco provider :’, min_value=0, max_value=240, value=0)
monthlycharges= st.number_input(‘Monthly charges :’, min_value=0, max_value=240, value=0)
totalcharges = tenure*monthlycharges
output= ""
output_prob = ""
input_dict={
"gender":gender ,
"seniorcitizen": seniorcitizen,
"partner": partner,
"dependents": dependents,
"phoneservice": phoneservice,
"multiplelines": multiplelines,
"internetservice": internetservice,
"onlinesecurity": onlinesecurity,
"onlinebackup": onlinebackup,
"deviceprotection": deviceprotection,
"techsupport": techsupport,
"streamingtv": streamingtv,
"streamingmovies": streamingmovies,
"contract": contract,
"paperlessbilling": paperlessbilling,
"paymentmethod": paymentmethod,
"tenure": tenure,
"monthlycharges": monthlycharges,
"totalcharges": totalcharges
}
if st.button("Predict"):
X = dv.transform([input_dict])
y_pred = model.predict_proba(X)[0, 1]
churn = y_pred >= 0.5
output_prob = float(y_pred)
output = bool(churn)
st.success(‘Churn: {0}, Risk Score: {1}’.format(output, output_prob))
Your app’s frontend leverages Streamlit’s input widgets like select box, slider, and number input. Users interact with these widgets by entering values. Input data is then packaged into a Python dictionary. The backend — which handles the prediction score computation logic — is defined inside the st.button layer and awaits the user trigger. When this happens, the dictionary is passed to the dictionary vectorizer which performs encoding for categorical features and makes it consumable for the model.
Streamlit passes any transformed inputs to the model and calculates the churn prediction score. Using the threshold of 0.5, the churn score is converted into a binary class. The risk score and churn class are returned to the frontend via Streamlit’s success component. This displays a success message.
To display the file upload button when the user selects “Batch” from the sidebar, the following code snippet might be useful:
if add_selectbox == ‘Batch':
file_upload = st.file_uploader("Upload csv file for predictions", type=["csv"])
if file_upload is not None:
data = pd.read_csv(file_upload)
X = dv.transform([data])
y_pred = model.predict_proba(X)[0, 1]
churn = y_pred >= 0.5
churn = bool(churn)
st.write(churn)
When the user wants to batch score customers, the page layout will dynamically change to match this selection. Streamlit’s file uploader component will display a related widget. This prompts the user to upload a CSV file, which is then read using the panda library and processed by the dictionary vectorizer and model. It displays prediction scores on the frontend using st.write.
The above application skeleton is wrapped within a main function in the below script. Running the script invokes the main function. Here’s how that final script looks:
import pickle
import streamlit as st
import pandas as pd
from PIL import Image
model_file = ‘model_C=1.0.bin’
with open(model_file, ‘rb’) as f_in:
dv, model = pickle.load(f_in)
def main():
image = Image.open(‘images/icone.png’)
image2 = Image.open(‘images/image.png’)
st.image(image,use_column_width=False)
add_selectbox = st.sidebar.selectbox(
"How would you like to predict?",
("Online", "Batch"))
st.sidebar.info(‘This app is created to predict Customer Churn’)
st.sidebar.image(image2)
st.title("Predicting Customer Churn")
if add_selectbox == ‘Online':
gender = st.selectbox(‘Gender:’, [’male’, ‘female’])
seniorcitizen= st.selectbox(‘ Customer is a senior citizen:’, [0, 1])
partner= st.selectbox(‘ Customer has a partner:’, [’yes’, ‘no’])
dependents = st.selectbox(‘ Customer has dependents:’, [’yes’, ‘no’])
phoneservice = st.selectbox(‘ Customer has phoneservice:’, [’yes’, ‘no’])
multiplelines = st.selectbox(‘ Customer has multiplelines:’, [’yes’, ‘no’, ‘no_phone_service’])
internetservice= st.selectbox(‘ Customer has internetservice:’, [’dsl’, ‘no’, ‘fiber_optic’])
onlinesecurity= st.selectbox(‘ Customer has onlinesecurity:’, [’yes’, ‘no’, ‘no_internet_service’])
onlinebackup = st.selectbox(‘ Customer has onlinebackup:’, [’yes’, ‘no’, ‘no_internet_service’])
deviceprotection = st.selectbox(‘ Customer has deviceprotection:’, [’yes’, ‘no’, ‘no_internet_service’])
techsupport = st.selectbox(‘ Customer has techsupport:’, [’yes’, ‘no’, ‘no_internet_service’])
streamingtv = st.selectbox(‘ Customer has streamingtv:’, [’yes’, ‘no’, ‘no_internet_service’])
streamingmovies = st.selectbox(‘ Customer has streamingmovies:’, [’yes’, ‘no’, ‘no_internet_service’])
contract= st.selectbox(‘ Customer has a contract:’, [’month-to-month’, ‘one_year’, ‘two_year’])
paperlessbilling = st.selectbox(‘ Customer has a paperlessbilling:’, [’yes’, ‘no’])
paymentmethod= st.selectbox(‘Payment Option:’, [’bank_transfer_(automatic)’, ‘credit_card_(automatic)’, ‘electronic_check’ ,’mailed_check’])
tenure = st.number_input(‘Number of months the customer has been with the current telco provider :’, min_value=0, max_value=240, value=0)
monthlycharges= st.number_input(‘Monthly charges :’, min_value=0, max_value=240, value=0)
totalcharges = tenure*monthlycharges
output= ""
output_prob = ""
input_dict={
"gender":gender ,
"seniorcitizen": seniorcitizen,
"partner": partner,
"dependents": dependents,
"phoneservice": phoneservice,
"multiplelines": multiplelines,
"internetservice": internetservice,
"onlinesecurity": onlinesecurity,
"onlinebackup": onlinebackup,
"deviceprotection": deviceprotection,
"techsupport": techsupport,
"streamingtv": streamingtv,
"streamingmovies": streamingmovies,
"contract": contract,
"paperlessbilling": paperlessbilling,
"paymentmethod": paymentmethod,
"tenure": tenure,
"monthlycharges": monthlycharges,
"totalcharges": totalcharges
}
if st.button("Predict"):
X = dv.transform([input_dict])
y_pred = model.predict_proba(X)[0, 1]
churn = y_pred >= 0.5
output_prob = float(y_pred)
output = bool(churn)
st.success(‘Churn: {0}, Risk Score: {1}’.format(output, output_prob))
if add_selectbox == ‘Batch':
file_upload = st.file_uploader("Upload csv file for predictions", type=["csv"])
if file_upload is not None:
data = pd.read_csv(file_upload)
X = dv.transform([data])
y_pred = model.predict_proba(X)[0, 1]
churn = y_pred >= 0.5
churn = bool(churn)
st.write(churn)
if __name__ == ‘__main__':
main()
You can download the complete script from our Dockersamples GitHub page.
Execute the script
streamlit run stream_app.py
View your Streamlit app
You can now view your Streamlit app in your browser. Navigate to the following:
Local URL: http://localhost:8501Network URL: http://192.168.1.23:8501
Containerizing the Streamlit app with Docker
Let’s explore how to easily run this app within a Docker container, using a Docker Official image. First, you’ll need to download Docker Desktop. Docker Desktop accelerates the image-building process while making useful images more discoverable. Complete this installation process once your download is finished.
Docker uses a Dockerfile to specify each image’s “layers.” Each layer stores important changes stemming from the base image’s standard configuration. Create an empty Dockerfile in your Streamlit project:
touch Dockerfile
Next, use your favorite text editor to open this Dockerfile. We’re going to build out this new file piece by piece. To start, let’s define a base image:
FROM python:3.8.12-slim
It’s now time to ensure that the latest pip modules are installed:
RUN /usr/local/bin/python -m pip install –upgrade pip
Next, let’s quickly create a directory to house our image’s application code. This is the working directory for your application:
WORKDIR /app
The following COPY instruction copies the requirements file from the host machine to the container image:
COPY requirements.txt ./requirements.txt
RUN pip install -r requirements.txt
The EXPOSE instruction tells Docker that your container is listening on the specified network ports at runtime:
EXPOSE 8501
Finally, create an ENTRYPOINT to make your image executable:
ENTRYPOINT ["streamlit", "run"]
CMD ["stream_app.py"]
After assembling each piece, here’s your complete Dockerfile:
FROM python:3.8.12-slim
RUN /usr/local/bin/python -m pip install –upgrade pip
WORKDIR /app
COPY requirements.txt ./requirements.txt
RUN pip install -r requirements.txt
EXPOSE 8501
COPY . .
ENTRYPOINT ["streamlit", "run"]
CMD ["stream_app.py"]
Build your image
docker build -t customer_churn .
Run the app
docker run -d -p 8501:8501 customer_churn
View the app within Docker Desktop
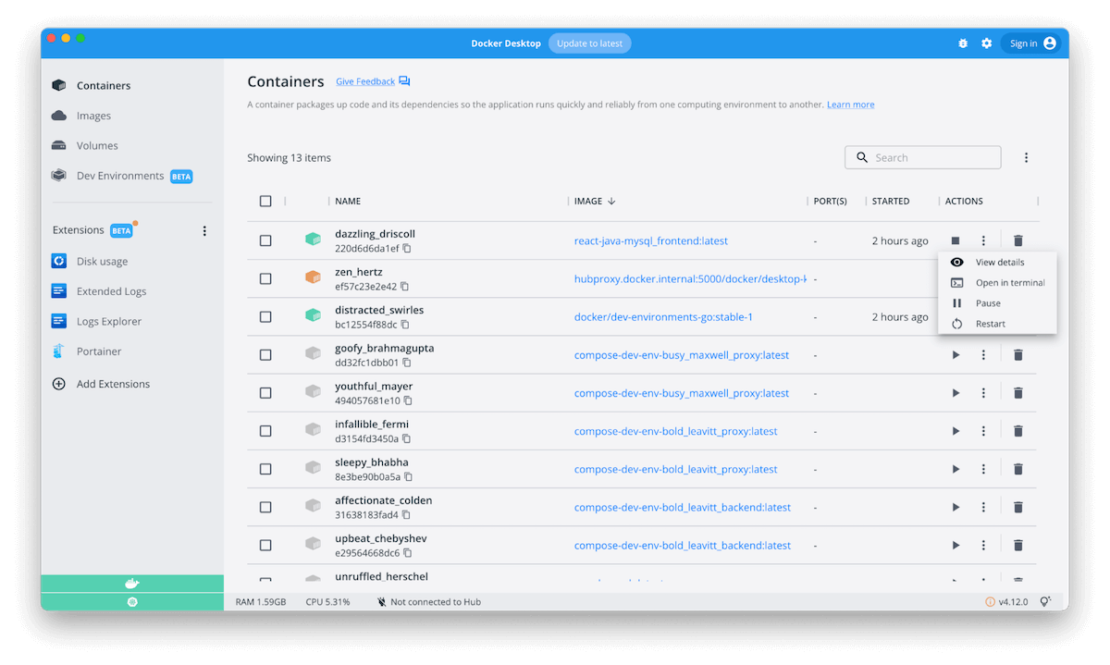
You can do this by navigating to the Containers interface, which lists your running application as a named container:
Access the app
First, select your app container in the list. This opens the Logs view. Click the button with a square icon (with a slanted arrow) located next to the Stats pane. This opens your app in your browser:
Alternatively, you can hover over your container in the list and click that icon once the righthand toolbar appears.
Develop and deploy your next machine learning model, today
Congratulations! You’ve successfully explored how to build and deploy customer churn prediction models using Streamlit and Docker. With a single Dockerfile, we’ve demonstrated how easily you can build an interactive frontend and deploy this application in seconds.
With just a few extra steps, you can use this tutorial to build applications with much greater complexity. You can make your app more useful by implementing push-notification logic in the app — letting the marketing team send promotional emails to high-churn customers on the fly. Happy coding.
Quelle: https://blog.docker.com/feed/