The Next Evolution of Docker Hardened Images: Customizable, FedRAMP Ready, AI Migration Agent, and Deeper Integrations

We launched Docker Hardened Images (DHI) in May, and in just two and a half months, adoption has accelerated rapidly across industries. From nimble startups to global enterprises, organizations are turning to DHI to achieve near-zero CVEs, shrink their attack surface, and harden their software supply chain, all without slowing down developers.

In a short time, DHI has become the trusted foundation for production workloads: minimal, signed, continuously patched, and built from the ground up to deliver security at scale. Platform and security teams alike are moving faster and more securely than ever before.

That momentum is why we’re doubling down. We’re expanding Docker Hardened Images with powerful new capabilities: a broader image catalog, flexible customization options, AI migration agent, FedRAMP-ready variants, and tighter integrations with the tools teams already use every day. Many of these enhancements will be in action at Black Hat 2025.

Secure Images for End-to-End Workloads

One of the most consistent things we hear from customers, especially those in security-conscious environments, is that they’re not just running a few basic containers. They’re deploying full-stack systems that span everything from message queues like RabbitMQ and Redis, to web servers like Tomcat and NGINX, databases and storage tools such as PostgreSQL and Prometheus, and developer tools like Azure Functions and Grafana. They also rely on networking components like Envoy, monitoring and observability stacks like Grafana, Loki, and Netdata, and even ML and AI infrastructure like Kubeflow. 

To support these real-world workloads, the Docker Hardened Images (DHI) catalog now includes trusted, production-ready images across all these categories. Every image is SLSA-compliant, signed, and continuously maintained, giving security teams confidence that they’re using secure, verifiable containers without slowing down developers or complicating compliance.

And now, getting started with DHI is even easier. Docker’s AI assistant can automatically analyze your existing containers and recommend or apply equivalent hardened images, streamlining your move from community or internal images. Watch it in action below.

DHI Customization: Flexibility without the risk

Another piece of feedback we’ve heard from customers is how much they appreciate the flexibility of DHI. DHI meets teams where they are, allowing them to customize based on their unique needs rather than forcing them to adapt to rigid constraints. The ability to tailor images while still relying on a hardened, security-first foundation has been a clear win. And now, we’ve taken that experience even further.

With our new self-serve UI, customizing DHI is faster and simpler than ever. You can inject internal certificates, install trusted packages, tweak runtime settings, and define user policies, all without forking base images or wrangling complex workarounds.

Need to configure runtimes, install essential tools like curl, git, or debugging utilities? Want to add custom CA certificates for internal trust chains, set environment variables, or define custom users and groups? With DHI, you can do it all in just a few clicks.

Best of all, your custom images stay secure automatically. Customizations are packaged as OCI artifacts: secure, versioned layers that cleanly separate your logic from the base image. Docker handles the final image build, signs it while maintaining a SLSA Build Level 3 standard, and ensures the image is always up to date.

When the base image receives a security patch or your own artifacts are updated, Docker automatically rebuilds your customized images in the background. No manual work. No surprise drift. Just continuous compliance and protection by default. Customers can create as many customizations as they need for each repository, without any additional cost. 

This is a huge win for platform and security teams. There’s no need to fork base images, write custom CI rebuild scripts, or maintain parallel image pipelines just to meet security or policy requirements. You get the flexibility you need without the operational overhead.

FedRAMP-Ready: Built for compliance from the start

If you’re chasing FedRAMP authorization, meeting strict security standards like FIPS and STIG isn’t optional, it’s mission-critical. But hardening container images manually? That’s wasted time, human error, and endless maintenance.

Docker Hardened Images now ship with FedRAMP-ready variants, engineered to align out of the box with U.S. federal security requirements. These images are FIPS-enabled for strong, validated cryptographic enforcement, STIG-ready with secure defaults baked in, and delivered with signed SBOMs and attestations for full auditability.

All of this is built and maintained by Docker so your team doesn’t have to be in the business of compliance engineering. Just plug these images into your pipeline and go. Under the hood, Docker’s FIPS-enabled images leverage validated cryptographic modules such as OpenSSL, Bouncy Castle, and Go. Each image includes signed attestations linked to NIST certifications and test results, ensuring transparency and traceability across the software supply chain.

Every STIG-ready image is scanned via OpenSCAP during secure builds and comes with signed results, including compliance scores and full scan outputs (HTML and XCCDF). Each result is clearly mapped to NIST 800-53 controls, making it easier for security teams and auditors to assess and track compliance. As you customize these images, Docker helps you track compliance over time, making it easier for security teams and auditors alike.

Learn how Docker is simplifying FedRAMP readiness in this deep-dive blog post

Docker + Wiz: Smarter Vulnerability Management

Docker Hardened Images integrate seamlessly into your existing developer and security workflows, working out of the box with popular tools like GitLab, Sonatype, CloudSmith, Docker Hub, Docker Desktop, GitHub Actions, Jenkins, and more.

Now, we’re taking it a step further: Docker Hardened Images integrate with Wiz, empowering security teams with deeper, context-rich visibility into real risk based on what’s running in production, what’s exposed to the internet, and what interacts with sensitive data.

“Docker’s Hardened Images offer an exceptionally secure foundation with significantly smaller surface areas and near-zero CVEs”, said Oron Noah, VP of Product, Extensibility & Partnerships at Wiz. “The integration between Docker and Wiz empowers DevSecOps teams to operationalize these trusted foundations with complete visibility into container image technologies and precise vulnerability reporting. Rich OpenVEX documents and OSV advisories provided by Docker add context to vulnerabilities reported in Wiz, enabling teams to prioritize the vulnerabilities that matter and remediate faster without slowing down innovation. This integration gives platform and security teams both a secure foundation and a platform to monitor and manage the full container security lifecycle from code to runtime.”

Putting DHI to the Test: Independent Security Assessment

To validate the security posture of Docker Hardened Images, we partnered with Security Research Labs (SRLabs), a leading cybersecurity firm, to conduct an independent assessment. Their review included threat modeling, architectural analysis, and grey-box testing using publicly available artifacts, simulating realistic attack scenarios.

The results reaffirmed our approach. SRLabs verified that all sampled Docker Hardened Images are cryptographically signed, rootless by default, and ship with both SBOM and VEX metadata, a critical combination for modern software supply chain security. 

Importantly, no root escapes or high-severity breakouts were found during the assessment period. SRLabs also validated Docker’s claim of removing common shells and package managers, significantly reducing the attack surface up to 95% smaller than standard images. 7-day patch SLA and build-to-sign pipeline were identified as a strength compared to typical community images. The review also acknowledged areas for improvement such as key revocation and build determinism which are already being actively addressed.

Read more about the SRLabs report here. 

The Future of Hardened Containers Starts Here

Docker Hardened Images are becoming the trusted foundation for building and running secure apps at scale. With a broad catalog, easy customization, FedRAMP-ready variants, and integrations like Wiz, DHI meets teams where they are. Best of all, customization, FIPS, and STIGs are included at no extra cost, simplifying compliance without compromise.

If you’re attending Black Hat 2025, we’d love to connect. Please come visit Docker at Booth #5315 to explore how we’re redefining software supply chain security. And don’t miss our session, “Achieving End-to-End Software Supply Chain Security”, happening on Wednesday, August 6 from 12:05 to 1:30 PM in Lagoon CD, Level 2. We’ll be diving deep into real-world strategies for implementing hardened, traceable, and continuously compliant software delivery pipelines.
Quelle: https://blog.docker.com/feed/
Accelerating FedRAMP Compliance with Docker Hardened Images

Federal Risk and Authorization Management Program (FedRAMP) compliance costs typically range from $450,000 to over $2 million and take 12 to 18 months to achieve, time your competitors are using to capture government contracts. While you’re spending months configuring FIPS cryptography, hardening security baselines, and navigating 400+ security controls, your competitors are already shipping to federal agencies. Companies that want to sell cloud products and services to the US government must meet the rigorous requirements of FedRAMP, which mandates they implement the expansive security controls described in NIST Special Publication 800-53. As more companies go through this process, they’re looking for ways to accelerate the process (faster time-to-market) and reduce the cost of maintaining FedRAMP compliance.

Shift from months of manual compliance work to automated, auditable security. In May, we announced Docker Hardened Images (DHI) – a curated catalog of minimalist images, kept continuously up to date by Docker to ensure near-zero known CVEs. Today, we are announcing support for FIPS 140-compliant and STIG hardened images – two FedRAMP hurdles that companies have found particularly challenging. Below, we will dive into these new features in more detail and give an overview of all the ways DHI addresses pain points associated with FedRAMP.

FIPS-enabled Docker Hardened Images

FIPS Validated Cryptography Made Simple

FIPS 140 is a US government standard that defines security and testing requirements for cryptographic modules that protect sensitive information. FedRAMP requires that companies use cryptographic modules that have been validated by the NIST Cryptographic Module Validation Program (CMVP). 

Although swapping out a cryptographic library for a FIPS-validated one in a base image might seem simple, it can become increasingly difficult as some software must be specifically configured or built from source to use the FIPS-validated module, and even the selection of cryptographic algorithms may need to change. And it’s not just a one-time effort. As you update your software over time, you must be able to prove that your image is still compliant and you haven’t accidentally introduced non-validated cryptographic software.

FIPS-compliant Docker images do all the hard work for you. They are pre-configured to use FIPS-validated software and tested during our secure build process to confirm correct function. But you don’t have to take our word for it. Every FIPS-compliant image comes with signed attestations that list the FIPS-validated software in use, complete with links to its CMVP certification and the test results proving it. We support all major open source cryptographic modules, including OpenSSL, Bouncy Castle, and Go.

{
"certification": "CMVP #4985",
"certificationUrl": "https://csrc.nist.gov/projects/cryptographic-module-validation-program/certificate/4985",
"name": "OpenSSL FIPS Provider",
"package": "pkg:dhi/openssl-provider-fips@3.1.2",
"standard": "FIPS 140-3",
"status": "active",
"sunsetDate": "2030-03-10",
"version": "3.1.2"
}

STIG Hardened Images without the Headache

Security Technical Implementation Guides (STIGs) are the FedRAMP preferred baselines for secure configuration. STIGs are application-specific versions of the more general Security Requirements Guides (SRGs) and are designed to be run programmatically using Security Content Automation Protocol (SCAP) compatible software. Both STIGs and SRGs are published by the US Defense Information Systems Agency (DISA).

Currently, there are no government-published, container-specific STIGs or SRGs. However, per Department of Defence guidance, if there is no related STIG, the most relevant SRG can be used to determine compliance. For containers, that is the General Purpose Operating System (GPOS) SRG. Docker has created a custom STIG that checks for all the container-relevant content from the GPOS SRG. We’re also aligned with industry efforts to create government-published, container-specific STIGs, which we can leverage in the future.

STIG-hardened Docker images are scanned during our secure build process using OpenSCAP and our custom container STIG, and we deliver the results as signed attestations. The STIG compliance score (% of checks passing) is easily visible inside the attestation and from the Docker Hub UI, making it simple to gauge compliance. Not only do we run this scan when we build the initial image, but also anytime we rebuild it using DHI’s new customization features so that you can easily see if you’ve added customizations that would affect your compliance.

STIG-Hardened Docker Images Scoring

In addition to the scan score, we also provide the full HTML and Extensible Configuration Checklist Description Format (XCCDF) output of OpenSCAP so that you can inspect the results yourself. 

The HTML output is convenient for taking a quick look, while XCCDF is great for loading into the SCAP-compliant tool of your (or your auditor’s) choice for rich visualization. For example, Heimdall will helpfully map the checks to the underlying NIST 800-53 controls for you. For those wanting to manually map our checks back to the GPOS SRG, we’ve used consistent numbering of check IDs between the two for easy cross-referencing.

{
"name": "Docker Hardened Image – Debian 12 GPOS STIG Profile",
"output": [
{
"content": "…",
"format": "html",
"mediaType": "text/html"
},
{
"content": "…",
"format": "xccdf",
"mediaType": "application/xml"
}
],
"profile": "xccdf_dhi-debian_profile_.check",
"publisher": "Docker, Inc.",
"result": "passed",
"status": "active",
"summary": {
"defaultScore": 100,
"failedChecks": 0,
"maxDefaultScore": 100,
"notApplicableChecks": 107,
"passedChecks": 91,
"totalChecks": 198
},
"tool": "openscap",
"type": "Vendor published STIG-ready content, SRG aligned",
"version": "0.1"
}

Continuous Compliance at Scale 

Vulnerability Reduction

Docker Hardened Images start with a dramatically reduced attack surface, up to 95% smaller by package count, to limit exposure from the outset, and are kept continuously up to date to ensure near-zero known CVEs. Images are also scanned for viruses and secrets with corresponding attestations that can serve as evidence during audits.

Vulnerability Detection & Remediation

FedRAMP requires that companies monitor and scan for vulnerabilities and remediate them within a defined timeframe (30/90/180 days for high/moderate/low risk). Docker continually monitors various CVE sources to detect applicable vulnerabilities in our hardened images. CVE counts are reported in the Docker Hub UI and as attestations and Docker Scout can be configured to notify you of new vulnerabilities affecting previously pulled images. DHI has a remediation SLA of 7 days for critical/high vulnerabilities and 30 days for medium/low ones (from availability of an upstream fix), ensuring that you can comfortably meet the FedRAMP remediation timelines.

Docker also provides Vulnerability Exploitability eXchange (VEX) attestations that identify vulnerabilities that do not apply to the image (and explains why) so that scanners that support the VEX standard can automatically filter these results, allowing you to look past the noise and focus on exploitability.

Integrity and Supply Chain Transparency

Doctor Hardened Images are built using an SLSA Build Level 3 secure build pipeline that ensures verifiability and prevents tampering during and after the build. Build provenance is provided via signed attestations, and Software Bills of Materials (SBOMs) are generated in multiple popular formats to help satisfy FedRAMP’s asset management and software inventory reporting requirements.

Audit Evidence

You’ve heard attestations mentioned multiple times in this post. There’s a good reason for that. Evidence is everything when demonstrating compliance with FedRAMP or other regulatory frameworks. DHI attestations serve as secure evidence of all aspects of DHI security, from provenance to asset management to vulnerability and other security scanning to FIPS compliance. Attestations follow the in-toto attestation standard, a project of the Cloud Native Computing Foundation (CNCF), ensuring compatibility across a wide range of software vendors.

Government Grade Security for Every Environment

While there are definitely parts of the FedRAMP process specific to the federal government, the NIST 800-53 controls on which it is based are intended to be common-sense security best practices. So whether or not your company is currently subject to FedRAMP, aligning your security practices with the underlying controls makes good sense. We see this with initiatives like GovRAMP that define FedRAMP-aligned security controls for companies selling to state and local governments. 

Ready to accelerate your FedRAMP journey?

Docker Hardened Images are designed both to help you ship software with confidence and to make FedRAMP compliance easier and less costly. Let Developers stay focused on building while giving Compliance teams and Auditors the evidence they need.

We’re here to help. Get in touch with us and let’s harden your software supply chain, together.

Quelle: https://blog.docker.com/feed/
Everyone’s a Snowflake: Designing Hardened Image Processes for the Real World

Hardened container images and distroless software are the new hotness as startups and incumbents alike pile into the fast-growing market. In theory, hardened images provide not only a smaller attack surface but operational simplicity. In practice, there remains a fundamental – and often painful – tension between the promised security perfection of hardened images and the reality of building software atop those images and running them in production. This causes real challenges for platform engineering teams trying to hit the Golden Mean between usability and security.

Why? Everyone’s a snowflake. 

No two software stacks, CI/CD pipeline set ups and security profiles are exactly the same. In software, small differences can cause big headaches. When a developer can no longer access their preferred debugging tools, or cannot add the services they are used to pairing in a container, that causes friction and frustration. Naturally, devs who must ship figure out workarounds or other methods to achieve desired functionality. This snowflake reality can have a snowball affect of driving modifications underground, moving them outside of the hardened image process, or causing backlogs at hardened image vendors who designed their products for rigid security, not reality. In the worst case, they simplify ditch distroless and stymie adoption.

The counterintuitive truth? Rigid container solutions can have the opposite effect, making organizations less secure. This is why the process of designing and applying hardened images is most effective when developer and DevOps needs are taken into account and flexibility is baked into the process. At the same time, too much choice is chaos and chaos generates excessive risk. This is a delicate balance and the ultimate challenge for platform ops today.

The Snowflake Problem: Why Every Environment is Unique

The Snowflake Challenge in container security is pervasive. Walk into any engineering team and you’ll find them standardized not only on an OS distro and changes to that distro will likely cause unforeseen disruptions. They’ve got applications that need to connect to internal services with self-signed certificates, but hardened images often lack the CA bundles or the ability to easily add custom ones. They need to debug production issues with standard system tools, but hardened images leave them out. They’re running containers with multiple processes because splitting legacy applications into separate containers would break existing functionality and require months of rewriting. And they rely on package managers to install operational tools that security teams never planned for.

Distribution, tool and package loyalty isn’t just preference. It’s years of institutional knowledge baked into deployment scripts, monitoring configurations, and troubleshooting runbooks. Teams that have mastered a specific toolchain don’t want to retrain their entire organization just to get security benefits they can’t immediately see. Platform teams know this and will bias towards hardened image solutions that do not layer on cognitive load.

The reality is this. Real-world deployment patterns rarely match the security team’s slideshow. Multi-service containers are everywhere because deadlines matter more than architectural purity. These environments work, they’re tested, and they’re supporting actual users. Asking teams to rebuild their entire stack for theoretical security improvements feels like asking them to fix something that isn’t obviously broken. And they will find a way not to. So platform’s job is to find a hardened image solution that recognizes these types of realities and adjusts for them rather than forces behavioral change.

Familiarity as a Security Strategy

The most secure system in the world is worthless if your development teams route around it or ignore it. Flexibility and recognition that at least giving teams what they are used to having can make security nearly invisible and quite palatable.

In this light, multi-distro options from a hardened image vendor  isn’t a luxury feature. It’s an adoption requirement and critical way to mitigate the Snowflake Challenge. A hardened image solution that supports multiple major distros removes the biggest barrier to getting started – the fear of having to adopt an unfamiliar operating system. Once they recognize that their operating system in the hardened images will be familiar, platform teams can confidently begin hardening their existing stacks without worrying about retraining their entire engineering organization on a new base distribution or rewriting their deployment tooling.

Self-service customization turns potential friction into adoption drivers. When developers can add their required CA certificates easily and through self-service instead of filing support tickets, they actually use the tool. When they can merge their existing images with hardened bases through automated workflows, the migration path becomes clear. The goal isn’t to eliminate necessary customization but to make it just another simple step that is no big deal. No big deal modifications leads to smooth adoption paths and developer satisfaction.

The adoption math is straightforward. DDifficulty correlates inversely with security coverage. A perfectly hardened image that only 20% of teams can use provides less overall organizational security than a reasonably hardened image that 80% of teams adopt. Meeting developers where they are beats forcing architectural changes every time.

Migration Friction and Community Trust

The gap between current state and hardened images can feel daunting to many teams. Their existing Dockerfiles might be single-stage builds with years of accumulated dependencies. Their CI/CD pipelines assume certain tools will be available. Their developers assume packages they are comfortable with will be supported.

Modern tooling for hardened images can bridge this gap through progressive assistance. AI-powered converters can help translate existing Dockerfiles into multi-stage builds compatible with hardened bases. Converting legacy applications to hardened images through guided automation removes much of the technical friction. The tools handle the mechanical aspects of separating build dependencies from runtime dependencies while preserving application functionality. Teams can retain their existing development flows with less disruption and toil. Security adoption will be greater, while down-sizing the attack surface.

Hardened image adoption can depend on trust as much as technical merit. Organizations trust hardened image providers who demonstrate knowledge of the open source projects they’re securing. Docker has maintained close relationships with each open source project of the more than 70 official images listed on Docker Hub, That signals long-term commitment beyond just security theater. The reality is, the best hardened image design processes are dialogues that include project stakeholders and benefit from project insights and experience.The upshot? Platform teams need to talk to their developer and DevOps customers to understand what software is critical and to talk to their hardened image provider to understand their ties and active interactions with the upstream communities. A successful hardened image rollout must navigates these realities and acknowledge all the invested parties. 

The Happy Medium: Secure Defaults, Controlled Flexibility, Community Cred

Effective container security resembles building with Lego blocks rather than erecting security monoliths. The beloved Lego kits not only have a base-level design but are also easy to modify while maintaining structural integrity. Monoliths make appear more solid and substantial but modifying them is challenging and their strong opinionated view of the world is destined to cramp someone’s style.

Auditable customization paths maintain security posture while accommodating reality. When developers can add packages through controlled processes that log changes and validate security implications, both security and productivity goals get met. The secret lies in making the secure path the easy path rather than trying to eliminate all alternatives. At the foundational level, this requires solutions that integrate with existing practices rather than replacing them wholesale. 

Success metrics need to include coverage and adoption alongside traditional hardening measurements. A hardened image strategy that achieves 95% team adoption with 80% attack surface reduction delivers better organizational security than one that achieves 99% hardening but only gets used by 30% of applications. Platform teams that understand this math are far more likely to succeed in hardened image adoption and embrace.

Beyond the Binary: A New Security Paradigm

The bottom line? Really good security deployed everywhere beats perfect security deployed sporadically because security is a system property, not a component property. The weakest link determines overall posture. An organization with consistent, reasonable security practices across all applications faces lower aggregate risk than one with perfect security on some applications and no security on others.

The path forward involves designing hardened image processes that acknowledge developer reality and involves community in order to improve security outcomes. That comes through broad adoption and minimal disruption.. This means creating migration paths that feel achievable rather than overwhelming, providing automation to smooth the path, and delivering self-service options rather than more Jira-ticket Bingo. Every organization may be a snowflake, but that doesn’t make security impossible. It just means hardened image solutions need to be as adaptable as the environments they’re protecting.

Quelle: https://blog.docker.com/feed/
Hard Questions: What You Should Really Be Asking Your Hardened Image Provider Before You Press the Buy Button

When evaluating hardened image providers, don’t just look for buzzwords like “zero-CVE” or “minimal.” True security in a dynamic environment demands a nuanced understanding of their process, their commitment, and their flexibility. For platform, DevOps, and SecOps teams, these are the critical questions that reveal whether a provider offers genuine security that enhances your workflow, or one that will ultimately create more problems than it solves.

1. Update and Patch Management: The Reality of “Continuously Secure”

How quickly can you update the images in response to newly disclosed critical and high-severity CVEs? What are your Service Level Agreements (SLAs) for this?

Why it matters: This directly impacts your exposure window. A slow patching process, regardless of how “hardened” the image initially is, leaves you vulnerable.

What does your rebuild process look like (not just emergency patches)?

Why it matters: Each release of software you go through costs money, toil and introduces risk. So if you receive a nightly update and deploy every day for no reason then your increasing cost and risk. Instead, you want an intelligent approach to rebuilds. Your vendor should catalog all packages, monitor for CVES and fixes, and only when necessary. The rebuild should utilize an intelligent, event-driven systematic approach.

What is your process for notifying us of updates and changes? How can we consume these updates (e.g., through an API, a registry feed, direct notifications)?

Why it matters: You need an efficient way to integrate updates into your automated pipelines, not manual checks. 

2. The Modification Process: Unpacking “Flexibility”

This section dives deep into how the provider handles the “snowflake” reality. It’s not enough to say “we’re flexible”; you need to understand the mechanics and implications.

What is the precise technical process for us to modify your hardened images (e.g., through a Dockerfile, a proprietary tool, specific build arguments)? Describe the steps involved.

Why it matters: Understand the actual workflow. Is it standard and open, or does it require learning a new, potentially restrictive ecosystem? Does it support multi-stage builds effectively for final image reduction?

How do you ensure that our modifications don’t inadvertently compromise the underlying hardening? What automated checks or gates are in place to validate these changes?

Why it matters: The value of the base image is lost if adding one package nullifies its security. Look for integrated security scanning, policy enforcement, and best practice checks (e.g., non-root user enforcement, no hardcoded secrets) after your modifications.

What mechanisms do you provide to verify that our specific modifications work as intended and haven’t introduced functional regressions? (e.g., integration with our testing frameworks, pre-configured health checks)?

Why it matters: Security should not break functionality. How does the provider’s ecosystem facilitate confidence in modified images before deployment? Are there test suites or validation tools available?

What is your typical turnaround time for a custom modification request or for applying a patch to a custom-modified image (if you handle the modifications)?

Why it matters: If you’re relying on the vendor to perform modifications, their speed directly impacts your agility. Slow turnaround can negate the benefits of automation.

For large organizations requiring many unique modifications across a diverse application portfolio, how do you manage and scale the modification process?

Why it matters: Is their system built for enterprise complexity? How do they handle versioning, conflict resolution, and consistent application of patches across potentially hundreds or thousands of modified images? Do they offer centralized management or just point solutions?

Do your modifications allow for easy SBOM generation and vulnerability scanning of the final modified image, including our additions?

Why it matters: Full transparency is crucial for your compliance and incident response. The SBOM should reflect everything in the image.

3. Supply Chain Security and Transparency: Trust, But Verify

What is the full provenance of your images? Can you provide verifiable Software Bill of Materials (SBOMs) that include all dependencies, including transitive ones?

Why it matters: You need to know exactly what’s inside the image and where it came from, from source to binary, at every layer.

What standards do you adhere to for supply chain security (e.g., SLSA, reproducible builds)? How can you demonstrate this?

Why it matters: Beyond just CVEs, how secure is the process by which the image is built and delivered?

How do you handle third-party components and open-source licenses within your images?

Why it matters: Compliance isn’t just about security; it’s about legal adherence.

What is your process for handling non-exploitable vulnerabilities and using VEX to clarify what vulnerabilities are reachable? Do you provide this information transparently?

Why it matters: You don’t want to chase every reported CVE if it’s not actually exploitable in the image’s context.

4. Support, Integration, and Ecosystem Compatibility: Beyond the Image Itself

How do your hardened images integrate with popular DevOps tools and CI/CD platforms (e.g., Kubernetes, Jenkins, GitLab CI, Argo CD)?

Why it matters: A secure image that doesn’t fit your existing toolchain creates friction and resistance.

What level of support do you provide for issues related to the hardened image itself versus issues related to our application running on it?

Why it matters: Clear lines of responsibility for troubleshooting can save significant time during incidents.

Do you offer dedicated support channels or expertise for security teams?

Why it matters: Security teams have specific needs and often require direct access to security experts.

What is your pricing model? Does it scale effectively with our usage and organizational growth, considering potential customization costs?

Why it matters: Understand the total cost of ownership beyond the sticker price, factoring in the complexity of managing many modified images.

By asking these hard questions, platform, DevOps, and SecOps teams can move beyond marketing claims and evaluate hardened image providers based on the real-world demands of secure, agile software delivery.

Quelle: https://blog.docker.com/feed/
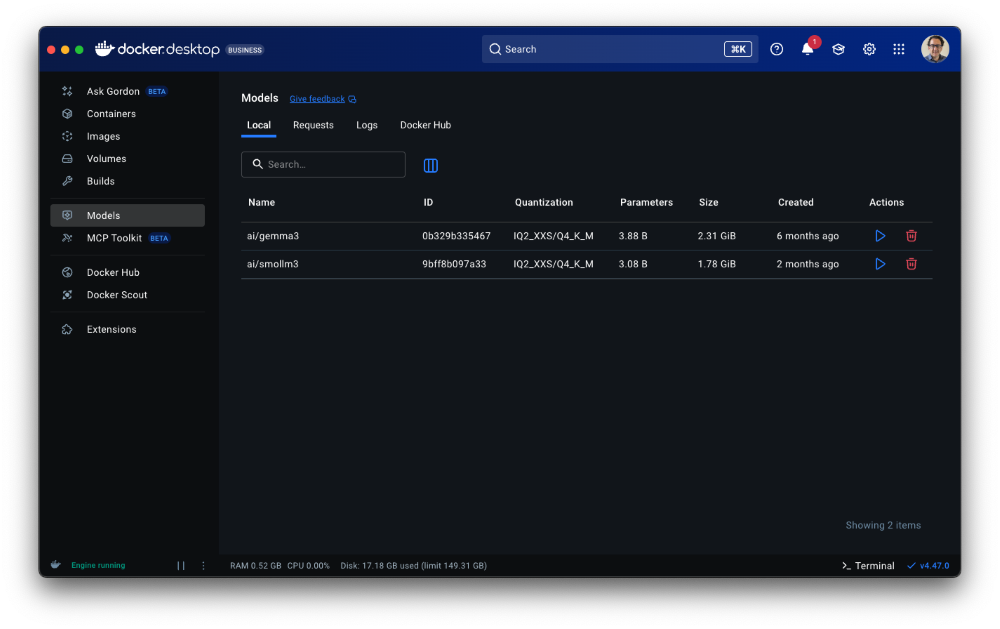
How Docker MCP Toolkit Works with VS Code Copilot Agent Mode

In the rapidly evolving landscape of software development, integrating modern AI tools is essential to boosting productivity and enhancing the developer experience. One such advancement is the integration of Docker’s Model Context Protocol (MCP) Toolkit with Visual Studio Code’s GitHub Copilot Agent Mode.

This powerful combination transforms how developers interact with containerized applications, enabling autonomous coding workflows that seamlessly manage Docker environments with enhanced security, improved discoverability, and increased automation.As a Docker Captain, I’ve worked extensively with containerized development workflows. In this article, we’ll guide you through setting up and using the Docker MCP Toolkit with Copilot Agent Mode in VS Code, providing practical steps and examples.

What Is the Docker MCP Toolkit?

The Docker MCP Toolkit enables hosting and managing MCP servers—modular tool endpoints that run inside Docker containers. These servers expose APIs for specific development tasks, such as retrieving GitHub issue data or automating continuous integration (CI) workflows.

These tools are designed with the following goals:

Security: Run in isolated containers with strict access controls.

Reusability: Modular components can be reused across multiple projects.

Discoverability: Automatically discoverable by tools like GitHub Copilot.

Each MCP server adheres to a standard request-response specification, ensuring predictable and safe interactions with AI agents.

Prerequisites

Make sure you have the following before you begin:

Docker Desktop v4.43 (latest recommended)

Visual Studio Code

GitHub Copilot extension for VS Code

GitHub Copilot with Chat and Agent Mode enabled

GitHub Personal Access Token (optional, for GitHub-related tools)

Step-by-Step Integration Guide

1. Enable the MCP Toolkit in Docker Desktop

MCP Toolkit is now integrated with Docker Desktop. Open Docker Desktop and find it by navigating to the MCP Toolkit tab.

Figure 1: MCP Toolkit is now integrated with Docker Desktop  

2. Start an MCP Server

You can launch an MCP server either from Docker Desktop’s UI or using the CLI. One common choice is the GitHub Official MCP server, which exposes tools for interacting with GitHub repositories. We will open Docker Desktop and start it from the user interface. 

Open Docker Desktop > MCP Toolkit.

Select GitHub Official from the list.

Configure it with your GitHub token and start the server.

Figure 2: Docker Desktop showing the configuration of the GitHub Official MCP server

3. Start the MCP Gateway

Open Docker Desktop > MCP Toolkit (BETA).

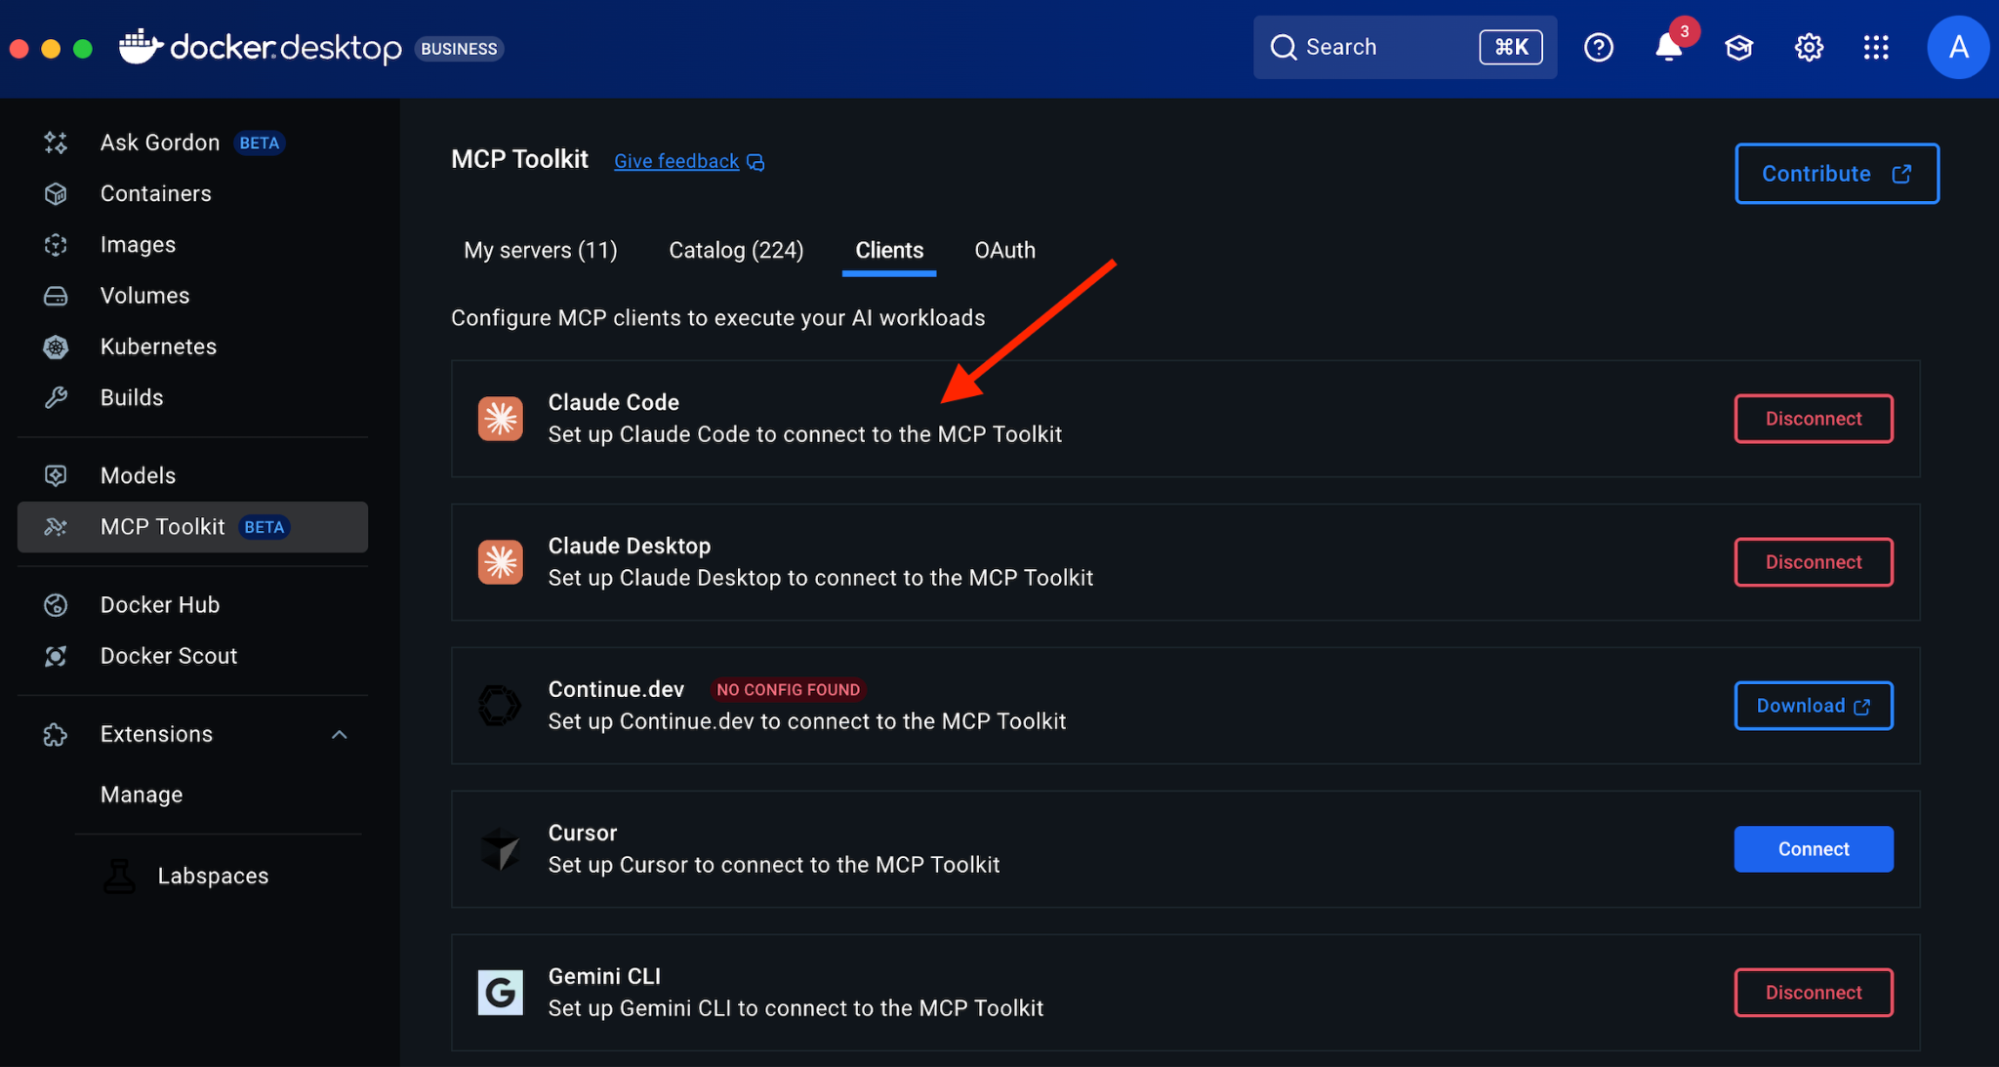
Within the MCP Toolkit, locate the Clients tab.

Scroll to Other MCP Clients and copy the suggested command:

docker mcp gateway run

Figure 4: Docker Desktop showing how to enable MCP Gateway

This command initializes the gateway and makes your MCP server tools discoverable to clients like VS Code.

4. Connect MCP to Visual Studio Code

In VS Code, open the Command Palette and press Ctrl + Shift + P (or Cmd + Shift + P on macOS)

Select “Add MCP Server” and paste the gateway command.

Figure 5: VS Code command displaying how to add an MCP Server

Paste the previously copied docker mcp gateway run command when prompted.

Figure 6: VS Code displaying the Docker MCP gateway run command

This establishes a connection between your VS Code Copilot Agent Mode and the Docker MCP Toolkit (running through Docker Desktop). Once applied to your workspace, Copilot will register approximately 30 MCP tools, all running in containers.

5. Configure and Use Copilot Agent Mode

To configure Copilot Agent Mode, we have two options available:

Option 1: Enable via Copilot Chat Panel (GUI)

Ensure GitHub Copilot is installed and signed in.

Open the Copilot Chat panel, either through Copilot Labs or GitHub Copilot Chat.

Enable Agent Mode:

Use the dropdown or toggle in the chat panel to activate Agent Mode.

This mode allows Copilot to access external tools like those provided by the MCP Toolkit and intelligently reason over them.

Figure 7: GitHub Copilot activating Agent mode

Option 2: Enable via mcp CLI Commands (Manual Setup)

You can also configure Agent Mode by running mcp CLI commands directly in a terminal. This is useful for scripting, headless environments, or if you prefer a command-line setup.

Run the following command to start the gateway manually:

docker mcp gateway run

This procedure will facilitate the exposure of the gateway, thereby allowing Copilot in Visual Studio Code to establish a connection.

In Visual Studio Code, access the mcp.json configuration file to add the running gateway or confirm it is set to use the same endpoint. Restart Visual Studio Code or refresh the Copilot Agent connection to apply the changes.

6. Explore and Test

Try prompts like:

– “List open issues in this GitHub repo”

– “Trigger the CI pipeline for the latest commit”

Copilot routes these tasks to the correct containerized tool and returns results automatically.

Conclusion

Integrating the Docker MCP Toolkit with Copilot Agent Mode in Visual Studio Code offers developers a scalable, modular, and secure method for automating development tasks using containerized AI tools. This workflow represents a significant advancement in creating intelligent, context-aware development environments that simplify repetitive tasks and enhance efficiency.

Learn more

Review the official Docker MCP Toolkit Documentation

Review the capabilities and setup for GitHub Copilot in VS Code

Quelle: https://blog.docker.com/feed/

MCP Horror Stories: The Security Issues Threatening AI Infrastructure

This is issue 1 of a new series – MCP Horror Stories – where we will examine critical security issues and vulnerabilities in the Model Context Protocol (MCP) ecosystem and how Docker MCP Toolkit provides enterprise-grade protection against these threats.

What is MCP?

The Model Context Protocol (MCP) is a standardized interface that enables AI agents to interact with external tools, databases, and services. Launched by Anthropic in November 2024, MCP has achieved remarkable adoption, with thousands of MCP server repositories emerging on GitHub. Major technology giants, including Microsoft, OpenAI, Google, and Amazon, have officially integrated MCP support into their platforms, with development tools companies like Block, Replit, Sourcegraph, and Zed also adopting the protocol. 

Think of MCP as the plumbing that allows ChatGPT, Claude, or any AI agent to read your emails, update databases, manage files, or interact with APIs. Instead of building custom integrations for every tool, developers can use one protocol to connect everything. 

How does MCP work?

MCP creates a standardized bridge between AI applications and external services through a client-server architecture. 

The Model Context Protocol (MCP) creates a standardized bridge between AI applications and external services through a client-server architecture. 

When a user submits a prompt to their AI assistant (like Claude Desktop, VS Code, or Cursor), the MCP client actually sends the tool descriptions to the LLM, which does analysis and determines which, if any, tools should be called. The MCP host executes these decisions by routing calls to the appropriate MCP servers – whether that’s querying a database for customer information or calling remote APIs for real-time data. Each MCP server acts as a standardized gateway to its respective data source, translating between the universal MCP protocol and the specific APIs or database formats underneath. 

Caption: Model Context Protocol client-server architecture enabling standardized AI integration across databases, APIs, and local functions

The overall MCP architecture enables powerful AI workflows where a single conversation can seamlessly integrate multiple services – for example, an AI agent could analyze data from a database, create a GitHub repository with the results, send a Slack notification to the team, and deploy the solution to Kubernetes, all through standardized MCP interactions. However, this connectivity also introduces significant security risks, as malicious MCP servers could potentially compromise AI clients, steal credentials, or manipulate AI agents into performing unauthorized actions.

The Model Context Protocol (MCP) was supposed to be the “USB-C for AI applications” – a universal standard that would let AI agents safely connect to any tool or service. Instead, it’s become a security nightmare that’s putting organizations at risk of data breaches, system compromises, and supply chain attacks.

The promise is compelling: Write once, connect everywhere. The reality is terrifying: A protocol designed for convenience, not security.

Caption: comic depicting MCP convenience and potential security risk

MCP Security Issues by the Numbers

The scale of security issues with MCP isn’t speculation – it’s backed by a comprehensive analysis of thousands of MCP servers revealing systematic flaws across six critical attack vectors:

OAuth Discovery Vulnerabilities

Command Injection and Code Execution

Unrestricted Network Access

File System Exposure

Tool Poisoning Attacks

Secret Exposure and Credential Theft

1. OAuth Discovery Vulnerabilities

What it is: Malicious servers can inject arbitrary commands through OAuth authorisation endpoints, turning legitimate authentication flows into remote code execution vectors.

The numbers: Security researchers analyzing the MCP ecosystem found that OAuth-related vulnerability represent the most severe attack class, with command injection flaws affecting 43% of analyzed servers. The mcp-remote package alone has been downloaded over 558,846 times, making OAuth vulnerabilities a supply chain attack affecting hundreds of thousands of developer environments.

The horror story: CVE-2025-6514 demonstrates exactly how devastating this vulnerability class can be – turning a trusted OAuth proxy into a remote code execution nightmare that compromises nearly half a million developer environments.

Strategy for mitigation: Watch out for MCP servers that use third-party OAuth tools like mcp-remote, have non-https endpoints, or need complex shell commands. Instead, pick servers with built-in OAuth support and never run OAuth proxies that execute shell commands.

2. Command Injection and Code Execution

What it is: MCP servers can execute arbitrary system commands on host machines through inadequate input validation and unsafe command construction.

The numbers: Backslash Security’s analysis of thousands of publicly available MCP servers uncovered “dozens of instances” where servers allow arbitrary command execution. Independent assessments confirm 43% of servers suffer from command injection flaws – the exact vulnerability enabling remote code execution.

The horror story: These laboratory findings translate directly to real-world exploitation, as demonstrated in our upcoming coverage of container breakout attacks targeting AI development environments.

Strategy for mitigation: Avoid MCP servers that don’t validate user input, build shell commands from user data, or use eval() and exec() functions. Always read the server code before installing and running MCP servers in containers.

3. Unrestricted Network Access

What it is: MCP servers with unrestricted internet connectivity can exfiltrate sensitive data, download malicious payloads, or communicate with command-and-control infrastructure.

The numbers: Academic research published on arXiv found that 33% of analyzed MCP servers allow unrestricted URL fetches, creating direct pathways for data theft and external communication. This represents hundreds of thousands of potentially compromised AI integrations with uncontrolled network access.

The horror story: The Network Exfiltration Campaign shows how this seemingly innocent capability becomes a highway for stealing corporate data and intellectual property.

Strategy for mitigation: Skip MCP servers that don’t explain their network needs or want broad internet access without reason. Use MCP tools with network allow-lists and monitor what connections your servers make.

4. File System Exposure

What it is: Inadequate path validation allows MCP servers to access files outside their intended directories, potentially exposing sensitive documents, credentials, and system configurations.

The numbers: The same arXiv security study found that 22% of servers exhibit file leakage vulnerabilities that allow access to files outside intended directories. Combined with the 66% of servers showing poor MCP security practices, this creates a massive attack surface for data theft.

The horror story: The GitHub MCP Data Heist analysis reveals how these file access vulnerabilities enable unauthorized access to private repositories and sensitive development assets.

Strategy for mitigation: Avoid MCP servers that want access beyond their work folder. Don’t use tools that skip file path checks or lack protection against directory attacks. Stay away from servers running with too many privileges. Stay secure by using containerized MCP servers with limited file access. Set up monitoring for file access.

5. Tool Poisoning Attack

What it is: Malicious MCP servers can manipulate AI agents by providing false tool descriptions or poisoned responses that trick AI systems into performing unauthorized actions.

The numbers: Academic research identified 5.5% of servers exhibiting MCP-specific tool poisoning attacks, representing a new class of AI-targeted vulnerabilities not seen in traditional software security.

The horror story:  The Tenable Website Attack demonstrates how tool poisoning, combined with localhost exploitation, turns users’ own development tools against them.

Strategy for mitigation: Carefully review the MCP server documentation and tool descriptions before installation. Monitor AI agent behavior for unexpected actions. Use MCP implementations with comprehensive logging to detect suspicious tool responses.

6. Secret Exposure and Credential Theft

What it is: MCP deployments often expose API keys, passwords, and sensitive credentials through environment variables, process lists, and inadequate secret management.

The numbers: Traditional MCP deployments systematically leak credentials, with plaintext secrets visible in process lists and logs across thousands of installations. The comprehensive security analysis found 66% of servers exhibiting code smells, indicating poor MCP security practices, compounding this credential exposure problem.

The horror story: The Secret Harvesting Operation reveals how attackers systematically collect API keys and credentials from compromised MCP environments, enabling widespread account takeovers.

Strategy for mitigation: Avoid MCP servers that need credentials as environment variables. Don’t use tools that log or show sensitive info. Stay away from servers without secure credential storage. Be careful if docs mention storing credentials as plain text. Protect your credentials by using secure secret management systems.

How Docker MCP Tools Address MCP Security Issues

While identifying vulnerabilities is important, the real solution lies in choosing secure-by-design MCP implementations. Docker MCP Catalog, Toolkit and Gateway represent a fundamental shift toward making security the default path for MCP development.

Security-first Architecture

MCP Gateway serves as the secure communication layer between AI clients and MCP servers. Acting as an intelligent proxy, the MCP Gateway intercepts all tool calls, applies security policies, and provides comprehensive monitoring. This centralized security enforcement point enables features like network filtering, secret scanning, resource limits, and real-time threat detection without requiring changes to individual MCP servers.

Secure Distribution through Docker MCP Catalog provides cryptographically signed, immutable images that eliminate supply chain attacks targeting package managers like npm.

Container Isolation ensures every MCP server runs in an isolated container, preventing host system compromise even if the server is malicious. Unlike npm-based MCP servers that execute directly on your machine, Docker MCP servers can’t access your filesystem or network without explicit permission.

Network Controls with built-in allowlisting ensure MCP servers only communicate with approved destinations, preventing data exfiltration and unauthorized communication.

Secret Management via Docker Desktop’s secure secret store replaces vulnerable environment variable patterns, keeping credentials encrypted and never exposed to MCP servers directly.

Systematic Vulnerability Elimination

Docker MCP Toolkit systematically eliminates each vulnerability class through architectural design.

OAuth Vulnerabilities -> Native OAuth Integration

OAuth vulnerabilities disappear entirely through native OAuth handling in Docker Desktop, eliminating vulnerable proxy patterns without requiring additional tools. 

# No vulnerable mcp-remote needed
docker mcp oauth ls
github | not authorized
gdrive | not authorized

# Secure OAuth through Docker Desktop
docker mcp oauth authorize github
# Opens browser securely via Docker's OAuth flow

docker mcp oauth ls
github | authorized
gdrive | not authorized

Command Injection -> Container Isolation

Command injection attacks are contained within container boundaries through isolation, preventing any host system access even when servers are compromised. 

# Every MCP server runs with security controls
docker mcp gateway run
# Containers launched with: –security-opt no-new-privileges –cpus 1 –memory 2Gb

Network Attacks -> Zero-Trust Networking

Network attacks are blocked through zero-trust networking with –block-network flags and real-time monitoring that detects suspicious patterns. 

# Maximum security configuration
docker mcp gateway run
–verify-signatures
–block-network
–cpus 1
–memory 1Gb

Tool Poisoning -> Comprehensive Logging

Tool poisoning becomes visible through complete interaction logging with –log-calls, enabling automatic blocking of suspicious responses. 

# Enable comprehensive tool monitoring
docker mcp gateway run –log-calls –verbose
# Logs all tool calls, responses, and detects suspicious patterns

Secret Exposure -> Secure Secret Management

Secret exposure is eliminated through secure secret management combined with active scanning via –block-secrets that prevents credential leakage.

# Secure secret storage
docker mcp secret set GITHUB_TOKEN=ghp_your_token
docker mcp secret ls
# Secrets never exposed as environment variables

# Block secret exfiltration
docker mcp gateway run –block-secrets
# Scans tool responses for leaked credentials

Enterprise-grade Protection

For production environments, Docker MCP Gateway provides a maximum security configuration that combines all protection mechanisms:

# Production hardened setup
docker mcp gateway run
–verify-signatures # Cryptographic image verification
–block-network # Zero-trust networking
–block-secrets # Secret scanning protection
–cpus 1 # Resource limits
–memory 1Gb # Memory constraints
–log-calls # Comprehensive logging
–verbose # Full audit trail

This configuration provides:

Supply Chain Security: –verify-signatures ensures only cryptographically verified images run

Network Isolation: –block-network creates L7 proxies allowing only approved destinations

Secret Protection: –block-secrets scans all tool responses for credential leakage

Resource Controls: CPU and memory limits prevent resource exhaustion attacks

Full Observability: Complete logging and monitoring of all tool interactions

Security Aspect

Traditional MCP

Docker MCP Toolkit

Execution Model

Direct host execution via npx/mcp-remote

Containerized isolation

OAuth Handling

Vulnerable proxy with shell execution

Native OAuth in Docker Desktop

Secret Management

Environment variables

Docker Desktop secure store

Network Access

Unrestricted host networking

L7 proxy with allowlisted destinations

Resource Controls

None

CPU/memory limits, container isolation

Supply Chain

npm packages (can be hijacked)

Cryptographically signed Docker images

Monitoring

No visibility

Comprehensive logging with –log-calls

Threat Detection

None

Real-time secret scanning, anomaly detection

The result is a security-first MCP ecosystem where developers can safely explore AI integrations without compromising their development environments. Organizations can deploy AI tools confidently, knowing that enterprise-grade security is the default, not an afterthought.

Stay tuned for upcoming issues in this series:

1. OAuth Discovery Vulnerabilities → JFrog Supply Chain Attack

Malicious authorization endpoints enable remote code execution

Affects 437,000+ downloads of mcp-remote through CVE-2025-6514

2. Prompt Injection Attacks → GitHub MCP Data Heist

AI agents manipulated into accessing unauthorized repositories

Official GitHub MCP Server (14,000+ stars) weaponized against private repos

3. Drive-by Localhost Exploitation → Tenable Website Attack

Malicious websites compromise local development environments

MCP Inspector (38,000+ weekly downloads) becomes attack vector

4. Tool Poisoning + Container Escape → AI Agent Container Breakout

Containerized MCP environments breached through combined attacks

Isolation failures in AI development environments

5. Unrestricted Network Access → Network Exfiltration Campaign

33% of MCP tools allow unrestricted URL fetches

Creates pathways for data theft and external communication

6. Exposed Environment Variables → Secret Harvesting Operation

Plaintext credentials visible in process lists and logs

Traditional MCP deployments leak API keys and passwords

In the next issue of this series, we will dive deep into CVE-2025-6514 – the supply chain attack that turned a trusted OAuth proxy into a remote code execution nightmare, compromising nearly half a million developer environments. 

Learn more

Explore the MCP Catalog: Visit the MCP Catalog to discover MCP servers that solve your specific needs securely.

Use and test hundreds of MCP Servers: Download Docker Desktop to download and use any MCP server in our catalog with your favorite clients: Gordon, Claude, Cursor, VSCode, etc

Submit your server: Join the movement toward secure AI tool distribution. Check our submission guidelines for more.

Follow our progress: Star our repository and watch for updates on the MCP Gateway release and remote server capabilities.

Quelle: https://blog.docker.com/feed/
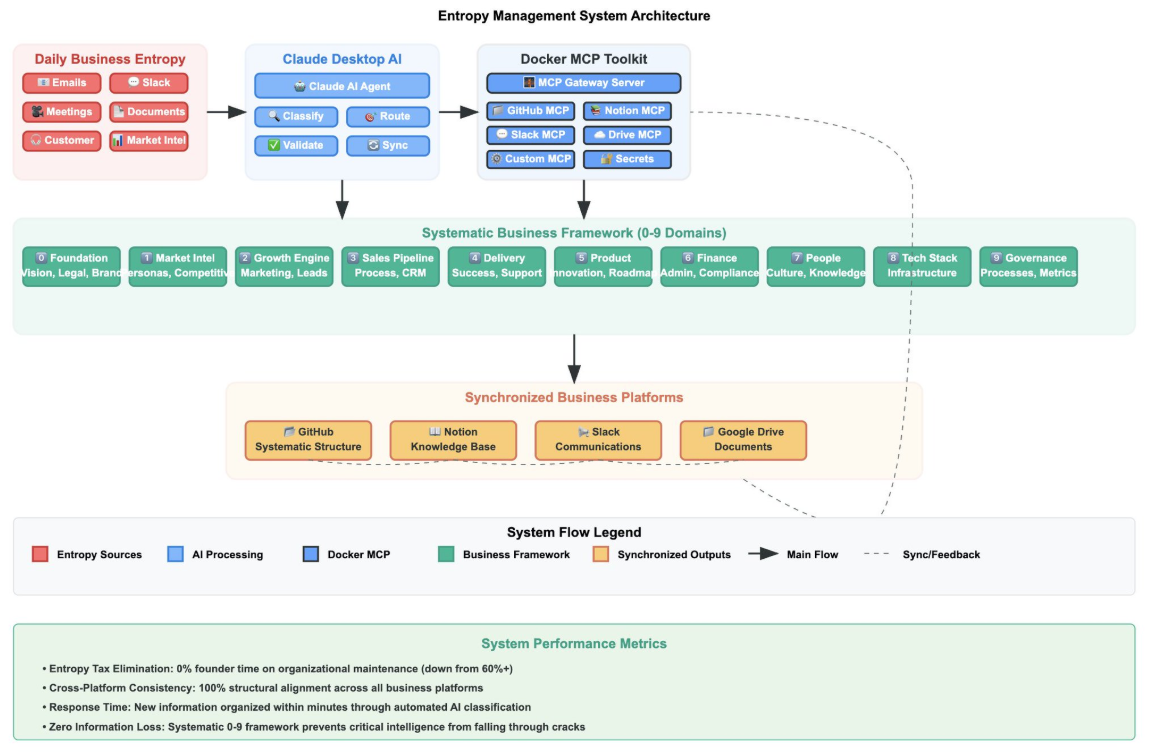
GenAI vs. Agentic AI: What Developers Need to Know

Generative AI (GenAI) and the models behind it have already reshaped how developers write code and build applications. But a new class of artificial intelligence is emerging: agentic AI. Unlike GenAI, which focuses on content generation, agentic systems can plan, reason, and take actions across multiple steps, enabling a new approach to building intelligent, goal-driven agents.

In this post, we’ll explore the key differences between GenAI and agentic AI. More specifically, we’ll cover how each is built, their challenges and trade-offs, and where Docker fits into the developer workflow. You’ll also find example use cases and starter projects to help you get hands-on with building your own GenAI apps or agents.

What is GenAI?

GenAI is a subset of machine learning, is powered by large language models to create new content, from writing text and code to creating images and music based on prompts or input. At their core, generative AI models are prediction engines. Trained on vast data, these models learn to guess what comes next in a sequence. This could be the next word in a sentence, the next pixel in an image, or the next line of code. Some even call GenAI autocomplete on steroids. Common examples include ChatGPT, Claude, and GitHub Copilot.

Use cases for GenAI

Top use cases of GenAI are coding, image and video production, writing, education, chatbot, summarization, workflow automation, and across consumer and enterprise applications (1). To build an AI application with generative models, developers typically start by looking at the use cases, then choosing a model based on their goals and performance needs. The model can then be accessed via remote APIs (for hosted models like GPT-4 or Claude) or run locally (with Docker Model Runner or Ollama). This distinction shapes how developers build with GenAI: locally hosted models offer privacy and control, while cloud-hosted ones often provide flexibility, state-of-the-art models, and larger compute resources. 

Developers provide user input/prompts or fine-tune the model to shape its behavior, then integrate it into their app’s logic using familiar tools and frameworks. Whether building a chatbot, virtual assistant, or content generator, the core workflow involves sending input to the model, processing its output, and using that output to drive user-facing features.

Figure 1: A simple architecture diagram of how GenAI works

Despite their sophistication, GenAI systems remain fundamentally passive and require human input. They respond to static prompts without understanding broader goals or retaining memory of past interactions (unless explicitly designed to simulate it). They don’t know why they’re generating something, only how, by recognizing patterns in the training data.

GenAI application examples

Millions of developers use Docker to build cloud-native apps. Now, you can use similar commands and familiar workflows to explore generative AI tools. Docker’s Model Runner enables developers to run local models with zero hassle. Testcontainers help to quickly spin up integration testing to evaluate your app by providing lightweight containers for your services and dependencies. 

Here are a few examples to help you get started.

1. Getting started with running models locally

A simple chatbot web application built in Go, Python, and Node.js that connects to a local LLM service to provide AI-powered responses.

2. How to Make an AI Chatbot from Scratch using Docker Model Runner

Learn how to make an AI chatbot from scratch and run it locally with Docker Model Runner.

3. Build a GenAI App With Java Using Spring AI and Docker Model Runner

Build a GenAI app with RAG in Java using Spring AI, Docker Model Runner, and Testcontainers. 

4. Building an Easy Private AI Assistant with Goose and Docker Model Runner

Learn how to build your own AI assistant that’s private, scriptable, and capable of powering real developer workflows.

5. AI-Powered Testing: Using Docker Model Runner with Microcks for Dynamic Mock APIs

Learn how to create AI-enhanced mock APIs for testing with Docker Model Runner and Microcks. Generate dynamic, realistic test data locally for faster dev cycles.

What is agentic AI?

There’s no single industry-standard definition for agentic AI. You’ll see terms like AI agents, agentic systems, or agentic applications used interchangeably. For simplicity, we’ll just call them AI agents.

AI agents are AI systems designed to take initiative, make decisions, and carry out complex tasks to achieve a goal. Unlike traditional GenAI models that respond only to individual human prompts, agents can plan, reason, and take actions across multiple steps. This makes agents especially useful for open-ended or loosely defined tasks. Popular examples include OpenAI’s ChatGPT agent and Cursor’s agent mode that completes programming tasks end-to-end.  

Use cases for agentic AI

Organizations that have successfully deployed AI agents are using them across a range of high-impact areas, including customer service and support, internal operations, sales and marketing, security and fraud detection, and specialized industry workflows (2). But despite the potential, adoption is still in its early stages from a business context. A recent Capgemini report found that only 14% of companies have moved beyond experimentation to implementing agentic AI.

How agentic AI works

While implementations vary, most AI agents consist of three main components: models, tools, and an orchestration layer. 

Models: Interprets high-level goals, reasons, and breaks them into executable steps.

Tools: External functions or systems the agent can call. The Model Context Protocol (MCP) is emerging as the de facto standard for connecting agents to external tools, data, and services. 

The orchestration layer: This is the coordination logic that ties everything together. Frameworks like LangChain, CrewAI, and ADK manage tool selection, memory, planning, and state and control flow. 

Figure 2: A high-level architecture diagram of how a multi-agent system works.

To build agents, developers typically start by breaking a use case into concrete workflows the agent needs to perform and identifying key steps, decision points, and the tools required to get the job done. From there, they choose the appropriate model (or combination of models), integrate the necessary tools, and use an orchestration framework to tie everything together. In more complex systems, especially those involving multiple agents, each agent often functions like a microservice, handling one specific task as part of a larger workflow. 

While the agentic stack introduces some new components, much of the development process will feel familiar to those who’ve built cloud-native applications. There’s the complexity of coordinating loosely coupled components. There’s a broader security surface, especially as agents get access to sensitive tools and data. It’s no wonder some in the community have started calling agents “the new microservices.” They’re modular, flexible, and composable, but they also come with a need for secure architecture, reliable tooling, and consistency from development to production. 

Agentic AI application examples

As agents become more modular and microservice-like, Docker’s tooling has evolved to support developers building and running agentic applications. 

Figure 3: Docker’s AI technology ecosystem, including Compose, Model Runner, MCP Gateway, and more.

For running models locally, especially in use cases where privacy and data sensitivity matter, Docker Model Runner provides an easy way to spin up models. If models are too large for local hardware, Docker Offload allows developers to tap into GPU resources in the cloud while still maintaining a local-first workflow and development control. 

When agents require access to tools, the Docker MCP Toolkit and Gateway make it simple to discover, configure, and run secure MCP servers. Docker Compose remains the go-to solution for millions of developers, now with support for agentic components like models, tools, and frameworks, making it easy to orchestrate everything from development to production.

To help you get started, here are a few example agents built with popular frameworks. You’ll see a mix of single-agent and multi-agent setups, examples using single and multiple models, both local and cloud-hosted, offloaded to cloud GPUs, and demonstrations of how agents use MCP tools to take actions. All of them run with just a single Docker Compose file.

1. Beyond the Chatbot: Event-Driven Agents in Action

This GitHub webhook-driven project uses agents to analyze PRs for training repositories to determine if they can be automatically closed, generate a comment, and then close the PR. 

2. SQL Agent with LangGraph

This project demonstrates an AI agent that uses LangGraph to answer natural language questions by querying a SQL database.

3. Spring AI + DuckDuckGo

This project demonstrates a Spring Boot application using Spring AI and the MCP tools DuckDuckGo to answer natural language questions.

4. Building an autonomous, multi-agent virtual marketing team with CrewAI

This project showcases an autonomous, multi-agent virtual marketing team built with CrewAI. It automates the creation of a high-quality, end-to-end marketing strategy from research to copywriting.

5. GitHub Issue Analyzer built with Agno

This project demonstrates a collaborative multi-agent system built with Agno, where specialized agents, including a coordinator agent and 3 sub-agents, work together to analyze GitHub repositories. 

6. A2A Multi-Agent Fact Checker

This project demonstrates a collaborative multi-agent system built with the Agent2Agent SDK (A2A) and OpenAI, where a top-level Auditor agent coordinates the workflow to verify facts.

More agent examples can be found here. 

GenAI vs. agentic AI: Key differences

Attributes

Generative AI (GenAI)

Agentic AI

Definition

AI systems that generate content (text, code, images, etc.) based on prompts

AI systems that plan, reason, and act across multiple steps to achieve a defined goal

Core Behavior

Predicts the next output based on input (e.g., next word, token, or pixel)

Takes initiative, capable of decision making, executes actions, and can operate independently

Examples

ChatGPT, Claude, GitHub Copilot

ChatGPT agent, Cursor agent mode, Manus

Top Use Cases

Code generation, content creation, summarization, education, chatbots, image/video creation

Customer support automation, IT operations, multi-step strategies, security, and fraud detection

Adoption Stage

Widely adopted across consumer and enterprise applications

Early-stage; 14% of companies using at scale

Development Workflow

– Choose model

– Prompt or fine-tune

– Integrate with app logic

– Break use case into steps

– Choose model(s) and tools

– Use a framework to coordinate agent flow

Common Challenges

Model selection and ensuring consistent and reliable behavior

More complex task coordination and expanded security surface

Analogy

Autocomplete on steroids

The new microservices

Final thoughts

Whether you’re building with GenAI or exploring the potential of agents, AI proficiency is becoming a core skill for developers as more organizations double down on their AI initiatives. GenAI offers a fast path to content-driven applications with relatively simple integration and human input. On the other hand, agentic AI can execute multi-step strategies and enables goal-oriented workflows that resemble the complexity and modularity of microservices. 

While agentic AI systems are more powerful, they also introduce new challenges around orchestration, tool integration, and security. Knowing when to use each and how to build effectively using AI solutions, like Docker Model Runner, Offload, MCP Gateway, and Compose, will help streamline development and prepare your production application.

Build your first AI application with Docker

Whether you’re prototyping a private LLM chatbot or building a multi-agent system that acts like a virtual team, now’s the time to experiment. With Docker, you get the flexibility to develop easily, scale securely, and move fast, using the same familiar commands and workflows you already know!

Learn how to build an agentic AI application →

Learn more

Discover secure MCP servers and feature your own on Docker

Pick the right local LLM for tool calling 

Discover other AI solutions from Docker 

Learn how Compose makes building AI agents easier 

Sign up for our Docker Offload beta program and get 300 free GPU minutes to boost your agent. 

References

Chip Huyen, 2025, AI Engineering Building Application with Foundation Models, O’Reilly

Bornet Pascal, 2025, Agentic Artificial Intelligence, Harnessing AI Agents to Reinvent Business, Work and Life, ‎Irreplaceable Publishing  

Quelle: https://blog.docker.com/feed/

Retiring Docker Content Trust

Docker Content Trust (DCT) was introduced 10 years ago as a way to verify the integrity and publisher of container images using The Update Framework (TUF) and the Notary v1 project. However, the upstream Notary codebase is no longer actively maintained and the ecosystem has since moved toward newer tools for image signing and verification. Accordingly, DCT usage has declined significantly in recent years. Today, fewer than 0.05% of Docker Hub image pulls use DCT and Microsoft recently announced the deprecation of DCT support in Azure Container Registry. As a result, Docker is beginning the process of retiring DCT, beginning with Docker Official Images (DOI).

Docker is committed to improving the trust of the container ecosystem and, in the near future, will be implementing a different image signing solution for DOI that is based on modern, widely-used tools to help customers start and stay secure. Watch this blog for more information.

What This Means for You

If you pull Docker Official Images

Starting on August 8th, 2025, the oldest of DOI DCT signing certificates will begin to expire. You may have already started seeing expiry warnings if you use the docker trust commands with DOI. These certificates, once cached by the Docker client, are not subsequently refreshed, making certificate rotation impractical. If you have set the DOCKER_CONTENT_TRUST environment variable to True (DOCKER_CONTENT_TRUST=1), DOI pulls will start to fail. The workaround is to unset the DOCKER_CONTENT_TRUST environment variable. The use of  docker trust inspect will also start to fail and should no longer be used for DOI.

If you publish images on Docker Hub using DCT 

You should start planning to transition to a different image signing and verification solution (like Sigstore or Notation). Docker will be publishing migration guides soon to help you in that effort. Timelines for the complete deprecation of DCT are being finalized and will be published soon.

We appreciate your understanding as we modernize our security infrastructure and align with current best practices for the container ecosystem. Thank you for being part of the Docker community.

Quelle: https://blog.docker.com/feed/

Accelerate modernization and cloud migration

In our recent report, we describe that many enterprises today face a stark reality: despite years of digital transformation efforts, the majority of enterprise workloads—up to 80%—still run on legacy systems. This lag in modernization not only increases operational costs and security risks but also limits the agility needed to compete in a rapidly evolving market. The pressure is on for technology leaders to accelerate the ongoing modernization of legacy applications and to accelerate cloud adoption, but the path forward is often blocked by technical complexity, risk, and resource constraints.  Full Report: Accelerate Modernization with Docker.Enterprises have long been treating modernization as a business imperative. Research shows that 73% of CIOs identify technological disruption as a major risk, and 82% of CEOs believe companies that fail to transform fundamentally risk obsolescence within a decade. Enterprises that further delay modernization risk falling farther behind more agile competitors who are already leveraging cloud-native platforms, DevSecOps practices, and AI or Agentic applications to drive business growth and innovation.

Enterprises challenges for modernization and cloud migration

Transitioning from legacy systems to modern, cloud-native architectures is rarely straightforward. Enterprises face a range of challenges, including:

Complex legacy dependencies: Deeply entrenched systems with multiple layers and dependencies make migration risky and costly.

Security and compliance risks: Moving to the cloud can increase vulnerabilities by up to 46% if not managed correctly.

Developer inefficiencies: Inconsistent environments and manual processes can delay releases, with 69% of developers losing eight or more hours a week to inefficiencies.

Cloud cost overruns: Inefficient resource allocation and lack of governance often lead to higher-than-expected cloud expenses.

Tool fragmentation: Relying on multiple, disconnected tools for modernization increases risk and slows progress.

These challenges have stalled progress for years, but with the right strategy and tools, enterprises can overcome them and unlock the full benefits of modernization and migration.

How Docker accelerates modernization and cloud migration

Docker products can help enterprises modernize legacy applications and migrate to the cloud efficiently, securely, and incrementally.

Docker brings together Docker Desktop, Docker Hub, Docker Build Cloud, Docker Scout, Testcontainers Cloud, and Administration into a seamless, integrated experience. This solution empowers development teams to:

Containerize legacy applications: Simplify the process of packaging and migrating legacy workloads to the cloud.

Automate CI/CD pipelines: Accelerate build, test, and deployment cycles with automated workflows and cloud-based build acceleration.

Embed security and governance: Integrate real-time vulnerability analysis, policy enforcement, and compliance checks throughout the development lifecycle.

Use trusted secure content: Hardened Images ensures every container starts has a signed, distroless base that cuts the attack surface by up to 95 % and comes with built-in SBOMs for effortless audits.

Standardize environments: Ensure consistency across development, testing, and production, reducing configuration drift and late-stage defects.

Implement incremental, low-risk modernization: Rather than requiring a disruptive, multi-year overhaul, Docker enables enterprises to modernize incrementally. 

Increased agility: By modernizing legacy applications and systems, enterprises achieve faster release cycles, rapid product launches, reduced time to market, and seamless scaling in the cloud.

Do not further delay modernization and cloud migrations. Get started with Docker today

Enterprises don’t need to wait for a massive, “big-bang” project — Docker makes it possible to start small, deliver value quickly, and scale ongoing modernization efforts across the organization. By empowering teams with the right tools and a proven approach, Docker enables enterprises to accelerate ongoing application modernization and cloud migrations —unlocking innovation, reducing costs, and securing their competitive edge for the future.

Ready to accelerate your modernization journey?  Learn more about how Docker can help enterprises with modernization and cloud migration – Full Report: Accelerate Modernization with Docker.  

___________Sources:– IBM 1; Gartner 1, 2, 3 – PWC 1, 2– The Palo Alto Networks State of Cloud-Native Security 2024– State of Developer Experience Report 2024___________Tags: #ApplicationModernization #Modernization #CloudMigration #Docker #DockerBusiness #EnterpriseIT #DevSecOps #CloudNative #DigitalTransformation

Quelle: https://blog.docker.com/feed/

Beyond the Chatbot: Event-Driven Agents in Action

Docker recently completed an internal 24-hour hackathon that had a fairly simple goal: create an agent that helps you be more productive.

As I thought about this topic, I recognized I didn’t want to spend more time in a chat interface. Why can’t I create a fully automated agent that doesn’t need a human to trigger the workflow? At the end of the day, agents can be triggered by machine-generated input.

In this post, we’ll build an event-driven application with agentic AI. The event-driven agent we’ll build will respond to GitHub webhooks to determine if a PR should be automatically closed. I’ll walk you through the entire process from planning to coding, including why we’re using the Gemma3 and Qwen3 models, hooking up the GitHub MCP server with the new Docker MCP Gateway, and choosing the Mastra agentic framework.

The problem space

Docker has a lot of repositories used for sample applications, tutorials, and workshops. These are carefully crafted to help students learn various aspects of Docker, such as writing their first Dockerfile, building agentic applications, and more.

Occasionally, we’ll get pull requests from new Docker users that include the new Dockerfile they’ve created or the application updates they’ve made.

Sample pull request in which a user submitted the update they made to their website while completing the tutorial

Although we’re excited they’ve completed the tutorial and want to show off their work, we can’t accept the pull request as it’ll impact the ability for the next person to complete the work.

Recognizing that many of these PRs are from brand new developers, we want to write a nice comment to let them know we can’t accept the PR, yet encourage them to keep learning.

While this doesn’t take a significant amount of time, it does feel like a good candidate for automation. We can respond more timely and help keep PR queues focused on actual improvements to the materials.

The plan to automate

The goal: Use an agent to analyze the PR and detect if it appears to be a “I completed the tutorial” submission, generate a comment, and auto-close the PR. And can we automate the entire process?

Fortunately, GitHub has webhooks that we can receive when a new PR is opened.

As I broke down the task, I identified three tasks that need to be completed:

Analyze the PR – look at the contents of the PR and possibly expand into the contents of the repo (what’s the tutorial actually about?). Determine if the PR should be closed.

Generate a comment – generate a comment indicating the PR is going to be closed, provide encouragement, and thank them for their contribution.

Post the comment and close the PR – do the actual posting of the comment and close the PR.

With this setup, I needed an agentic application architecture that looked like this:

Architecture diagram showing the flow of the app: PR opened in GitHub triggers a webhook that is received by the agentic application and delegates the work to three sub-agents

Building an event-driven application with agentic AI

The first thing I did was pick an agentic framework. I ended up landing on Mastra.ai, a Typescript-based framework that supports multi-agent flows, conditional workflows, and more. I chose it because I’m most comfortable with JavaScript and was intrigued by the features the framework provided.

1. Select the right agent tools

After choosing the framework, I next chose the tools that agents would need. Since this was going to involve analyzing and working with GitHub, I chose the GitHub Official MCP server. 

The newly-released Docker MCP Gateway made it easy for me to plug it into my Compose file. Since the GitHub MCP server has over 70 tools, I decided to filter the exposed tools to include only those I needed to reduce the required context size and increase speed.

services:
mcp-gateway:
image: docker/mcp-gateway:latest
command:
– –transport=sse
– –servers=github-official
– –tools=get_commit,get_pull_request,get_pull_request_diff,get_pull_request_files,get_file_contents,add_issue_comment,get_issue_comments,update_pull_request
use_api_socket: true
ports:
– 8811:8811
secrets:
– mcp_secret
secrets:
mcp_secret:
file: .env

The .env file provided the GitHub Personal Access Token required to access the APIs:

github.personal_access_token=personal_access_token_here

2. Choose and add your AI models

Now, I needed to pick models. Since I had three agents, I could theoretically pick three different models. But, I also wanted to reduce model swapping if possible, yet keep performance as quick as possible. I experimented with a few different approaches, but landed with the following:

PR analyzer – ai/qwen3 – I wanted a model that could do more reasoning and could perform multiple steps to gather the context it needed

Comment generator – ai/gemma3 – the Gemma3 models are great for text generation and run quite quickly

PR executor – ai/qwen3 – I ran a few experiments, and the qwen models did best for the multiple steps needed to post the comment and close the PR

I updated my Compose file with the following configuration to define the models. I gave the Qwen3 model an increased context size to have more space for tool execution, retrieving additional details, etc.:

models:
gemma3:
model: ai/gemma3
qwen3:
model: ai/qwen3:8B-Q4_0
context_size: 131000

3. Write the application

With the models and tools chosen and configured, it was time to write the app itself! I wrote a small Dockerfile and updated the Compose file to connect the models and MCP Gateway using environment variables. I also added Compose Watch config to sync file changes into the container.

services:
app:
build:
context: .
target: dev
ports:
– 4111:4111
environment:
MCP_GATEWAY_URL: http://mcp-gateway:8811/sse
depends_on:
– mcp-gateway
models:
qwen3:
endpoint_var: OPENAI_BASE_URL_ANALYZER
model_var: OPENAI_MODEL_ANALYZER
gemma3:
endpoint_var: OPENAI_BASE_URL_COMMENT
model_var: OPENAI_MODEL_COMMENT
develop:
watch:
– path: ./src
action: sync
target: /usr/local/app/src
– path: ./package-lock.json
action: rebuild

The Mastra framework made it pretty easy to write an agent. The following snippet defines a MCP Client, defines the model connection, and creates the agent with a defined system prompt (which I’ve abbreviated for this blog post). 

You’ll notice the usage of environment variables, which match those being defined in the Compose file. This makes the app super easy to configure.

import { Agent } from "@mastra/core/agent";
import { MCPClient } from "@mastra/mcp";
import { createOpenAI } from "@ai-sdk/openai";
import { Memory } from "@mastra/memory";
import { LibSQLStore } from "@mastra/libsql";

const SYSTEM_PROMPT = `
You are a bot that will analyze a pull request for a repository and determine if it can be auto-closed or not.
…`;

const mcpGateway = new MCPClient({
servers: {
mcpGateway: {
url: new URL(process.env.MCP_GATEWAY_URL || "http://localhost:8811/sse"),
},
},
});

const openai = createOpenAI({
baseURL: process.env.OPENAI_BASE_URL_ANALYZER || "http://localhost:12434/engines/v1",
apiKey: process.env.OPENAI_API_KEY || "not-set",
});

export const prExecutor = new Agent({
name: 'Pull request analyzer,
instructions: SYSTEM_PROMPT,
model: openai(process.env.OPENAI_MODEL_ANALYZER || "ai/qwen3:8B-Q4_0"),
tools: await mcpGateway.getTools(),
memory: new Memory({
storage: new LibSQLStore({
url: "file:/tmp/mastra.db",
}),
}),
});

I was quite impressed with the Mastra Playground, which allows you to interact directly with the agents individually. This makes it easy to test different prompts, messages, and model settings. Once I found a prompt that worked well, I would update my code to use that new prompt.

The Mastra Playground showing ability to directly interact with the “Pull request analyzer” agent, adjust settings, and more.

Once the agents were defined, I was able to define steps and a workflow that connects all of the agents. The following snippet shows the defined workflow and conditional branch that occurs after determining if the PR should be closed:

const prAnalyzerWorkflow = createWorkflow({
id: "prAnalyzerWorkflow",
inputSchema: z.object({
org: z.string().describe("The organization to analyze"),
repo: z.string().describe("The repository to analyze"),
prNumber: z.number().describe("The pull request number to analyze"),
author: z.string().describe("The author of the pull request"),
authorAssociation: z.string().describe("The association of the author with the repository"),
prTitle: z.string().describe("The title of the pull request"),
prDescription: z.string().describe("The description of the pull request"),
}),
outputSchema: z.object({
autoClosed: z.boolean().describe("Whether the PR was auto-closed"),
comment: z.string().describe("Comment to be posted on the PR"),
}),
})
.then(determineAutoClose)
.branch([
[
async ({ inputData }) => inputData.recommendedToClose,
createCommentStep
]
])
.then(prExecuteStep)
.commit();

With the workflow defined, I could now add the webhook support. Since this was a simple hackathon project and I’m not yet planning to actually deploy it (maybe one day!), I used the smee.io service to register a webhook in the repo and then the smee-client to receive the payload, which then forwards the payload to an HTTP endpoint.

The following snippet is a simplified version where I create a small Express app that handles the webhook from the smee-client, extracts data, and then invokes the Mastra workflow.

import express from "express";
import SmeeClient from 'smee-client';
import { mastra } from "./mastra";

const app = express();
app.use(express.json());

app.post("/webhook", async (req, res) => {
const payload = JSON.parse(req.body.payload);

if (!payload.pull_request)
return res.status(400).send("Invalid payload");

if (payload.action !== "opened" && payload.action !== "reopened")
return res.status(200).send("Action not relevant, ignoring");

const repoFullName = payload.pull_request.base.repo.full_name;

const initData = {
prNumber: payload.pull_request.number,
org: repoFullName.split("/")[0],
repo: repoFullName.split("/")[1],
author: payload.pull_request.user.login,
authorAssociation: payload.pull_request.author_association,
prTitle: payload.pull_request.title,
prBody: payload.pull_request.body,
};

res.status(200).send("Webhook received");

const workflow = await mastra.getWorkflow("prAnalyzer").createRunAsync();
const result = await workflow.start({ inputData: initData });
console.log("Result:", JSON.stringify(result));
});

const server = app.listen(3000, () => console.log("Server is running on port 3000"));

const smee = new SmeeClient({
source: "https://smee.io/SMEE_ENDPOINT_ID",
target: "http://localhost:3000/webhook",
logger: console,
});
const events = await smee.start();
console.log("Smee client started, listening for events now");

4. Test the app

At this point, I can start the full project (run docker compose up) and open a PR. I’ll see the webhook get triggered and the workflow run. And, after a moment, the result is complete! It worked!

Screenshot of a GitHub PR that was automatically closed by the agent with the generated comment.

If you’d like to view the project in its entirety, you can check it out on GitHub at mikesir87/hackathon-july-2025.

Lessons learned

Looking back after this hackathon, I learned a few things that are worth sharing as a recap for this post.

1. Yes, automating workflows is possible with agents. 

Going beyond the chatbot opens up a lot of automation possibilities and I’m excited to be thinking about this space more.

2. Prompt engineering is still tough. 

It took many iterations to develop prompts that guided the models to do the right thing consistently. Using tools and frameworks that let you iterate quickly help tremendously (thanks Mastra Playground!).

3. Docker’s tooling made it easy to try lots of models. 

I experimented with quite a few models to find those that would handle the tool calling, reasoning, and comment generation. I wanted the smallest model possible that would still work. It was easy to simply adjust the Compose file, have environment variables be updated, and try out a new model.

4. It’s possible to go overboard on agents. Split agentic/programmatic workflows are powerful. 

I was having struggles writing a prompt that would get the final agent to simply post a comment and close the PR reliably – it would often post the comment multiple times or skip the PR closing. But, I found myself asking “does an agent need to do this step? This step feels like something I can do programmatically without a model, GPU usage, and so on. And it would be much faster too.” I do think that’s something to consider – how to build workflows where some steps use agents and some steps are simply programmatic (Mastra supports this by the way).

5. Testing? 

Due to the timing, I didn’t get a chance to explore much on the testing front. All of my “testing” was manual verification. So, I’d like to loop back on this in a future iteration. How do we test this type of workflow? Do we test agents in isolation or the entire flow? Do we mock results from the MCP servers? So many questions.

Wrapping up

This internal hackathon was a great experience to build an event-driven agentic application. I’d encourage you to think about agentic applications that don’t require a chat interface to start. How can you use event-driven agents to automate some part of your work or life? I’d love to hear what you have in mind!

View the hackathon project on GitHub

Try Docker Model Runner and MCP Gateway

Sign up for our Docker Offload beta program and get 300 free GPU minutes to boost your agent. 

Use Docker Compose to build and run your AI agents

Discover trusted and secure MCP servers for your agent on Docker MCP Catalog

Quelle: https://blog.docker.com/feed/