Why a “protected repo”?
Modern teams depend on public container images, yet most environments lack a single, auditable control point for what gets pulled and when. This often leads to three operational challenges:
Inconsistent or improvised base images that drift across teams and pipelines.
Exposure to new CVEs when tags remain unchanged but upstream content does not.
Unreliable workflows due to rate limiting, throttling, or pull interruptions.
A protected repository addresses these challenges by evaluating images at the boundary between public sources and internal systems, ensuring only trusted content is available to the build process. Routing upstream pulls through a Nexus Repository Docker proxy that authenticates to Docker Hub and caches approved layers and creates a security and reliability checkpoint. Repository Firewall inspects image layers and their components against configured policies and enforces the appropriate action, such as allow, quarantine, or block, based on the findings. This provides teams a standard, dependable entry point for base images. Approved content is cached to accelerate subsequent pulls, while malware and high-severity vulnerabilities are blocked before any layer reaches the developer’s environment.Combining this workflow with curated sources such as Docker Official Images or Docker Hardened Images provides a stable, vetted baseline for the entire organization.
Docker Hub authentication (PAT/OAT) quick setup
Before configuring a Nexus Docker proxy, set up authenticated access to Docker Hub. Authentication prevents anonymous-pull rate limits and ensures that shared systems do not rely on personal developer credentials. Docker Hub supports two types of access tokens, and for proxies or CI/CD systems the recommended option is an Organization Access Token (OAT).
Choose the appropriate token type
Personal Access Token (PAT): Use a PAT when authentication is tied to an individual account, such as local development or small teams.
Tied to a single user account
Required for CLI logins when the user enables two-factor authentication
Not recommended for shared infrastructure
Organization Access Token (OAT) (recommended): Use an OAT when authentication is needed for systems that serve multiple users or teams.
Associated with an organization rather than an individual
Suitable for CI/CD systems, build infrastructure, and Nexus Docker proxies
Compatible with SSO and 2FA enforcement
Supports granular permissions and revocation
Requires a Docker Hub Team or Business plan
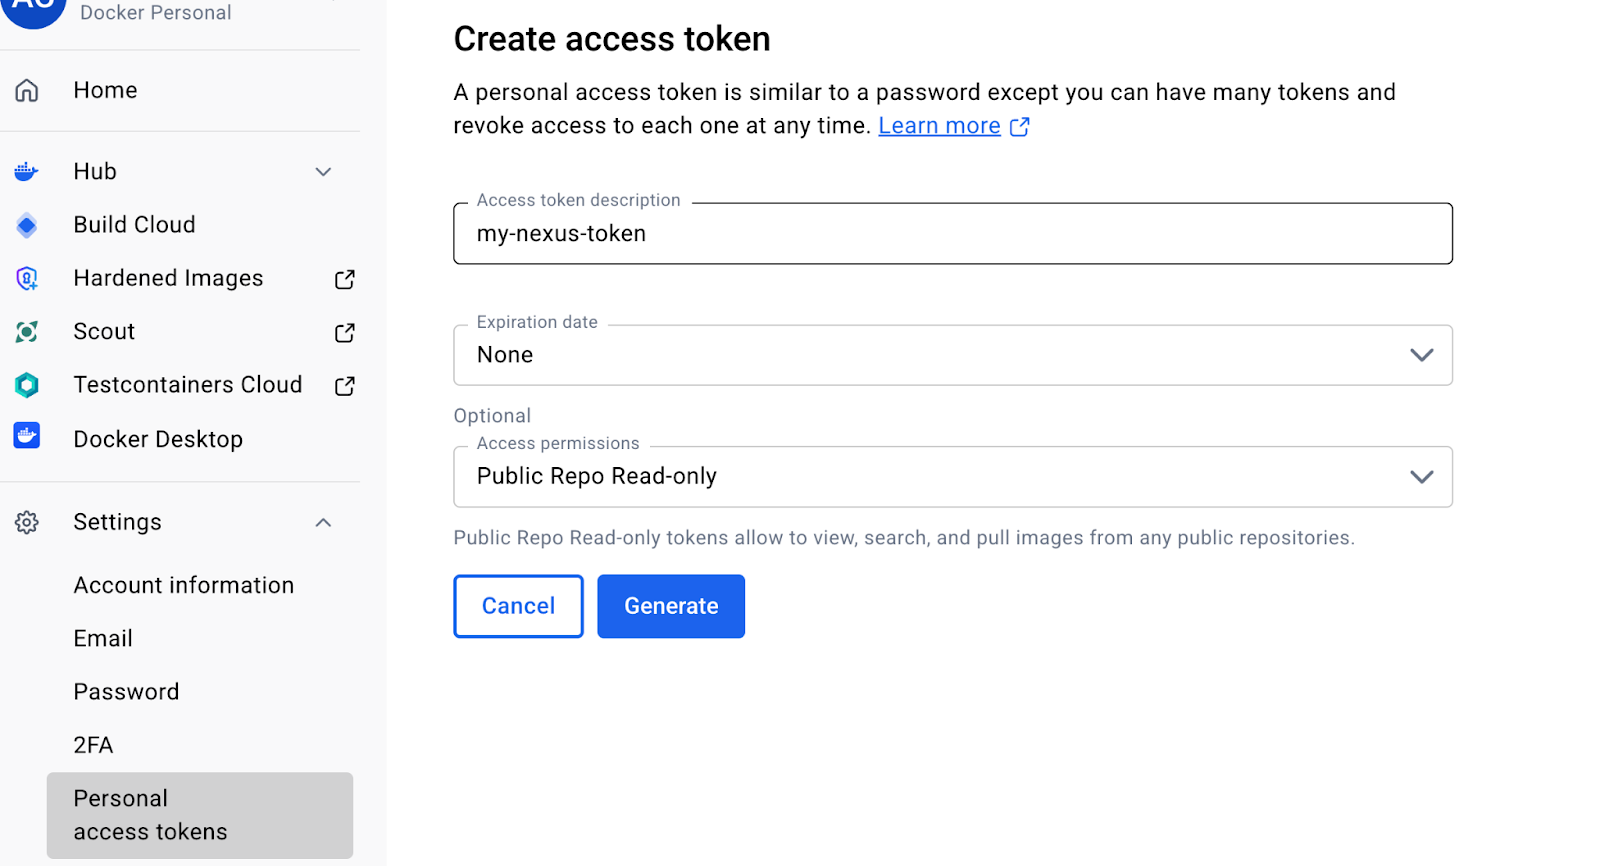
Create an access token
To create a Personal Access Token (PAT):
Open Docker Hub account settings (clink on your hub avatar in the top right corner).
Select “Personal access tokens”.
Click on “Generate new token”.
Define token Name, Expiration and Access permissions.
Choose “Generate” and save the value immediately, as it cannot be viewed again.
To create an Organization Access Token (OAT):
Sign in to Docker Home and select your organization.
Select Admin Console, then Access tokens.
Select Generate access token.
Expand the Repository drop-down and assign only the required permissions, typically read/pull for proxies or CI systems.
Select Generate token. Copy the token that appears on the screen and save it. You won’t be able to retrieve the token once you exit the screen.
Recommended practices
Scope tokens to the minimum necessary permissions
Rotate tokens periodically
Revoke tokens immediately if they are exposed
Monitor last-used timestamps to confirm expected usage patterns
Step-by-step: create a Docker Hub proxy
The next step after configuring authentication is to make your protected repo operational by turning Nexus into your organization’s Docker Hub proxy. A Docker proxy repository in Nexus Repository provides a single, policy-enforced registry endpoint that performs upstream pulls on behalf of developers and CI, caches layers locally for faster and more reliable builds, and centralizes access and audit trails so teams can manage credentials and image usage from one place.
To create the proxy:
As an administrator, navigate to the Settings view (gear icon).
Open Repositories and select Create repository.
Choose docker (proxy) as the repository type.
Configure the following settings:
Remote storage: https://registry-1.docker.io
Docker V1 API: Enabled
Index type: Select “Use Docker Hub”
Blob store and network settings as appropriate for your environment
Save the repository to finalize the configuration.
Provide a Clean Pull EndpointTo keep developer workflows simple, expose the proxy at a stable, organization-wide hostname. This avoids custom ports or per-team configurations and makes the proxy a transparent drop-in replacement for direct Docker Hub pulls.Common examples include:
docker-proxy.company.com
hub.company.internal
Use a reverse proxy or ingress controller to route this hostname to the Nexus proxy repository.
Validate Connectivity
Once the proxy is exposed, verify that it responds correctly and can authenticate to Docker Hub.Run:
docker login docker-proxy.company.comdocker pull docker-proxy.company.com/dhi/node:24
A successful pull confirms that the proxy is functioning correctly, upstream connectivity is working, and authenticated access is in place.
Turn on Repository Firewall for containers
Once the Docker proxy is in place, enable Repository Firewall so images are inspected before they reach internal systems. Repository Firewall enforces policy at download time, stopping malware and high-severity vulnerabilities at the registry edge, reducing the blast radius of newly disclosed issues and cutting remediation work for engineering teams.
To enable Firewall for the proxy repository:
As an administrator, navigate to the Settings view (gear icon).
Navigate to Capabilities under the System menu.
Create a ‘Firewall Audit and Quarantine’ capability for your Docker proxy repository.
Configure your policies to quarantine new violating components and protect against introducing risk.
Inform your development teams of the change to set expectations.
Understanding “Quarantine” vs. “Audit”Repository Firewall evaluates each image as it is requested:
Quarantine – Images that violate a policy are blocked and isolated. They do not reach the developer or CI system. The user receives clear feedback indicating the reason for the failure.
Audit – Images that pass the policies are served normally and cached. This improves performance and makes the proxy a consistent, reliable source of trusted base images.
Enabling Repository Firewall gives you immediate, download-time protection and the telemetry to operate it confidently. Start with conservative policies (quarantine on malware, and on CVSS ≥ 8), monitor violations and cache hit rate, tune thresholds based on real-world telemetry, and move to stricter block enforcement once false positives are resolved and teams are comfortable with the workflow.
What a blocked pull looks like
After enabling Repository Firewall and configuring your baseline policies, any pull that fails those checks is denied at the registry edge and no image layers are downloaded. By default Nexus returns a non-descriptive 404 to avoid exposing policy or vulnerability details, though you can surface a short, internal-facing failure message.As an example, If Firewall is enabled and your CVSS threshold policy is configured correctly, the following pull should fail with a 404 message.
docker pull docker-proxy.company.com/library/node:20
This confirms that:
The request is passing through the proxy.
Repository Firewall is inspecting the image metadata.
Policy violations are blocked before any image layers are downloaded.
In the Firewall UI, you can open the proxy repository and view the recorded violations. The details can include detected CVEs, severity information, and the policy that triggered the denial. This provides administrators with visibility and confirms that enforcement is functioning as expected.
Additionally, the Quarantined Containers dashboard lists every image that Repository Firewall has blocked, showing the triggering policy and severity so teams can triage with full context. Administrators use this view to review evidence, add remediation notes, and release or delete quarantined items; note that malware is quarantined by default while other violations are quarantined only when their rules are set to Fail at the Proxy stage.
Fix forward: choose an approved base and succeed
Once Policy Enforcement is validated, the next step is to pull a base image that complies with your organization’s security rules. This shows what the normal developer experience looks like when using approved and trusted content.
Pull a compliant tag through the proxy:
docker pull docker-proxy.company.com/dhi/node:24
This request passes the Repository Firewall checks, and the image is pulled successfully. The proxy caches each layer locally so that future pulls are faster and no longer affected by upstream rate limits or registry availability.If you repeat the pull, the second request is noticeably quicker because it is served directly from the cache. This illustrates the everyday workflow developers should expect: trusted images, predictable performance, and fewer interruptions.
Get started: protect your Docker pulls
A Sonatype-protected Docker proxy gives developers one policy-compliant registry endpoint for image pulls. Layers are cached for speed, policy violations surface with actionable guidance, and teams work with vetted base images with the same Docker CLI workflows they already rely on. When paired with trusted sources such as Docker Hardened Images, this pattern delivers predictable baselines with minimal developer friction.Ready to try this pattern? Check the following pages:
Sonatype Nexus Repository basic documentation
Integration with Docker Hub
Register for Nexus Repository trial here
Quelle: https://blog.docker.com/feed/