Building better businesses: Announcing our Red Hat EMEA Digital Leaders 2021

Life moves fast. Innovation moves faster. We’re all in a rush to keep up. Every now and then, it’s important to hit the pause button and reflect on achievements. Reflection isn’t just good for the soul. The accomplishments of others can be the gateway to our own progress. By taking inspiration and learnings from others, we can overcome organizational groupthink, draw on a more diverse pool of ideas and experiences, and shortcut our way to solutions and success.
Quelle: CloudForms

How to publish applications to our users globally with Cloud DNS Routing policies?

When building applications that are critical to your business, one key consideration is always high availability. In Google Cloud, we recommend building your strategic applications on a multi-regional architecture. In this article, we will see how Cloud DNS routing policies can help simplify your multi-regional design.As an example, let’s take a web application that is internal to our company, such as a knowledge-sharing wiki application. It uses a classic 2-tier architecture: front-end servers tasked to serve web requests from our engineers and back-end servers containing the data for our application. This application is used by our engineers based in the US (San Francisco), Europe (Paris) and Asia (Tokyo), so we decided to deploy our servers in three Google Cloud regions for better latency, performance and lower cost.High level designIn each region, the wiki application is exposed via an Internal Load Balancer (ILB), which engineers connect to over an Interconnect or Cloud VPN connection. Now our challenge is determining how to send users to the closest available front-end server. Of course, we could use regional hostnames such as <region>.wiki.example.com where <region> is US, EU, or ASIA – but this puts the onus on the engineers to choose the correct region, exposing unnecessary complexity to our users. Additionally, it means that if the wiki application goes down in a region, the user has to manually change the hostname to another region – not very user-friendly!So how could we design this better? Using Cloud DNS Policy Manager, we could use a single global hostname such as wiki.example.com and use a geo-location policy to resolve this hostname to the endpoint closest to the end user. The geo-location policy will use the GCP region where the Interconnect or VPN lands as the source for the traffic and look for the closest available endpoint.For example, we would resolve the hostname for US users to the IP address of the US Internal Load Balancer in the below diagram:DNS resolution based on the location of the userThis allows us to have a simple configuration on the client side and to ensure a great user experience.The Cloud DNS routing policy configuration would look like this:See the official documentation page for more information on how to configure Cloud DNS routing policies.This configuration also helps us improve the reliability of our wiki application: if we were to lose the application in one region due to an incident, we can update the geo-location policy and remove the affected region from the configuration. This would mean that new users will resolve the next closest region to them, and it would not require an action on the client’s side or the application team’s side.We have seen how this geo-location feature is great for sending users to the closest resource, but it can also be useful for machine-to-machine traffic. Expanding on our web application example, we would like to ensure that front-end servers all have the same configuration globally and use the back-end servers in the same region. We would configure front-end servers to connect to the global hostname backend.wiki.example.com. The Cloud DNS geo-location policy will use the front-end servers’ GCP region information to resolve this hostname to the closest available backend tier Internal Load Balancer.Front-end to back-end communication (instance to instance)Putting it all together, we now have a multi-regional and multi-tiered application with DNS policies to smartly route users to the closest instance of that application for optimal performance and costs. In the next few months, we will introduce even smarter capabilities to Cloud DNS routing policies, such as health checks to allow automatic failovers. We look forward to sharing all these exciting new features with you in another blog post.Related ArticleSimplify traffic steering with Cloud DNS routing policiesCloud DNS routing policies (geo-location and weighted round robin) helps you define custom ways to steer private and Internet traffic usi…Read Article
Quelle: Google Cloud Platform

Developing and securing a platform for healthcare innovation with Google Cloud

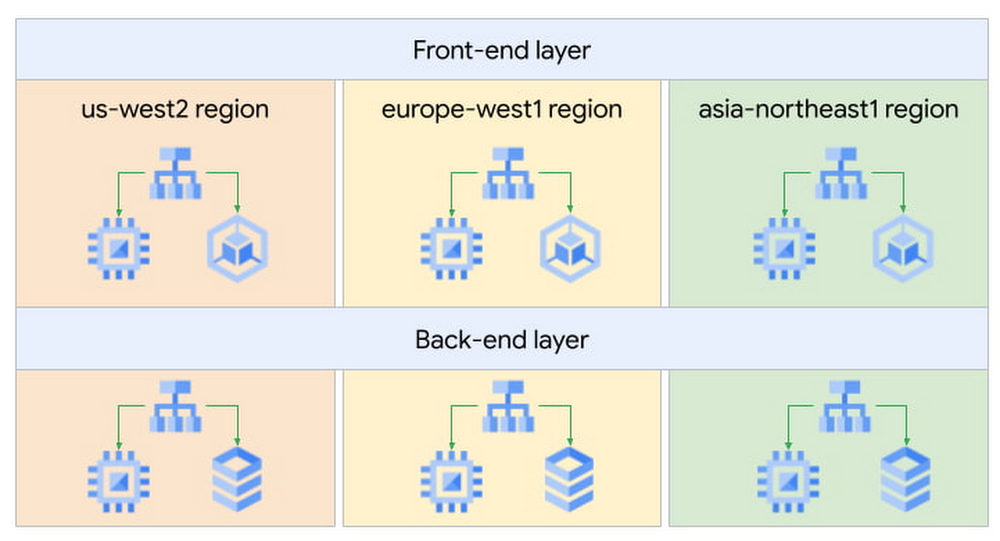
In an industry as highly regulated as healthcare, building a single secure and compliant application that tracks patient care and appointments at a clinic requires a great deal of planning from development and security teams. So, imagine what it would be like to build a solution that includes almost everything related to a patient’s healthcare, including insurance and billing. That’s what Highmark Health (Highmark)—a U.S. health and wellness organization that provides millions of customers with health insurance plans, a physician and hospital network, and a diverse portfolio of businesses–decided to do. Highmark is developing a solution called Living Health to re-imagine healthcare delivery, and it is using Google Cloud and the Google Cloud Professional Services Organization (PSO) to build and maintain the innovation platform supporting this forward thinking experience. Considering all the personal information that different parties like insurers, specialists, billers and coders, clinics, and hospitals share, Highmark must build security and compliance into every part of the solution. In this blog, we look at how Highmark Health and Google are using a technique called “secure-by-design” to address the security, privacy, and compliance aspects of bringing Living Health to life.Secure-by-design: Preventive care for developmentIn healthcare, preventing an illness or condition is the ideal outcome. Preventive care often involves early intervention—a course of ideas and actions to ward off illness, permanent injury, and so on. Interestingly, when developing a groundbreaking delivery model like Living Health, it’s a good idea to take the same approach to security, privacy, and compliance. That’s why Highmark’s security and technology teams worked with their Google Cloud PSO team to implement secure-by-design for every step of design, development, and operations. Security is built into the entire development process rather than waiting until after implementation to reactively secure the platform or remediate security gaps. It’s analogous to choosing the right brakes for a car before it rolls off the assembly line instead of having an inspector shut down production because the car failed its safety tests. The key aspect of secure-by-design is an underlying application architecture created from foundational building blocks that sit on top of a secure cloud infrastructure. Secure-by-design works to ensure that these building blocks are secure and compliant before moving on to development.The entire approach requires security, development, and cloud teams to work together with other stakeholders. Most importantly, it requires a cloud partner, cloud services, and a cloud infrastructure that can support it. Finding the right cloud and services for secure-by-design Highmark chose Google Cloud because of its leadership in analytics, infrastructure services, and platform as a service. In addition, Google Cloud has made strategic investments in healthcare interoperability and innovation, which was another key reason Highmark decided to work with Google. As a result, Highmark felt that Google Cloud and the Google Cloud PSO were best suited for delivering on the vision of Living Health—its security and its outcomes. “Google takes security more seriously than the other providers we considered, which is very important to an organization like us. Cloud applications and infrastructure for healthcare must be secure and compliant,” explains Highmark Vice President and Chief Information Security Officer, Omar Khawaja. Forming a foundation for security and complianceHow does security-by-design with services work? It starts with the creation and securing of the foundational platform, allowing teams to harden and enforce specified security controls. It’s a collaborative process that starts with input from cross-functional teams—not just technology teams—using terms they understand, so that everyone has a stake in the design. A strong data governance and protection program classifies and segments workloads based on risk and sensitivity. Teams build multiple layers of defense into the foundational layers to mitigate against key industry risks. Google managed services such as VPC Service Controls help prevent unauthorized access. Automated controls such as those in Data Loss Prevention help teams quickly classify data and identify and respond to potential sources of data risk. Automation capabilities help ensure that security policies are enforced.After the foundational work is done, it’s time to assess and apply security controls to the different building blocks, which are Google Cloud services such as Google Kubernetes Engine, Google Compute Engine, and Google Cloud Storage. The goal is to make sure that these and similar building blocks, or any combination of them, do not introduce additional risks and to ensure any identified risks are remediated or mitigated. Enabling use cases, step by stepAfter the foundational security is established, the security-by-design program enables the Google Cloud services that developers then use to build use cases that form Living Health. The service enablement approach allows Highmark to address complexity by providing the controls most relevant for each individual service. For each service, the teams begin by determining the risks and the controls that can reduce them. The next step is enforcing preventive and detective controls across various tools. After validation, technical teams can be granted an authorization to operate, also called an ATO. An ATO authorizes the service for development in a use case.For use cases with greater data sensitivity, the Highmark teams validate the recommended security controls with an external trust assessor, who uses the HITRUST Common Security Framework, which maps to certifications and compliance such as HIPAA, NIST, GDPR, and more. A certification process follows that can take anywhere from a few weeks to a few months. In addition to certification, there is ongoing monitoring of the environment for events, behavior, control effectiveness, and control lapses or any deviation from the controls.The approach simplifies compliance for developers by abstracting compliance requirements away. The process provides developers a set of security requirements written in the language of the cloud, rather than in the language of compliance, providing more prescriptive guidance as they build solutions. Through the secure-by-design program, the Highmark technology and security teams, Google, the business, and the third-party trust assessor all contribute to a secure foundation for any architectural design with enabled Google Cloud services as building blocks. Beating the learning curve Thanks to the Living Health project, the Highmark technology and security teams are trying new methods. They are exploring new tools for building secure applications in the cloud. They are paying close attention to processes and the use case steps and, when necessary, aligning different teams to execute. Because everyone is working together collaboratively toward a shared goal, teams are delivering more things on time and with predictability, which has reduced volatility and surprises. The secrets to success: Bringing everyone to the table early and with humilityTogether, Highmark and Google Cloud PSO have created over 24 secure-by-design building blocks by bringing everyone to the table early and relying on thoughtful, honest communication. Input for the architecture design produced for Highmark came from privacy teams, legal teams, security teams, and the teams that are building the applications. And that degree of collaboration ultimately leads to a much better product because everyone has a shared sense of responsibility and ownership of what was built. Delivering a highly complex solution like Living Health takes significant, more purposeful communication and execution. It is also important to be honest and humble. The security, technology, and Google teams have learned to admit when something isn’t working and to ask for help or ideas for a solution. The teams are also able to accept that they don’t have all the answers, and that they need to figure out solutions by experimenting. Khawaja puts it simply, “That level of humility has been really important and enabled us to have the successes that we’ve had. And hopefully that’ll be something that we continue to retain in our DNA.”
Quelle: Google Cloud Platform

Bio-pharma organizations can now leverage the groundbreaking protein folding system, AlphaFold, with Vertex AI

At Google Cloud, we believe the products we bring to market should be strongly informed by our research efforts across Alphabet. For example, Vertex AI was ideated, incubated and developed based on the pioneering research from Google’s research entities. Features like Vertex AI Forecast, Explainable AI, Vertex AI Neural Architecture Search (NAS) and Vertex AI Matching Engine were born out of discoveries by Google’s researchers, internally tested and deployed, and shared with data scientists across the globe as an enterprise-ready solution, each within a matter of a few short years. Today, we’re proud to announce another deep integration between Google Cloud and Alphabet’s AI research organizations: the ability in Vertex AI to run DeepMind’s groundbreaking protein structure prediction system, AlphaFold. We expect this capability to be a boon for data scientists and organizations of all types in the bio-pharma space, from those developing treatments for diseases to those creating new synthetic biomaterials. We’re thrilled to see Alphabet AI research continue to shape products and contribute to platforms on which Google Cloud customers can build. This guide provides a way to easily predict the structure of a protein (or multiple proteins) using a simplified version of AlphaFold running in a Vertex AI. For most targets, this method obtains predictions that are near-identical in accuracy compared to the full version. To learn more about how to correctly interpret these predictions, take a look at the “Using the AlphaFold predictions” section of this blog post below. Please refer to the Supplementary Information for a detailed description of the method.Solution OverviewVertex AI lets you develop the entire data science/machine learning workflow in a single development environment, helping you deploy models faster, with fewer lines of code and fewer distractions.For running AlphaFold, we choose Vertex AI Workbench user-managed notebooks, which uses Jupyter notebooks and offers both various preinstalled suites of deep learning packages and full control over the environment. We also use Google Cloud Storage and Google Cloud Artifact Registry, as shown in the architecture diagram below.Figure 1. Solution OverviewWe provide a customized Docker image in Artifact Registry, with preinstalled packages for launching a notebook instance in Vertex AI Workbench and prerequisites for running AlphaFold. For users who want to further customize the docker image for the notebook instance, we also provide the Dockerfile and a build script you can build upon. You can find the notebook, the Dockerfile and the build script in the Vertex AI community content.Getting StartedVertex AI Workbench offers an end-to-end notebook-based production environment that can be preconfigured with the runtime dependencies necessary to run AlphaFold. With user-managed notebooks, you can configure a GPU accelerator to run AlphaFold using JAX, without having to install and manage drivers or JupyterLab instances. The following is a step-by-step walkthrough for launching a demonstration notebook that can predict the structure of a protein using a slightly simplified version of AlphaFold that does not use homologous protein structures or the full-sized BFD sequence database.1. If you are new to Google Cloud, we suggest familiarizing yourself with the materials on the Getting Started page, and creating a first project to host the VM Instance that will manage the tutorial notebook. Once you have created a project, proceed to step 2 below.2. Navigate to the tutorial notebook, hosted in the vertex-ai-samples repository on GitHub.3. Launch the notebook on Vertex Workbench via the “Launch this Notebook in Vertex AI Workbench” link. This will redirect to the Google Cloud Platform Console and open Vertex AI Workbench using the last project that you used.4. If needed, select your project using the blue header at the top of the screen, on the left.If you have multiple Google Cloud user accounts, make sure you select the appropriate account using the icon on the right.First-time users will be prompted to take a tutorial titled “Deploy a notebook on AI Platform,” with the start button appearing on the bottom-right corner of the screen.This tutorial is necessary for first-time users; it will help orient you to the Workbench, as well as configure billing and enable the Notebooks API (both required).A full billing account is required for GPU acceleration, and is strongly recommended. Learn more here.5. Enter a name for the notebook but don’t click “Create” just yet; you still need to configure some “Advanced Options.” If you have used Vertex AI Workbench before, you may first need to select “Create a new notebook.”6. GPU acceleration is strongly recommended for this tutorial. When using GPU acceleration, you should ensure that you have sufficient accelerator quota for your project. Total GPU quota: “GPUs (all regions)”Quota for your specific GPU type: “NVIDIA V100 GPUs per region”Enter the Quota into the “filter” box and ensure Limit > 0. If needed, you can spin up small quota increases in only a few minutes by selecting the checkbox, and the “Edit Quotas.”7. Next, select “Advanced Options,” on the left, which will give you the remaining menus to configure:Under Environment, configure “Custom container” (first in the drop-down menu) In the “Docker container image” text box, enter (without clicking “select”): us-west1-docker.pkg.dev/cloud-devrel-public-resources/alphafold/alphafold-on-gcp:latestSuggested VM configuration:Machine type: n1-standard-8 (8 CPUs, 30 GB RAM)GPU type: NVIDIA Tesla V100 GPU accelerator (recommended).Longer proteins may require a powerful GPU; check your quota configuration for your specific configuration, and request a quota increase if necessary (as in Step 6).If you don’t see the GPU that you want, you might need to change your Region / Zone settings from Step 5. Learn more here.Number of GPUs: 1Make sure the check box “Install NVIDIA GPU driver automatically for me” is checked.The defaults work for the rest of the menu items. Press Create!8. After several minutes, a virtual machine will be created and you will be redirected to a JupyterLab instance. When launching, you may need to confirm the connection to the Jupyter server running on the VM; click Confirm:9. If a message about “Build Recommended” appears, click “Cancel.”10. The notebook is ready to run! From the menu, select Run > Run all Cells to evaluate the notebook top-to-bottom, or run each cell by individually highlighting and clicking <shift>-return. The notebook has detailed instructions for every step, such as where to add the sequence(s) of a protein you want to fold.11. Congratulations, you’ve just folded a protein using AlphaFold on the Vertex AI Workbench!12. When you are done with the tutorial, you should stop the host VM instance in the “Vertex AI” > ”Workbench” menu to avoid any unnecessary billing. Using the AlphaFold predictionsThe protein structure that you just predicted has automatically been saved as ‘selected_prediction.pdb’ to the ‘prediction’ folder of your instance. To download it, use the File Browser on the left side to navigate to the ‘prediction’ folder, then right click on the ‘selected_prediction.pdb’ file and select ‘Download’. You can then use this file in your own viewers and pipelines.You can also explore your prediction directly in the notebook by looking at it in the 3D viewer. While many predictions are highly accurate, it should be noted that a small proportion will likely be of lower accuracy. To help you interpret the prediction, take a look at the model confidence (the color of the 3D structure) as well as the Predicted LDDT and Predicted Aligned Error figures in the notebook. You can find out more about these metrics and how to interpret AlphaFold structures on this page and in this FAQ.If you use AlphaFold (e.g. in publications, services or products), please cite the AlphaFold paper and, if applicable, the AlphaFold-Multimer paper. Looking toward innovation in biology and medicineIn this guide, we covered how to get started with AlphaFold using Vertex AI, enabling a secure, scalable, and configurable environment for research in the Cloud. If you would like to learn more about AlphaFold, the scientific paper and source code are both openly accessible. We hope that insights you and others in the scientific community make will unlock many exciting future advances in our understanding of biology and medicine.Related ArticleVertex AI NAS: higher accuracy and lower latency for complex ML modelsHow Google Cloud’s Vertex AI Neural Architecture Search (NAS) accelerates time-to-value for sophisticated ML workloads.Read Article
Quelle: Google Cloud Platform

How to Purchase a Docker Subscription from a Reseller

With the grace period for the new Docker subscription service agreement ending very soon on January 31, 2022, we want to make it easy for customers to use their preferred reseller to purchase a Docker subscription.

That’s why we recently announced that your preferred reseller can now purchase a Docker Business subscription through Nuaware. That’s right, Docker and Nuaware have teamed up to advance the adoption of Docker throughout the software engineering departments of large organizations. Nuaware has established relationships with 1,000’s of resellers around the globe.

Nuaware is a Trusted Partner

Nuaware is a specialized distributor in developer tools, DevOps, Cloud, and Cloud-Native technologies. They help large enterprises adopt modern architectures by supporting them with the right products, training, and partner ecosystem. Nuaware is part of Exclusive Networks, a global provider of cybersecurity and cloud solutions with offices in over 50 countries across 5 continents with a reseller network exceeding 18,000 partners. Nuaware was founded with the view that new platform and software development technologies are an ecosystem business and in order for an enterprise to successfully adopt new technologies like microservice architectures in production, they need specialist partners in many areas. Nuaware helps select and introduce the right technologies, partners, and training to take ideas into production.

Serving Our Customers Around the Globe

Developers using Docker are more productive, build more secure software, and are able to collaborate more effectively. Combined with Nuaware’s developer tool expertise and the reach of Exclusive Networks’ channel ecosystem of 18,000 specialist channel partners, Docker has an unparalleled ability to service our clients’ needs around the globe. No matter how you prefer or need to purchase your software, Docker has you covered. 

Get Started Today

Learn more about Docker Business and get started today by visiting https://www.nuaware.com/docker
The post How to Purchase a Docker Subscription from a Reseller appeared first on Docker Blog.
Quelle: https://blog.docker.com/feed/

AWS Outposts jetzt als FedRAMP autorisiert

Heute geben wir bekannt, dass AWS Outposts jetzt FedRAMP Moderate für USA Ost (Nord-Virginia), USA Ost (Ohio), USA West (Nordkalifornien), USA West (Oregon) und FedRAMP High-Autorisierung für GovCloud (USA West) und GovCloud (USA Ost) autorisiert ist. 
Quelle: aws.amazon.com

Ankündigung neuer AWS Wavelength Zones in Charlotte, Detroit, Los Angeles und Minneapolis

Heute kündigen wir die Verfügbarkeit von vier neuen AWS Wavelength Zones im 5G-Ultra-Wideband-Netzwerk von Verizon in Charlotte, Detroit, Los Angeles und Minneapolis an. Wavelength Zones sind jetzt in 17 Großstädten in den USA verfügbar, darunter die bereits angekündigten Städte Atlanta, Boston, Chicago, Dallas, Denver, Houston, Las Vegas, Miami, New York City, Phoenix, San Francisco, Seattle und Washington DC.
Quelle: aws.amazon.com

Amazon CloudWatch Application Insights fügt Serviceüberwachung für Microsoft Active Directory und SharePoint hinzu

Jetzt können Sie mit CloudWatch Application Insights einfach und automatisch Überwachung, Alarme und Dashboards für Ihre Einrichtungen von Microsoft Active Directory und Microsoft SharePoint einrichten, die auf AWS ausgeführt werden. CloudWatch Application Insights ist ein Service, der Kunden bei der Überwachung und Fehlerbehebung ihrer auf AWS-Ressourcen laufenden Unternehmensanwendungen unterstützt. Die neue Funktion fügt die automatische Erkennung von Active-Directory- und SharePoint-Workloads hinzu, bestimmt ihre zugrunde liegenden EC2-Ressourcen und richtet die Metriken, Telemetriedaten und Protokolle zur Überwachung ihres Zustands und ihres Wohlbefindens ein.
Quelle: aws.amazon.com

Jetzt kann DynamoDB die von PartiQL-API-Aufrufen verbrauchte Durchsatzkapazität zurückgeben, um Sie bei der Optimierung Ihrer Abfragen und Durchsatzkosten zu unterstützen.

Amazon DynamoDB unterstützt PartiQL – eine SQL-kompatible Abfragesprache, mit der Sie Tabellendaten in DynamoDB abfragen, einfügen, aktualisieren und löschen können. Jetzt unterstützen DynamoDB-PartiQL-APIs ReturnConsumedCapacity, einen optionalen Parameter, der die gesamte verbrauchte Lese- und Schreibkapazität zusammen mit Statistiken für die Tabelle und alle an einer Operation beteiligten Indizes zurückgibt, um Sie bei der Optimierung Ihrer Abfragen und Durchsatzkosten zu unterstützen.
Quelle: aws.amazon.com

Mit AWS Systems Manager Automation können Sie jetzt über Webhooks Aktionen in Anwendungen von Drittanbietern durchführen

Mit AWS Systems Manager können Sie jetzt mithilfe von ausgehenden Webhooks Benachrichtigungen senden oder Aktionen in Tools und Anwendungen von Drittanbietern durchführen. Ausgehende Webhooks bieten eine vereinfachte Möglichkeit zur Integration mit vielen der von Ihnen verwendeten Tools, z. B. Slack. Jetzt können Sie einen ausgehenden Webhook als Schritt in Ihrem Automatisierungs-Runbook aufrufen, um ihn einfach in die vorhandenen Tools für Zusammenarbeit, Überwachung und Reaktion auf Vorfälle in Ihrer Organisation zu integrieren.
Quelle: aws.amazon.com