The post Working with multiple Kubernetes clusters in Mirantis Container Cloud and Lens appeared first on Mirantis | Ship Code Faster.
One of the advantages both Mirantis Container Cloud and the Lens IDE share is that both enable you to easily work with multiple Kubernetes clusters. What’s more, the Mirantis Container Cloud Lens extension ties the two together, making it simple to connect some or all of the clouds in your Mirantis Container Cloud to your Lens install.
In this tutorial, we will look at adding Kubernetes clusters to Lens, Installing the Mirantis Container Cloud Lens extension, and using the extension to add existing clusters from a Mirantis Container Cloud instance. We’ll look at both clusters and workspaces, and when we’re done, we’ll clean everything up.
Setting up
The first thing we’ll do is make sure everything is working properly by accessing a single cluster. The easiest way to do this is to follow these steps:
Make sure you have Lens installed. You can find instructions in the Getting Started with Lens blog.
Make sure you have a Kubernetes cluster running. You can create one easily using K0s. For instructions, see How to create a Kubernetes cluster with K0s: A quick and dirty guide.
Make sure that you have a copy of your KUBECONFIG file. (If you created a K0s cluster on an external server, make sure to edit the KUBECONFIG file to point to the appropriate IP address. You can see those instructions in the guide.)
Now you’re ready to add the cluster to Lens.
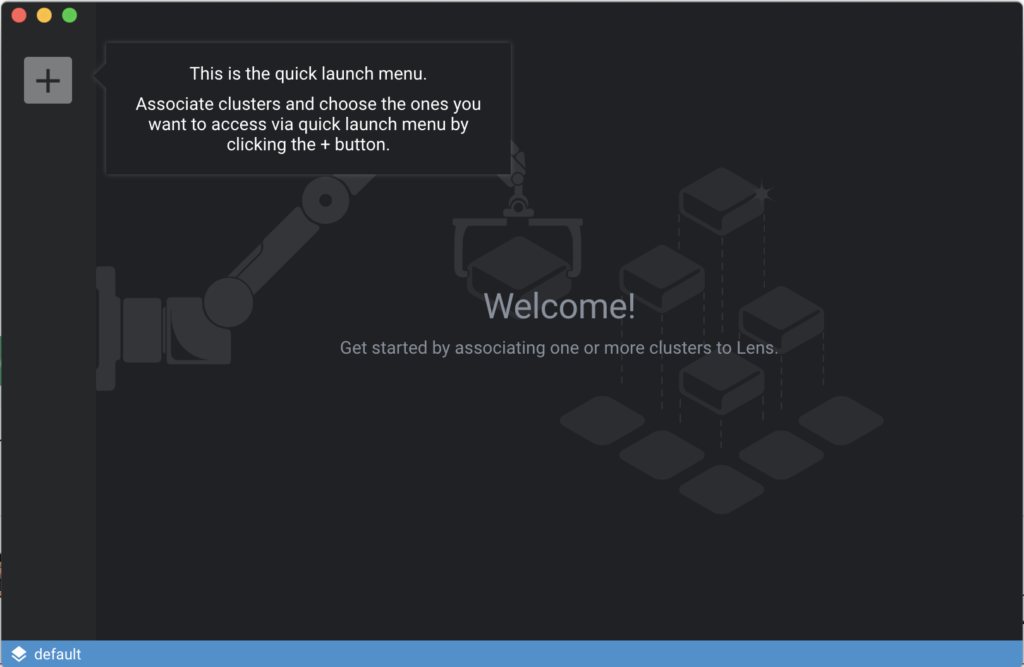
When you start Lens for the first time, you’ll be presented with the quick launch menu, which enables you to add a cluster.
Follow these steps to add the cluster:
Click the Add Cluster button (+) in the upper left.
Lens allows you to choose between adding an actual KUBECONFIG file and copying and pasting the kubeconfig information.
Add the kubeconfig file and select the appropriate context, then click Add Cluster. At that point you can navigate through the objects in your cluster.
At this point, you can add additional clusters and they will appear as an icon on the left-hand side. You can change the icon representing the cluster by choosing File->Cluster Settings and scrolling down to the General section.
You can then browse your local system for an image to use for the new cluster. For best results, use a square image, but all the common image formats such as jpg, png, and gif will work.
If you have multiple clusters you can also organize them into Workspaces.
Using Workspaces
Workspaces are a way to organize clusters to make them easier to find when you have dozens, hundreds, or thousands to deal with. To see the existing Workspaces, click the lower left-corner of the Lens interface.
In this case, we only have the original Workspace, default. To add more, click Workspaces->Add Workspace.
From there you can specify the new name and click the square disk icon to save. Once you’ve done that you will see the new workspace in the lower-left list.
Now we’re ready to go ahead and add in our Mirantis Container Cloud clusters.
Adding Mirantis Container Cloud
Mirantis Container Cloud is a convenient way for you to get control over multiple Kubernetes environments.
Let’s start by taking a quick tour of some relevant parts of Mirantis Container Cloud. (if you need to install Container Cloud, you can find information here.)
First sign with the username and password you specified at install, or that was given to you by your administrator.
From here, you can see a list of the main clusters. In this example, that means just the main management cluster:
Notice that I said “main clusters”. If you click Projects, you will see that you can also add individual projects.
Obviously default is the project we’re looking at to start with, and that’s where the kaas-mgmt cluster lives. In this case, however, we have a second project called demo, which we can access by clicking the icon next to the project name and choosing demo->Save.
As you can see, in this case we have two clusters that are part of the demo project:
And of course anything we do in this context will apply to the demo project.
So how do we get these clusters into Lens?
Adding the Mirantis Container Cloud extension to Lens
It would be simple for us to add each individual cluster to Lens as we added our original k0s cluster, but there’s also an easier way that takes advantage of the Lens Extensions API.
Mirantis has create a Mirantis Container Cloud Lens Extension that will enable you to easily import some or all of your Mirantis Container Cloud clusters. To take advantage of it, follow these steps:
Download the extension from Github. Don’t extract the archive, just make note of where you’ve saved it.
Open the Extensions view by choosing Lens->Extensions.
Under Install Extension, click the file folder icon and navigate to the archive you downloaded. The extension will likely install immediately, or click the Install button.
You should see the new extension listed under Installed Extensions.
If you need to disable or uninstall the extension, you can do it from this page.
Adding clusters to Lens with the Mirantis Container Cloud extension
Now we’re ready to go ahead and add our clusters to Lens so we can work with them more easily. Follow these steps:
We have a couple of ways to start this process. One would be to go to File->Add Cloud Clusters. The other is to click the Container Cloud icon at the bottom right of the window. or
From here, you can add the actual clusters by adding the Mirantis Container Cloud URL, username, and password.
On the right-hand side you have the option to make two decisions. The first is whether you want to add these clusters to new workspaces. These workspaces will be based on Container Cloud projects. For now, leave this option checked.
The other option is to decide whether to generate an offline token for access to the clusters. Note that once you generate a token, this token cannot be revoked, so only do this if absolutely necessary.
Choose which clusters you want to add and click Add selected clusters.
Open the Workspaces menu on the lower left-hand corner and you will see that we have two new namespaces, mcc_default and mcc_demo, corresponding to the Mirantis Container Cloud default and demo projects, respectively. Change to the mcc_default workspace.
Notice that there’s just one cluster, kaas-mgmt, in this namespace. You can see the user and the cluster name by hovering over the cluster icon.
Change to the mcc_demo workspace. Notice that you now see the demo-1 and demo-2 clusters that were part of the Mirantis Container Cloud demo project.
Now you have the ability to poke around the cluster just as you would with any other Kubernetes cluster linked to Lens.
Cleaning up
Of course, we can’t talk about how to add clusters and extensions to Lens without talking about how to clean them up again.
Removing a cluster
To remove a single cluster from Lens, follow these steps:
In the left-hand panel, click the cluster you want to delete.
Choose File->Cluster Settings.
This option brings up a page that shows you information about the cluster such as the Kubernetes version and distribution, status, API address, and so on. It also gives you the option to change parameters such as the cluster’s name and workspace, and to enable metrics or set the default namespace.
Scroll down to the bottom of the page and click the red Remove Cluster button.
Note that you’re not doing anything to the cluster itself, you’re just removing it from Lens.
Removing a workspace
One of the advantages of workspaces is that it gives you the ability to remove an entire group of clusters at once by removing the workspace. In this example we’ve added two new workspaces, so we can go ahead and remove them.
In the Workspaces menu at the bottom of the page, click the Workspaces link,
You will be presented with a list of existing workspaces. You can change the name by clicking the pencil icon. To delete the workspace, click the trash can icon.
Confirm the deletion by clicking Remove Workspace.
From here you can repeat the process for any additional workspaces that you want to delete.
Where to go from here
Many companies are working on extensions to Lens, and in the near future there will be some fun new extensions for you to play with. In the meantime, if you’re just starting out with Lens, we strongly recommend you check out the Getting Started with Lens tutorial, and join the Lens community.
The post Working with multiple Kubernetes clusters in Mirantis Container Cloud and Lens appeared first on Mirantis | Ship Code Faster.
Quelle: Mirantis
Published by